Adding Attachments to Header Record
Android and iOS
You can add photos, videos, and documents as attachments to a record using a Create or Edit SFM process provided the process has attachments configured.
To add or edit photos or videos:
1. Open any work order record.
2. Tap Actions to launch the required Create or Edit process.
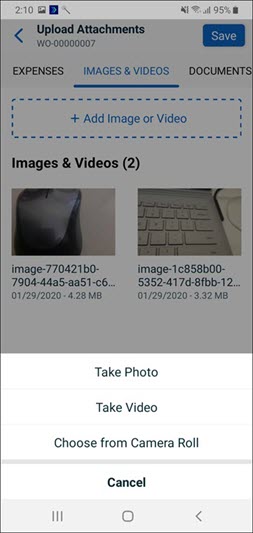
3. Go to the Images & Videos tab.
4. Tap Add Image or Video to display the following options. Choose any one option:
◦ Take Photo: Use this option to activate the device camera in photo mode and capture the photo.
◦ Take Video: Use this option to activate the device camera in video mode and capture a video.
◦ Choose from Camera Roll: Use this option to open the device-specific photo library and select a photo or video attached to the record.
|
|
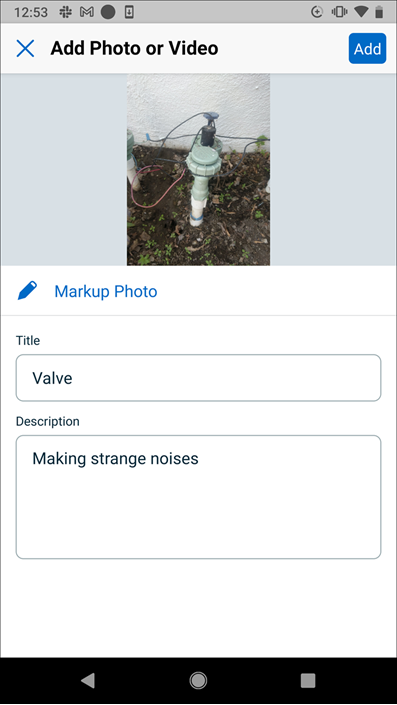
• The Title and Description of an individual photo or video can be changed while adding or selecting it from the gallery once it has been added.
• Title is mandatory for the attachment.
|
5. Tap Add.
Adding Markup/Annotation to an image
On the Images & Videos section of a Create or Edit SFM process:
1. Add an individual image, or select a previously added image.
2. Tap the Markup Photo option.
3. Use the Markup tool to add text, draw lines/curves, and crop the captured photo. You can select the color for drawing or adding text.
4. Tap Clear to remove markup added during the current session.
5. Tap the download arrow to save the current version of the image to the photo library.
6. Tap Done to save the changes to the image.
|
|
• EXIF data for the image is not retained when an image is edited using the markup/annotation feature.
• Markup/Annotation is not available for images already synced to the server, and the Markup Photo option is not displayed.
|
Adding documents
1. Open any work order record.
2. Tap Actions to launch the required Create or Edit process.
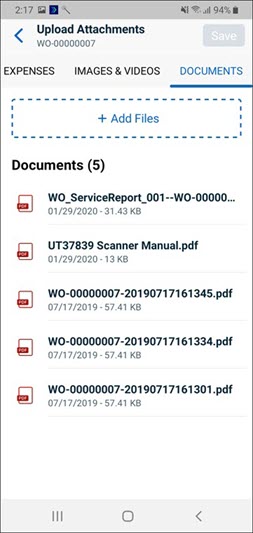
3. Go to the Documents tab.
4. Tap Add Files.
5. Browse and select a file to be attached to the record.
6. Edit the Title and Description of the attached file if desired.
|
|
Title is mandatory for the attachment.
|
7. Tap Add.
• Documents or Files are displayed under the Documents section.
• If an image is selected during this process, it is displayed under the Images & Videos section.
The default attachment name displays the information such as Process Name, Date and Time, and Record Name in the format {Process Name}_{DateTime}_{RecordName}.{ext}. For example PN-0000019278_2020-05-09T034425Z_WO-00002963.jpg.
If the Record Name is not defined while creating a record in the app, the default attachment name is {Process Name}_{DateTime}.{ext}. For example PN-0000019278_2020-05-09T034425Z.jpg.
|
|
You must run the Configuration Sync after upgrading to ServiceMax Go app version 2.0.0 to avoid the errors that may occur while loading the SFM.
|
Windows
You can add or edit photos, videos, and documents as attachments to a record using a Create or Edit SFM process, and the process has attachments configured.
To add or edit photos or videos:
1. Open any work order record.
2. Click Actions to launch the required Create or Edit process.
3. Go to the Images & Videos tab.
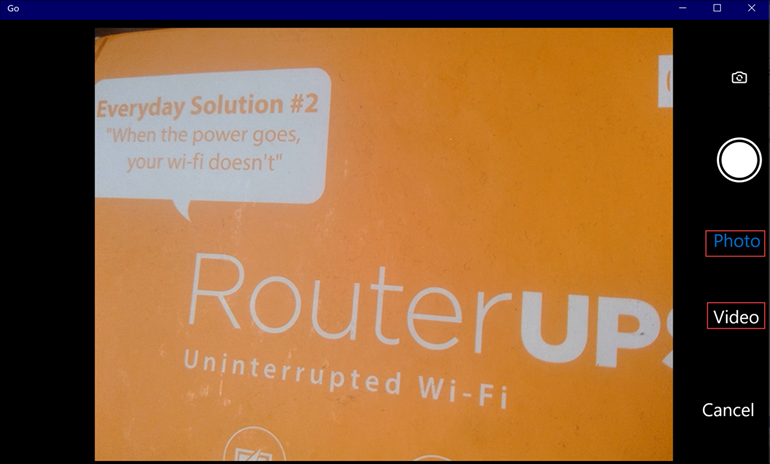
4. Click Add Image or Video. Choose one from the following options:
a. Take Photo or Video: Use this option to activate the device camera. Click Photo to capture a photo or click Video to capture a video. The captured photo or video is attached to the record under the Images & Videos section. Click Cancel to cancel this option.
b. Browse this PC: Use this option to open the device-specific photo library and select a photo or video attached to the record. The attached photo or video is available under the Images & Videos tab.
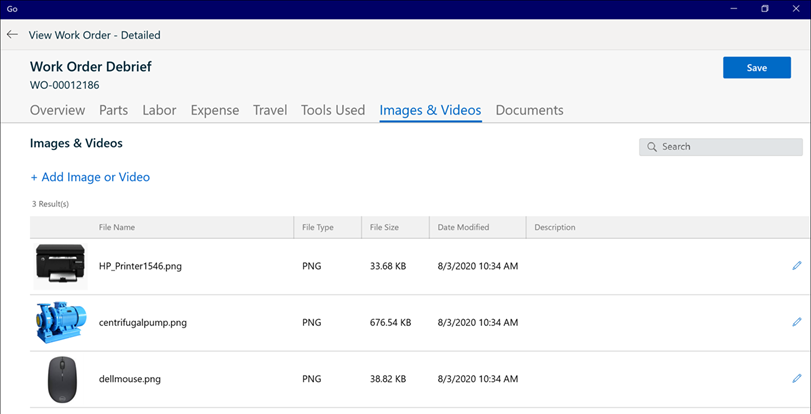
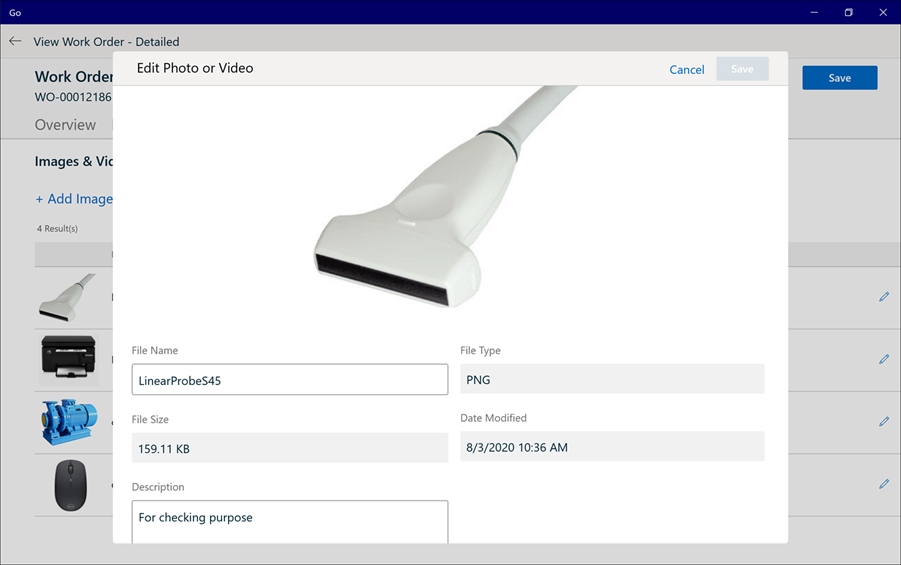
5. Click the pencil icon for each row to edit the File Name and Description of the attached photo or video. OR Right-click each row and click the Edit option to edit the File Name and Description of the attached photo or video.
|
|
• The Title and Description of an individual photo or video can be changed while adding or selecting it from the gallery once it has been added.
• Title is mandatory for the attachment.
|
6. Click Save.
To add or edit documents:
1. Open any work order record.
2. Click Actions to launch the required Create or Edit process.
3. Go to the Documents tab.
4. Click Add Documents.
5. Browse and select a document to be attached to the record. The attached document is available under the Documents tab.
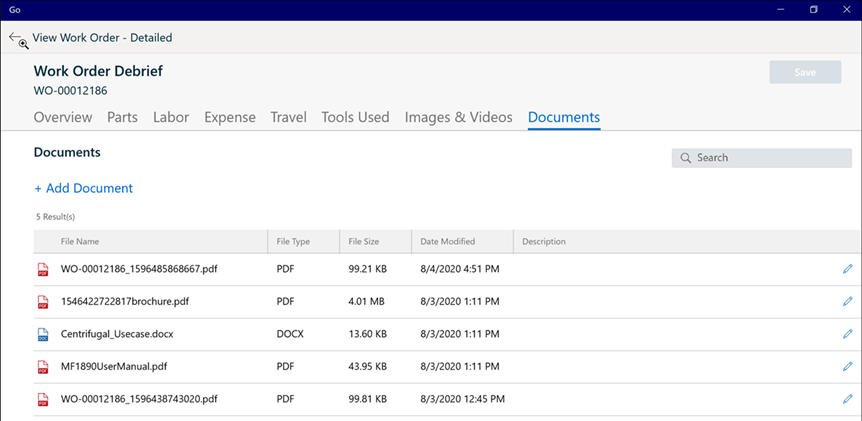
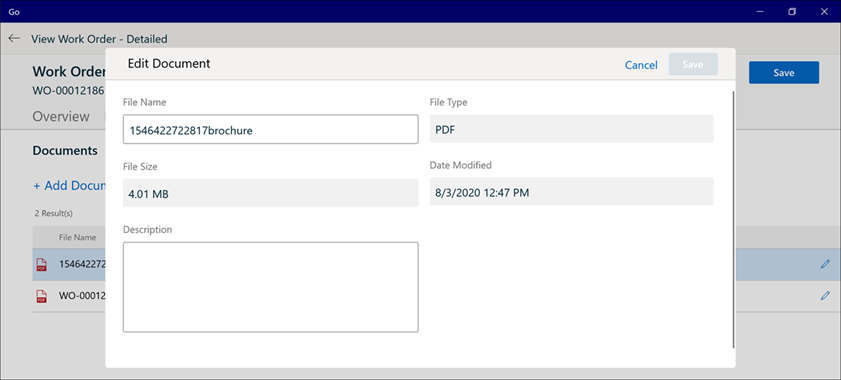
6. Click the pencil icon for each row to edit the File Name and Description of the attached document. OR
7. Right-click each row and click the Edit option to edit the File Name and Description of the attached document.
|
|
Title is mandatory for the attachment.
|
8. Click Save.