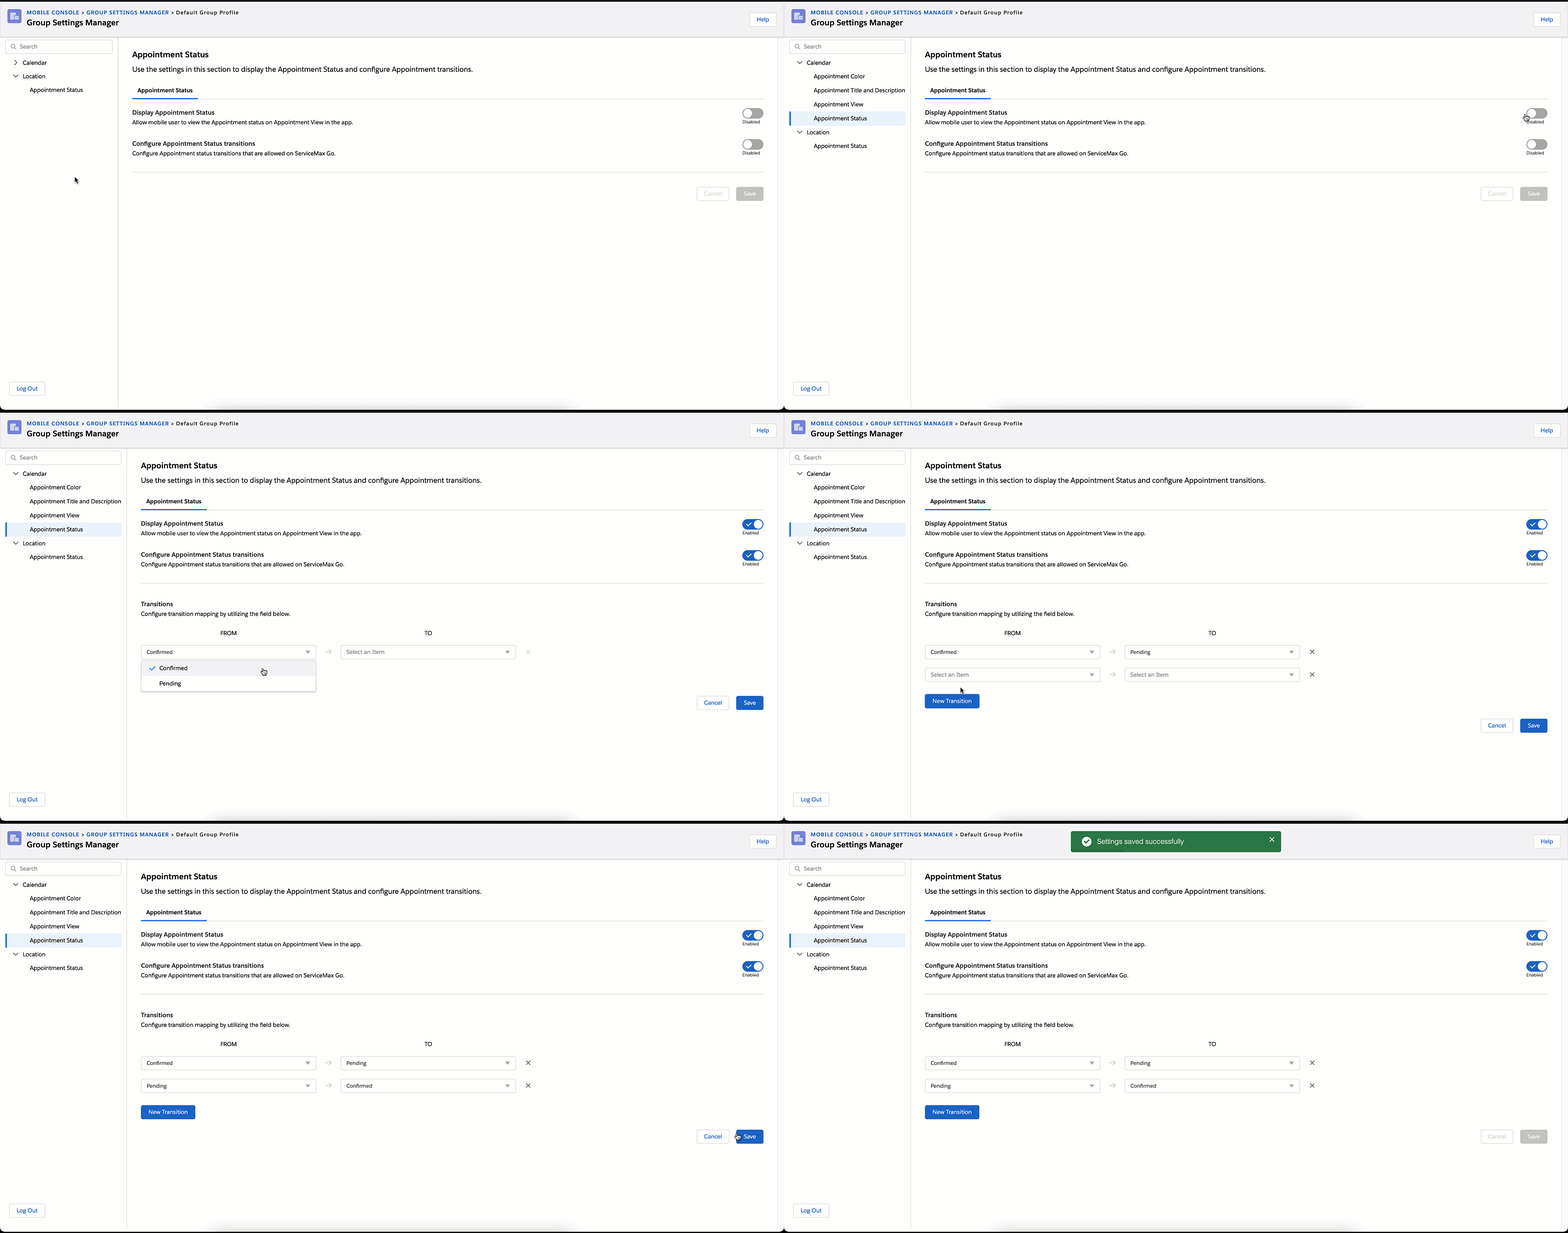
Configuring Appointment Status
As an administrator, you can configure the appointment status so that the technicians can view the current status of the appointment and update the status if required.
The technician must have the following settings.
• Read permission on the Appointment Status object to view the current status of the appointment.
• Create permission on the Appointment Status object to update the appointment status and sync to the server.
To configure the Appointment Status in the Calendar tab to display:
1. Click the toggle button to enable the Display Appointment Status. This allows users to view the Appointment status on Appointment View in the app.
You can configure the Appointment Status transitions. The transitions help the technicians update the appointment status from the current level to the next level.
The Appointment Status transitions option is available when the Service Board (SET001) is set to False in the settings.
|
|
If the Service Board (SET001) is set to True, the Appointment Status transitions option is not displayed as the Appointment status and the transitions are managed in Service Board.
|
To configure the Appointment Status transitions:
1. Click the toggle button to enable the Configure Appointment Status transitions that are allowed in the app.

2. Configure transition mapping by utilizing the available values from the FROM field to the TO field.
• The FROM field and the TO field display the active picklist values of the Status field of the Event Object set in Global Setting - GBL025. • The GBL025 value can be either Salesforce Event or ServiceMax Event. |
3. Click Save.
• The values in the FROM field and the TO field cannot be the same or blank. • An error message is displayed while saving with the duplicate rows. |