Template Designer in 23.2
The Template Designer tab of the Output Document Designer helps you to design the document template. For more information on accessing the Template Designer tab, see Configuring Output Documents.
The design involves the following aspects:
• Designing the UI aspects of the report, such as labels, fonts, logos, and others.
• Binding of Salesforce and ServiceMax data with the report's UI elements.
• Defining dynamic conditions, formatting, and calculations in the report.
Templates are managed using the ServiceMax Action icons at the top of the Template Designer tab. It is managed similarly to filters, maps, and page layouts. The actions supported are as follows:
• Selecting existing templates
• Editing custom templates
• Cloning standard and custom templates
• Discarding unsaved changes
• Deleting custom templates
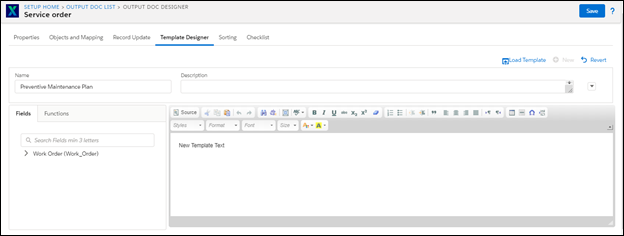
The following screen displays the landing page of the Template Designer:
The following table describes the fields and actions that can be performed on the Template Designer page:
Attributes of Template Designer | Description |
|---|---|
Name | This column displays the names of the templates and is unique. You can select only one template at a time. |
Description | This column displays the description of the current template. |
This column displays all the associated templates. | |
This option allows you to create a new layout. | |
This option allows you to revert the changes in the layout. | |
Source | This option enables you to view the template in the Source Code. Click on the Source button to view the Source Code Editor in the Template Designer. 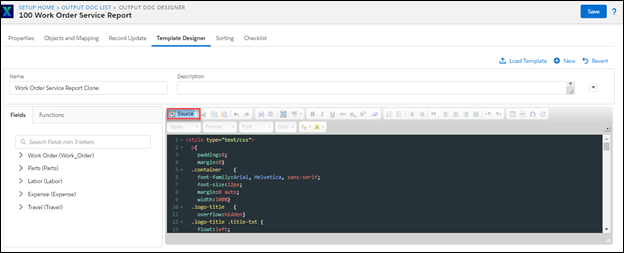 For more information on using functions in your template designer, see Using Output Document Functions. To add a signature to your template, see Widget Functions. |
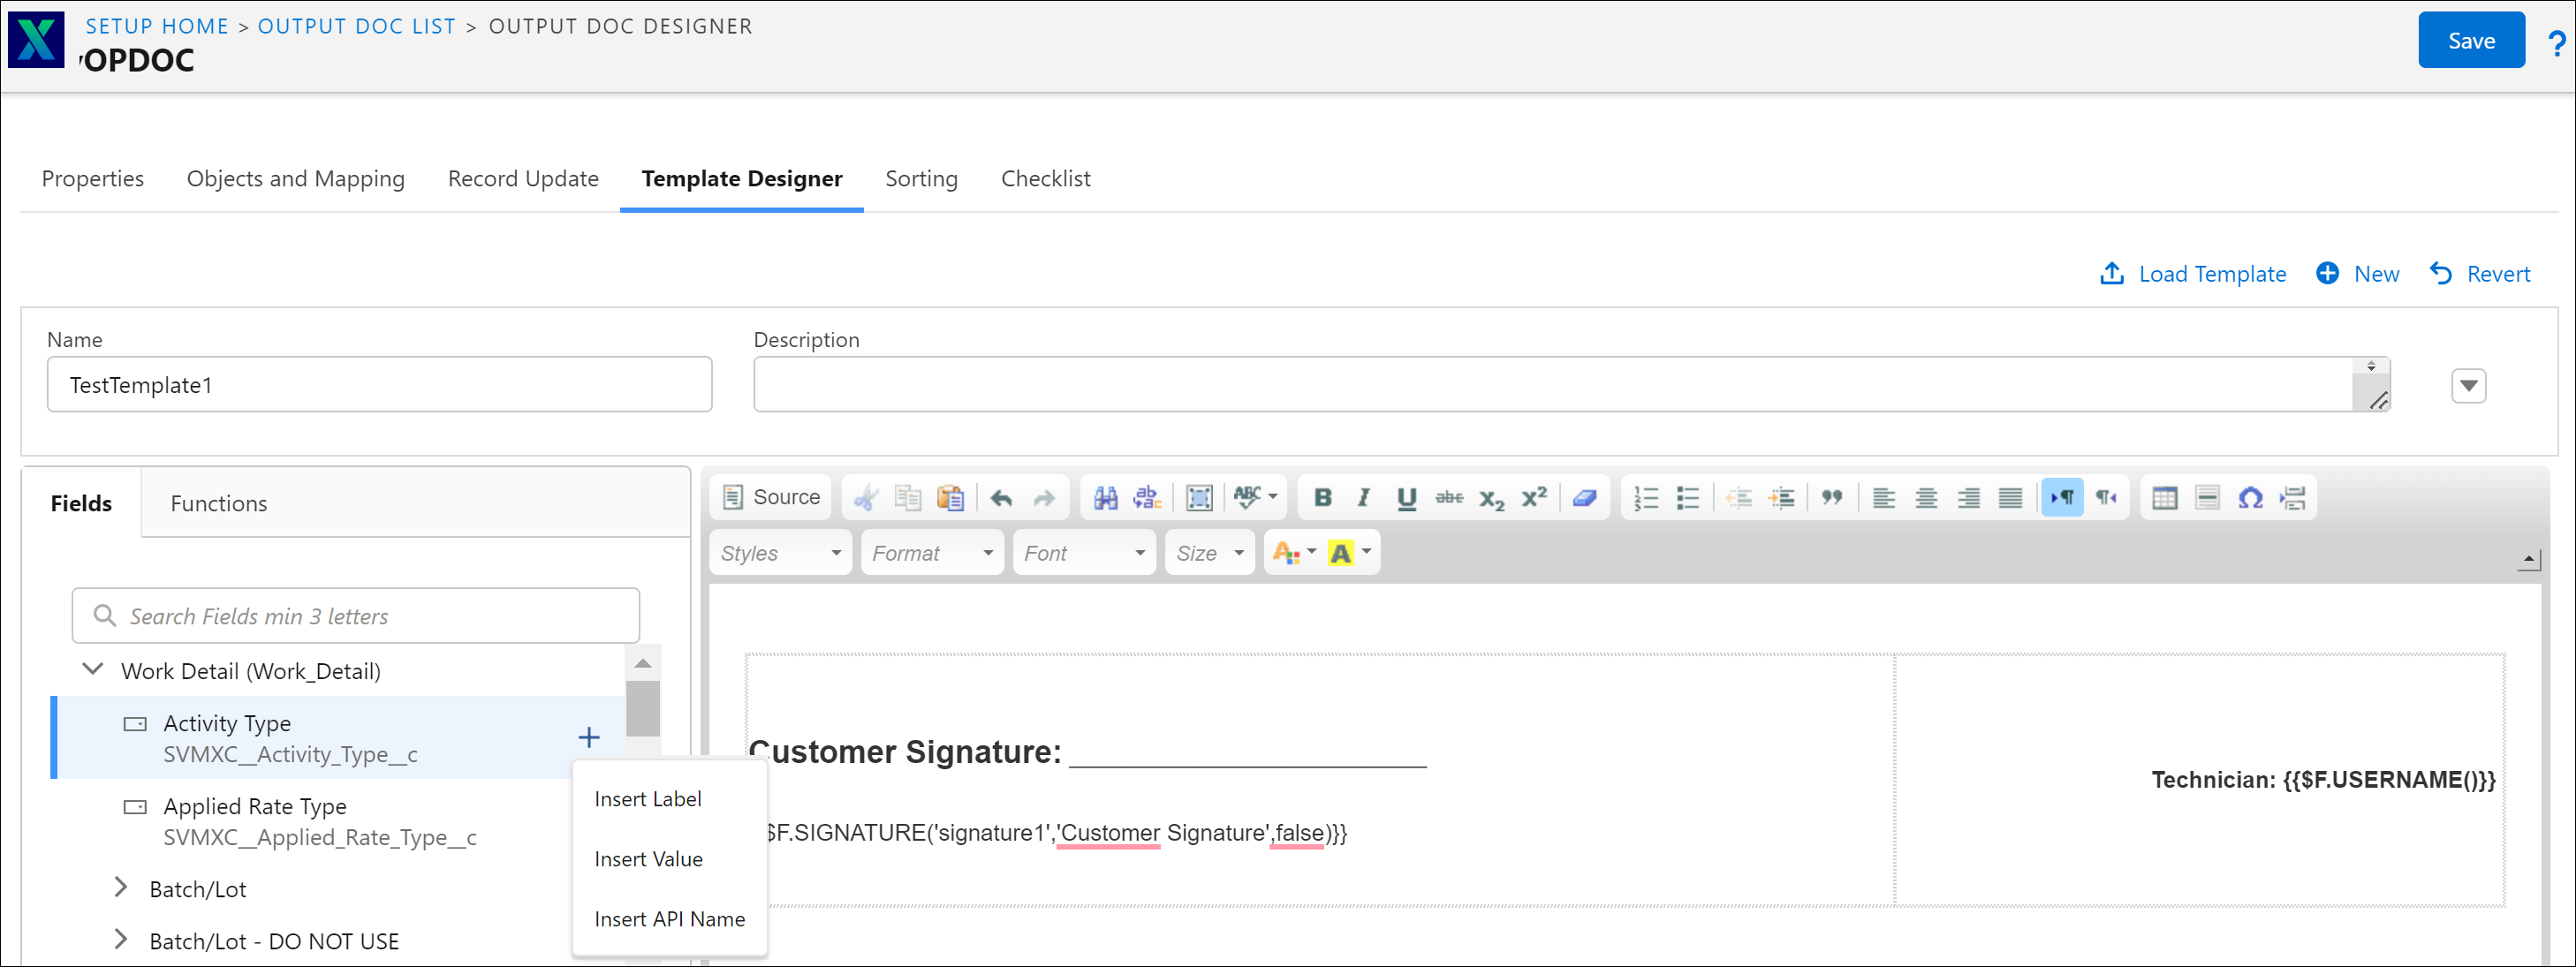
This option enables you to add a field label, field value, or field API name on the template designer. Click the field and then click the + icon to display the Insert Label, Insert Value, and Insert API Name options. |
Load Template
To load the template:
1. Click Load Template. A pop-up box with the list of associated templates is displayed.
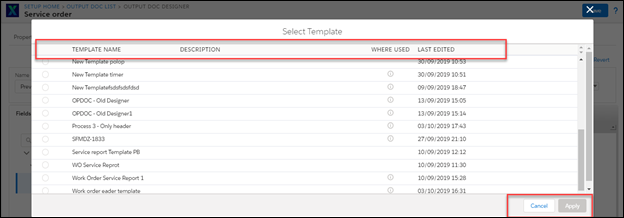
The following information is displayed in the list view:
a. Template Name: This column displays the names of the template. You can select only one template at a time.
b. Description: This column displays the description of the current template.
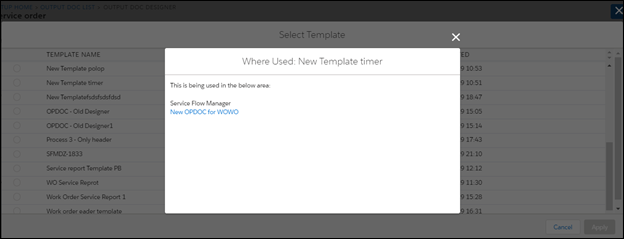
c. Where Used: This column displays the list where the current template is used.
d. Last Edited: This column displayed the time and date when this template was last edited.
New
To create a layout:
1. Click New. A pop-up box is displayed with the Confirmation/Warning messages alerting you about losing the changes and information in the existing template.
2. Click Yes to reset the page to the new template.
3. Click No to close the Confirmation/Warning pop-up box.
Revert
To save the changes in the existing layout:
1. Click Revert. A pop-up box is displayed with the Confirmation/Warning message about whether you will lose the changes in the existing layout. The options Yes and No enable you to take the decision.
2. Click Yes to undo the changes on the layout which are not saved.
3. Click No to close the Confirmation/Warning pop-up box.
Add Fields
1. Click the Fields tab.
2. Expand the objects to display the list of fields.
3. Click the field and then click the plus (+) icon to display the following options:
a. Insert Label
b. Insert Value
c. Insert API Name
The following table explains the Insert Label, Insert Value, and Insert API Name options in detail.
Options | Description | ||||
|---|---|---|---|---|---|
Insert Label | This option inserts the label format of the chosen field in the template designer. The format is $M.Object_API_Name.Field_API_Name.label. Example: The Insert Label option on the Billing Type field is displayed as follows:{{$M.Work_Order.SVMXC__Billing_Type__c.label}} In the Output Document, this format displays the label of the field, which is Billing Type. | ||||
Insert Value | This option inserts the value format of the chosen field in the template designer. The format is $D.Object_API_Name.Field_API_Name.label. Example: The Insert Value option on the Billing Type field is displayed as follows:{{$D.Work_Order.SVMXC__Billing_Type__c.label}} In the Output Document, this format displays the value of the Billing Type field. For example, Contract, Paid. | ||||
Insert API Name | This option inserts the format for API name display for the picklist or multi-picklist value.
The format is $D.Object_API_Name.Field_API_Name.value. Example: The Insert API Name on the Billing Type field is displayed as follows: {{$D.Work_Order.SVMXC__Billing_Type__c.value}}. In the Output Document, this format displays the API name of the Billing Type field value. For example, if the Billing Type is Contract, it displays Contract which is the API Name of the value Contract as displayed in the following screen. 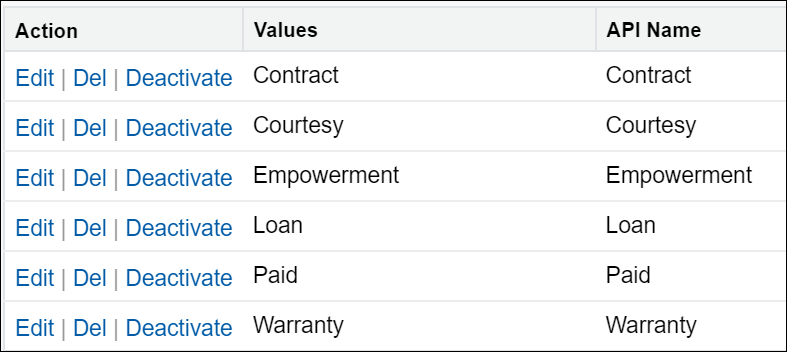 API name without attribute .value: Field format without the attribute .value displays the API name of the field. For example, {{$D.Work_Order.SVMXC__Billing_Type__c}} format in the template designer displays the API name of the Billing Type field value.
For more information about using the IF conditional functions for the picklist fields, see Conditional Functions. |
4. Click Save.