Launching Dispatch Console in Lightning Mode
This section provides steps to enable and launch Dispatch Console HTML5 in Lightning mode.
|
Prerequisite
|
|---|
|
Enable the Profile-level fields to launch the Dispatch Console. For more information, see Enabling Profile Level Fields.
Ensure that the custom domain is configured in the org in which you are launching DC HTML in lightning mode. If the custom domain is not configured, the DC_HTML component is not displayed in the Custom Components section as shown in the following procedure. In such a scenario, the following message is displayed under the Custom Components section: Deploy My Domain to see custom components here.
|
The Dispatch Console now launches with new libraries beginning in ServiceMax Core 25.2. If you want to access the legacy version of Dispatch Console, you must create a custom setting and set the value to True. To create a custom setting, see Creating Custom Setting.
Launching Dispatch Console HTML5 Through Lightning Component
To launch Dispatch Console HTML5 through Lightning Component:
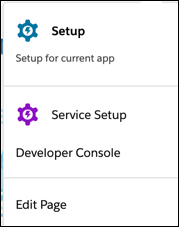
1. In the Org, navigate to Setup.
2. In the Quick Find/Search, enter the keyword Lightning Components.
3. Click the Lightning Components link. DC_HTML is listed on the right panel.
4. In the Org, click Switch to Lightning Experience.
5. In the Setup, click Edit Page.
Lightning App Builder page is launched.
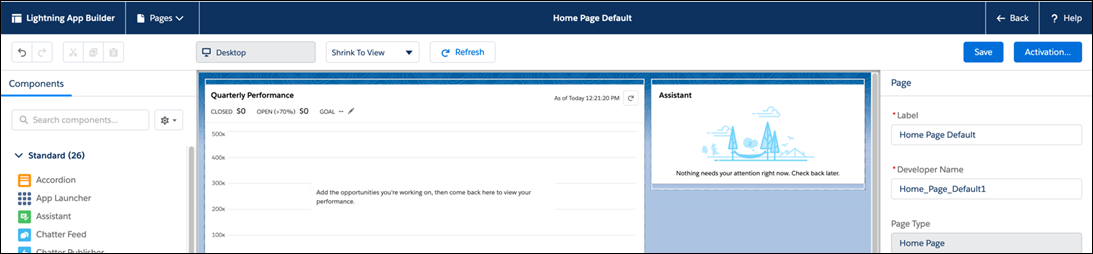
6. In Search Components, enter keyword DC_HTML. DC_HTML lightning component is displayed.

|
|
If DC_HTML lightning component is not shown in the Search Components, ensure to configure custom domain in your org.
|
7. Perform the following steps to place the DC_HTML component in the Lightning Home page:
a. Drag and drop DC_HTML lightning component on the home page layout as appropriate.
b. In the Home Page Default page, click Save.
c. In the Home Page Default page, click Activation.... The Activation: Home Page Default page is displayed.
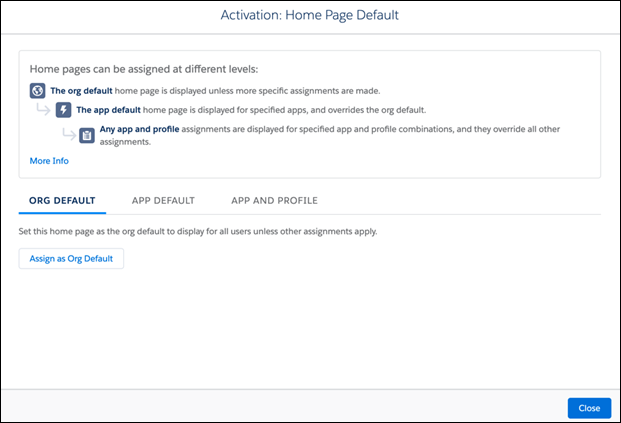
d. In the Activation: Home Page Default page, click Assign as Org Default.
e. In the Home Page Default page, click Save.
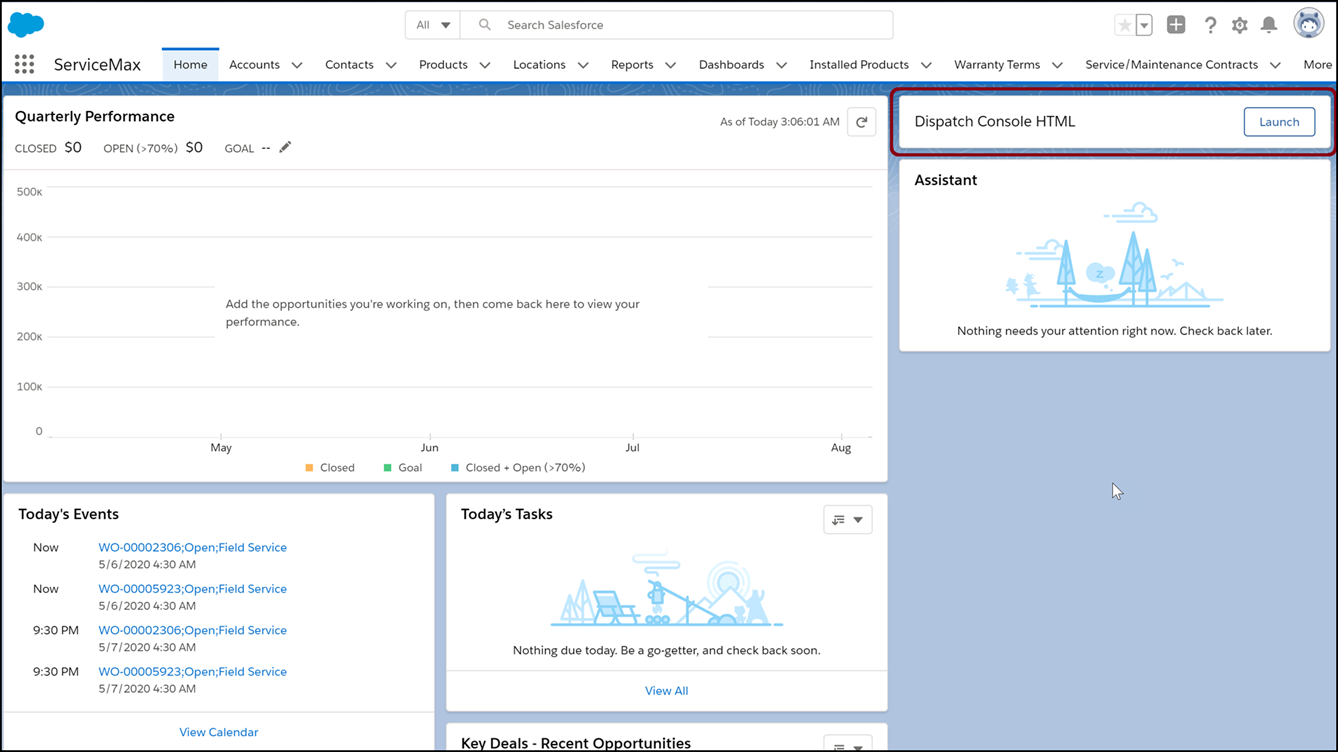
f. In the Home Page Default page, click Back. The Home Page is displayed with the new lightning component "DC_HTML".
|
|
These steps are for placing the DC_HTML component in the Lightning Home page. Similarly, you can place the DC_HTML component in any other page.
|
8. Click Launch. Dispatch Console HTML is launched in the new tab.
Launching Dispatch Console HTML5 Through App Launcher
To launch Dispatch Console HTML5 through App Launcher:
1. Navigate to Setup > Tabs.
2. In the Custom Tabs page, scroll down to the Visualforce Tabs section and click New.
3. In the New Visualforce Tab page, click the create new page now link to create a new Visualforce page to assign the new tab.
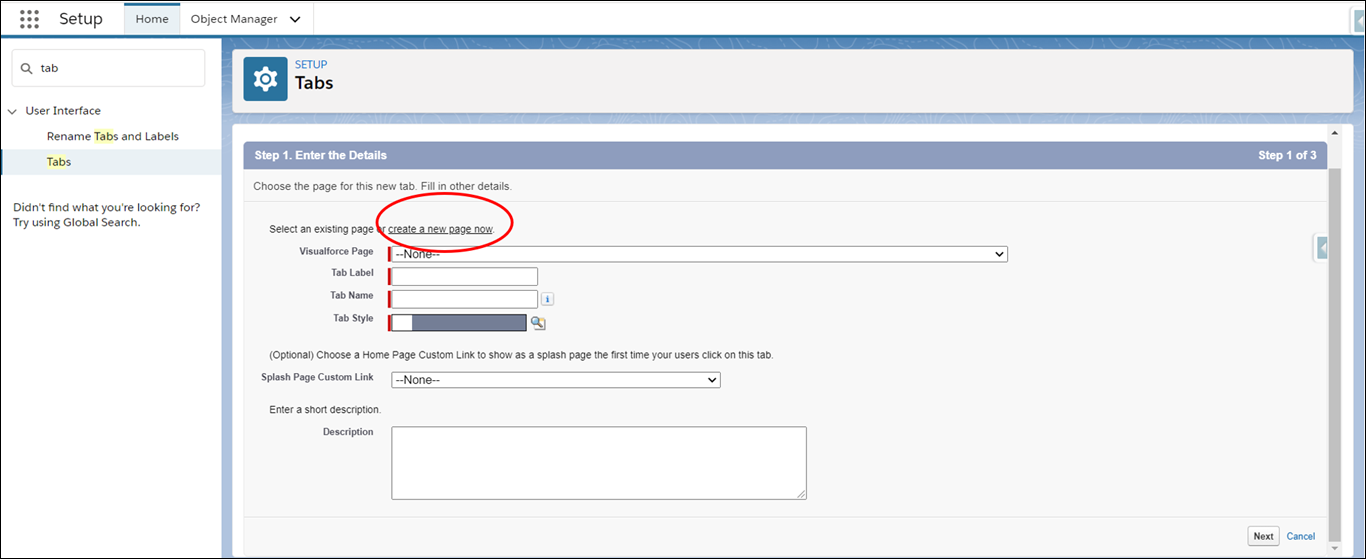
4. Specify the following information for the new Visualforce page.
◦ Label: DC_HTML1
◦ Name: DC_HTML1
◦ Description: Visualforce page for launching Dispatch Console HTML5.
◦ Check the Available for Lightning Experience check box.
◦ Copy the following code into the new Visualforce page and save it.
<apex:page >
  <script type="text/javascript">
  window.onload = newWindowDC();
function newWindowDC(){
  var urlString = '/apex/SVMXC__DCON_DispatchConsole_DCX?isdtp=mn';
  try {
    var strCommunityName = '';
    strCommunityName = "{!$Site.Prefix}";
    if(strCommunityName.length != 0)
      urlString = strCommunityName+urlString;

    window.open(urlString,
                'resizable=1,status=0,toolbar=0,menubar=0,scrollbars=1');
    //debugger;
  }
  catch(err) {
    window.open(urlString, '',
                'resizable=1,status=0,toolbar=0,menubar=0,scrollbars=1');
  }

  //Navigate back to the previous page
  if( (typeof sforce != 'undefined') && (sforce != null) ) {
    sforce.one.back();
  }
}
</script>
  </apex:page>
5. Navigate to Setup > Tabs > New and scroll down to create a new Visualforce page.
6. Use for the following information to create the new Visualforce page:
◦ Visualforce Page : Select the page created in step 4, DC_HTML1.
◦ Tab Label : Dispatch Console HTML
◦ Tab Name : Dispatch_Console_HTML
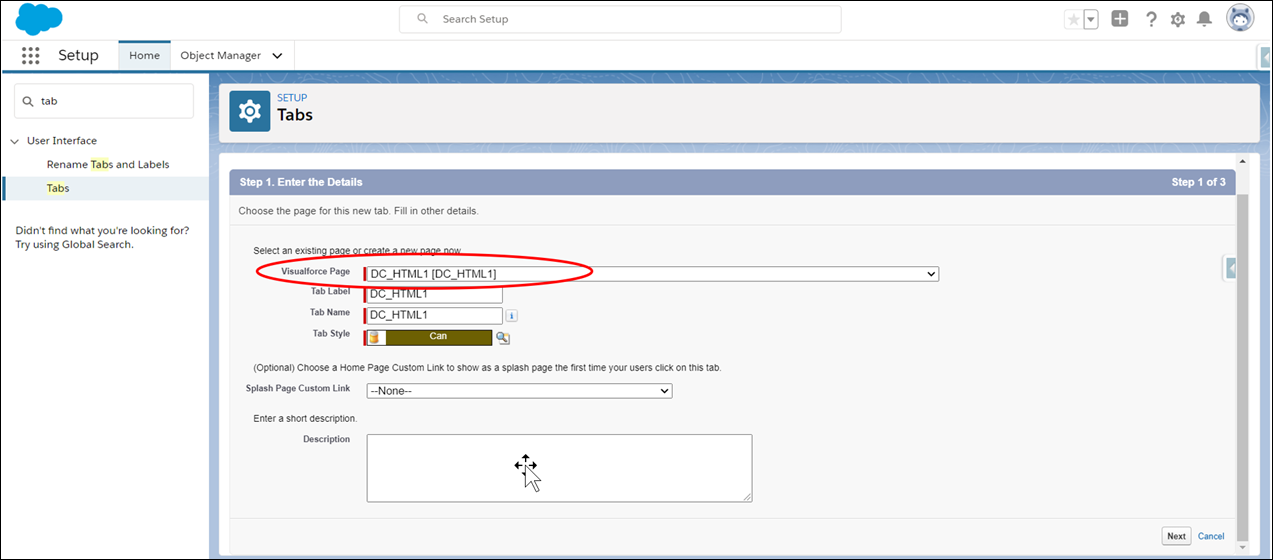
7. Click Next.
8. Add those profiles for which this component needs to be visible, and click Next.
9. Click Save to save the tab.
10. Refresh the browser and go to App Launcher.
11. Type the name of the Visualforce tab you just added and click it to launch Dispatch Console HTML5 in a new window.