Creating a FCO Header Record
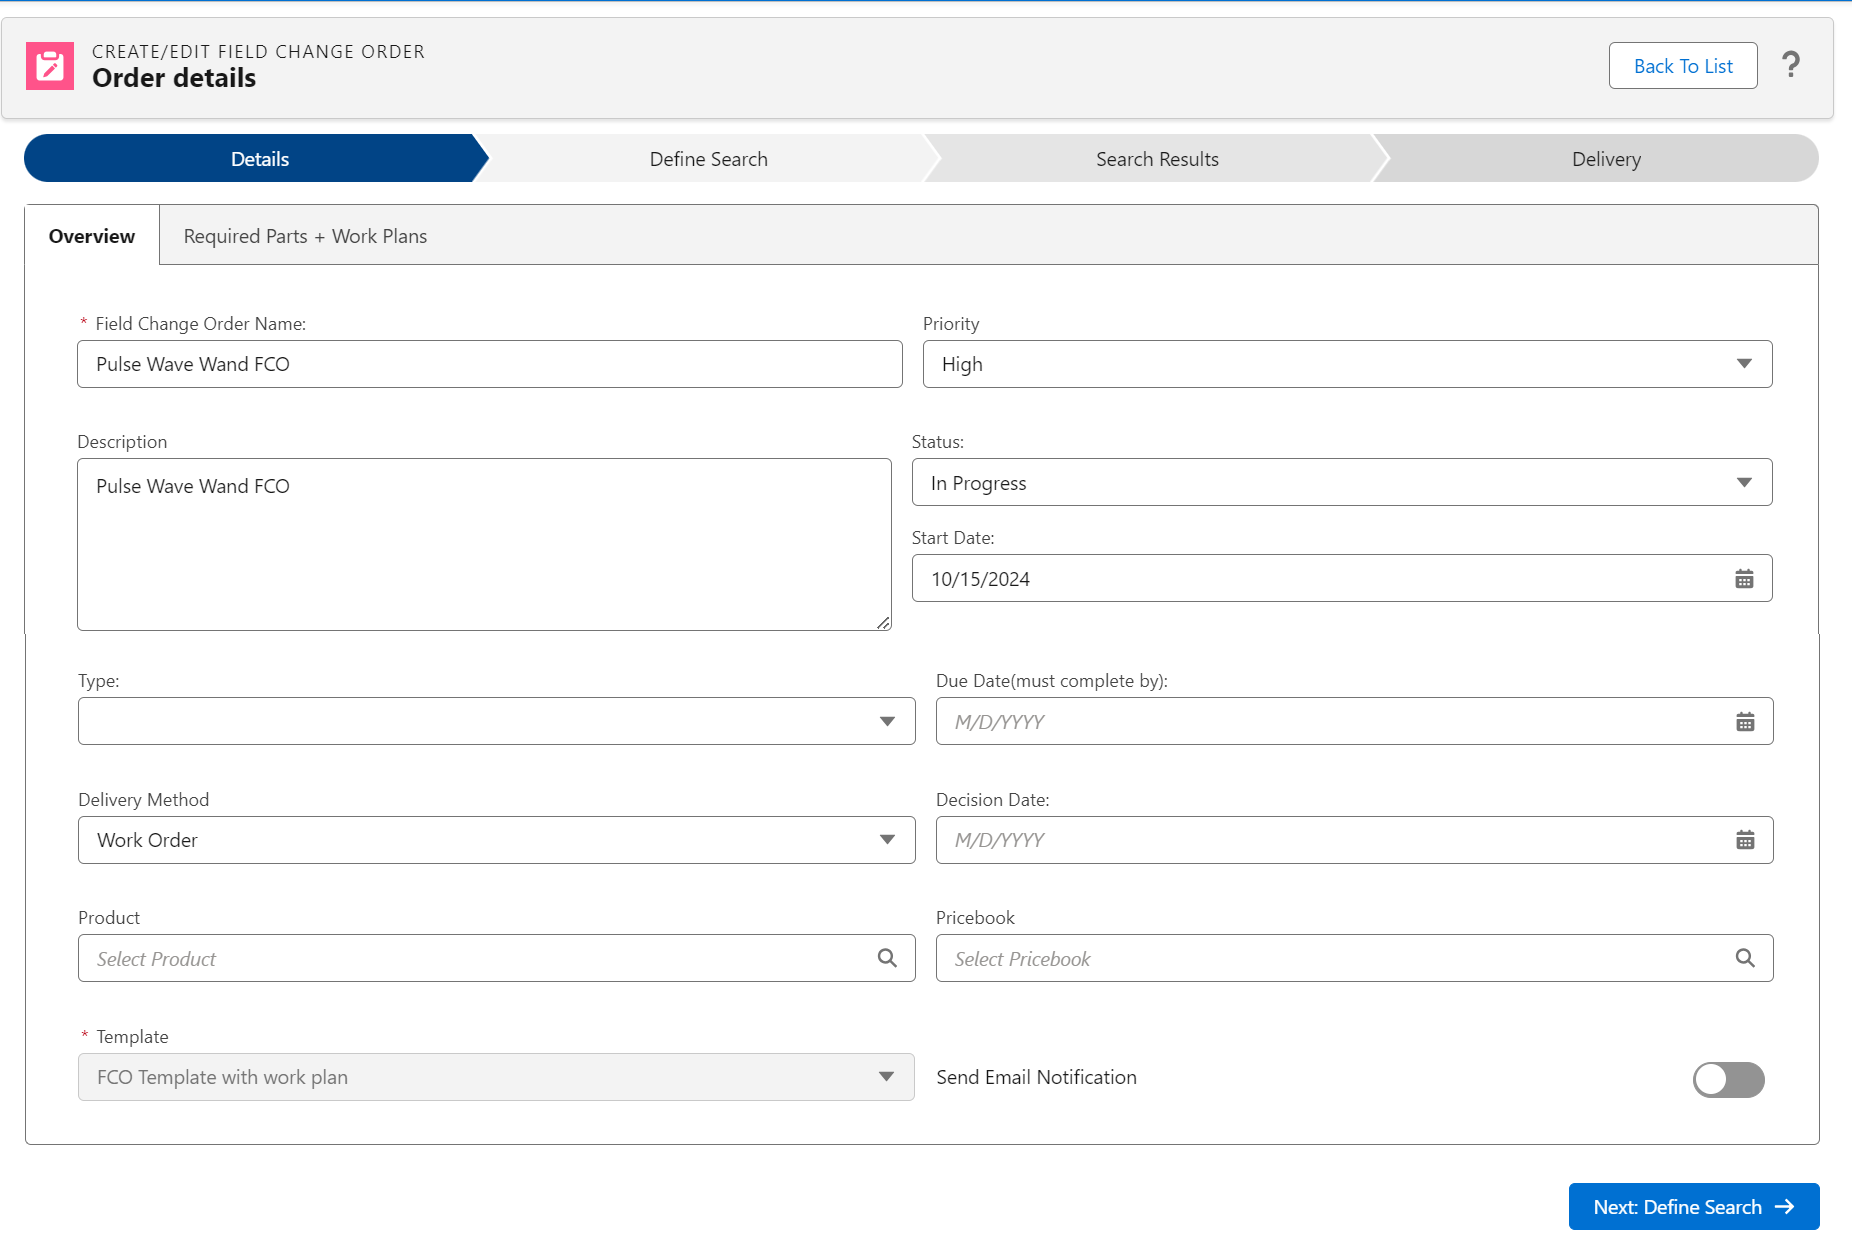
To create an FCO Header record from the FCO Console Landing Page, launch the FCO Creation Wizard. While creating a new FCO Header record you must capture the basic details of the Field Change Order, such as FCO Name, FCO specific dates, FCO type, FCO status, FCO description, and notification settings.
The FCO Creation Wizard's Details Screen offers the following sub-sections:
• Overview Details: This section is used for adding the basic details of the FCO header record details.
• Required Parts: This section is used for adding or viewing the required parts to an FCO record. For details on adding required parts, see Defining Required Parts for an FCO.
Overview Details
To create an FCO record with the details such as Name, Specific Dates, Type, Status, and Description, perform the following steps:
1. Navigate to the Field Change Order tab.
2. In the FCO Console Landing Page, click +New Field Change Order located in the upper right corner. A blank FCO record opens in the Field Change Order Wizard with the Overview section displayed by default:

3. In the Overview sub-tab, you must enter the values for the following fields:
Field | Description | ||
|---|---|---|---|
Field Change Order Name | Enter a name for the FCO Header record.
| ||
Priority | Indicate the priority of the FCO Header record. The following options are available as OOTB, but they can be configured by an admin user: • High • Low • Medium | ||
Description | Provide a description of the FCO Header record. | ||
Status | Select a status for the FCO Header. The following options are available OOTB, but these values can be configured by an admin: • Draft • In Progress • Canceled • Completed
| ||
Start Date | The Start date of the FCO Header record.
| ||
Due Date | The date when the FCO record is due. | ||
Type | The type of service required for the FCO. The following options are available OOTB, but can be configured by an admin: • Modification • Recall • Service • Upgrade | ||
Delivery Method | Select the type of delivery method that is the default for the FCO. The following options are available: • No Delivery • Case • Work Order • RMA/Shipment • IB Notification • Opportunity
| ||
Template | Select an FCO Configuration template from the drop-down list.
| ||
Decision Date | This is an optional date for indicating the date when a decision is made for the FCO. | ||
Product | Search for and select the Product applicable to the FCO Header record. This field is optional. |
4. Click Next: Define Search to save the FCO Header record.
If your organization has added custom fields to the Field Change Order Object, you will not be able to access those custom fields until you click Next: Define Search to save and create your FCO Record. After saving, navigate back to the FCO Detail Screen, and an option Custom Field displays to provide access to any custom fields added to the object. |