Creating Timeline Configurations
To create an IB timeline configuration:
1. Click New on the Timeline List page. The Timeline page is displayed.
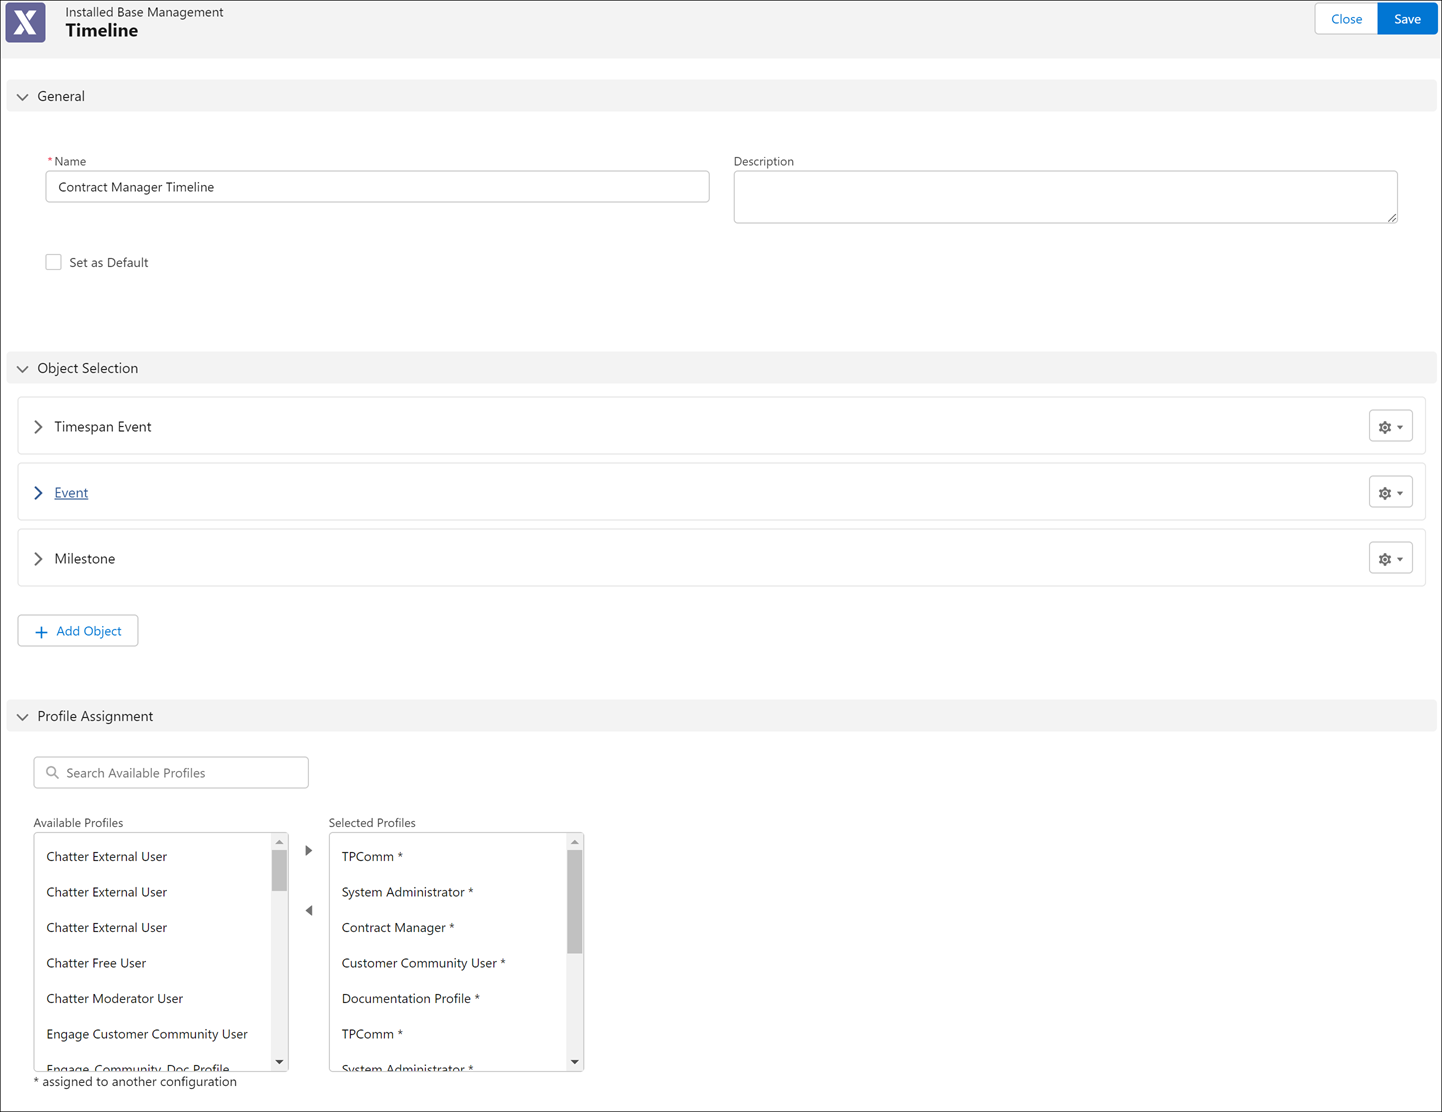
2. Enter the details for the fields as described in the following table:
|
Fields
|
Description
|
|---|---|
|
Fields marked with * are mandatory.
|
|
|
Name*
|
Name of the IB timeline configuration you are creating.
|
|
Description
|
Description of the IB timeline configuration you are creating.
|
|
Set as default
|
Select this checkbox to mark the timeline configuration as your org-specific default configuration.
|
3. Select and manage the objects for the timeline configuration.
For information about adding objects, see Selecting Objects for the Timeline Configuration.
For information about managing the object selection, see Managing Object Selection.
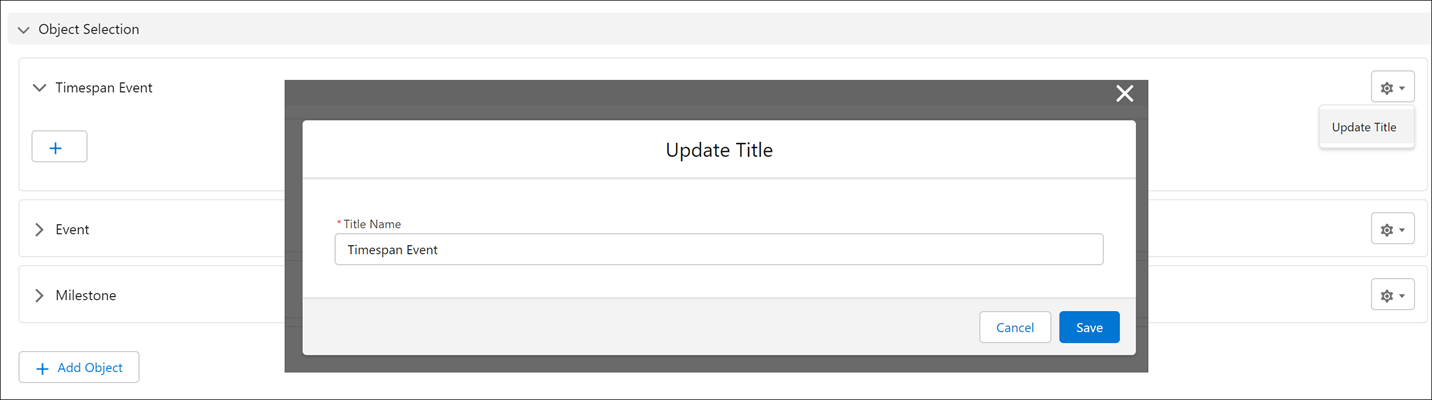
4. Update Title (optional): If you want to edit the object group name, click the gear icon for each group and select Update Title. The Update Title modal window is displayed. Edit the group name and click Save.
5. Define the properties for displaying the object records on the IB timeline in the Object Properties modal window. Based on the list of objects added, the respective records are displayed on the IB timeline.
6. Profile Assignment (optional): If you want to create a persona-specific timeline configuration, select the profiles from the Available Profiles list and move them to the Selected Profiles list. Based on this assignment, the timeline configuration is applied to all the users belonging to the selected profiles at runtime.
7. Click Save to save the IB timeline configuration.
8. Click Close to return to the Timeline List page.