Managing Competitor Asset Opportunities
Perform the following actions to record the Competitor Asset type opportunity.
1. Log into the SFS mobile application.
2. Launch the Work Order record for which you want to manage opportunities.
3. Click Actions, and then click the Manage Opportunities option as set by your administrator. The Choose Opportunities screen is displayed.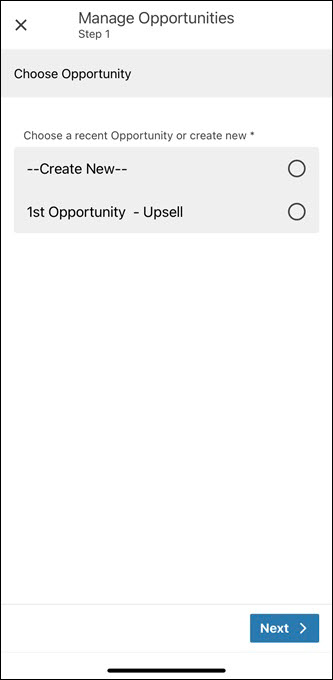

4. Select Create New, and then click Next. The Opportunity Type Choice screen is displayed.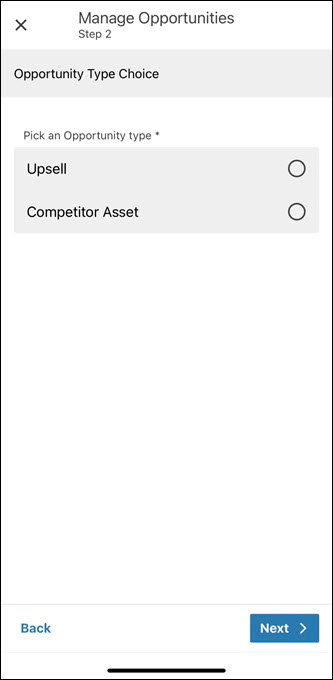

5. Select the opportunity type Competitor Asset, and then click Next. The Opportunity Information screen is displayed.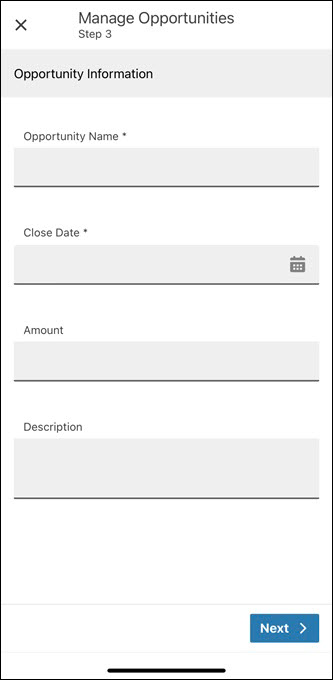

6. Provide the details for the fields as explained in the following table.
Field Name | Field Description |
|---|---|
Fields marked with * are mandatory. | |
Opportunity Name* | Enter a name for the identified opportunity. This field supports barcode scanning. |
Close Date* | Select a date by which the opportunity should be closed. |
Amount | Enter an estimated amount for the opportunity. |
Description | Enter a description of the opportunity. This field supports barcode scanning. |
7. Click Next. The Competitor Asset Information screen is displayed for you to specify the details of the competitor asset.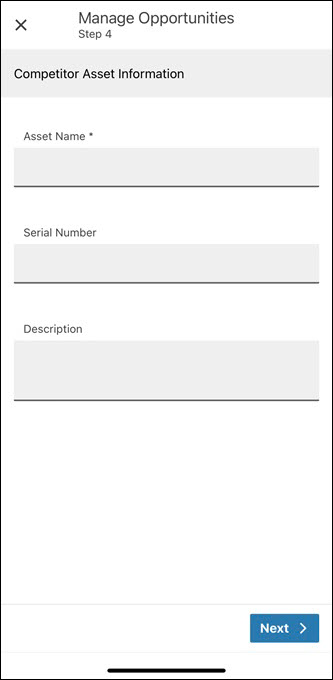

8. Provide the Asset Name as a mandatory field, and then click Next. The Product Search screen is displayed to specify a replacement product with the pricebook entry.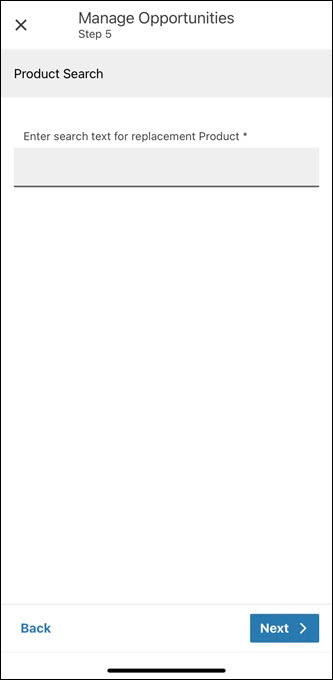

9. Enter the keywords to search for Product records, and then click Next. The Product Search Result screen is displayed with the matching results.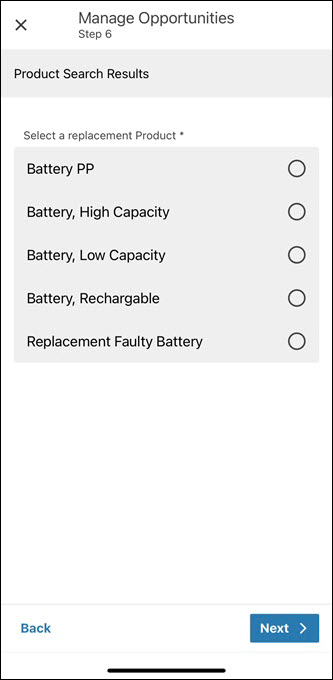

The search is performed against all accessible Product records in the system. |
10. Select the required Product, and then click Next. The Add Asset Choice screen is displayed.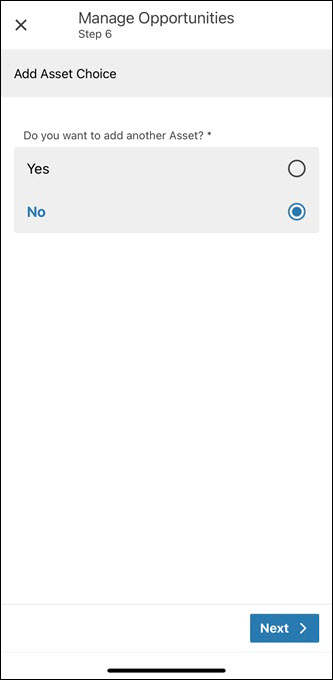

The replacement Product record cannot be added if there is no associated pricebook entry. |
11. Click Next to add only one Asset record to the opportunity. No is selected by default. The Next Steps screen is displayed informing the user that the same action can be executed again to upload images of the assets or add additional assets to the opportunity.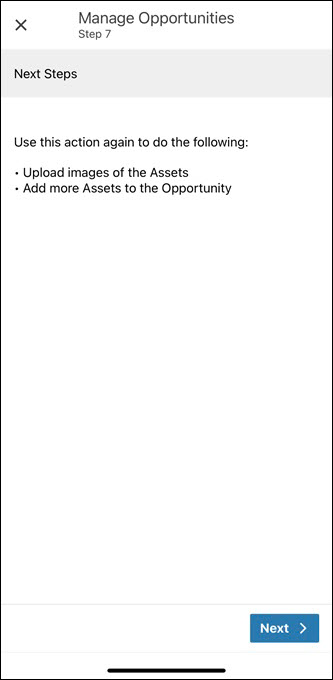 Alternatively, select Yes to add more Asset records. The Asset Search screen is displayed again. Repeat the same steps to add multiple Asset records.
 Alternatively, select Yes to add more Asset records. The Asset Search screen is displayed again. Repeat the same steps to add multiple Asset records.
12. Click Next. A confirmation screen is displayed.

13. Click Finish. The opportunity is recorded successfully and the Work Order record screen is displayed.
14. Click Actions, and then click the Manage Opportunities option set by your administrator to launch the flow again.
15. Select the opportunity that you just created, and then click Next. The Action Choice screen is displayed.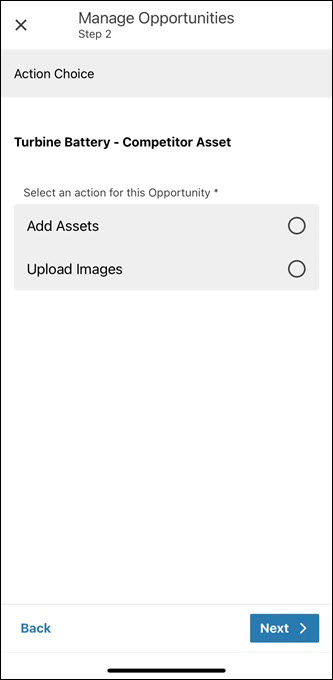

16. Select Add Assets to record more assets to the opportunity, and then click Next. Repeat from step-8 to step-12. Alternatively, select Upload Images to upload images of the competitor asset, and then click Next. The File Upload screen is displayed.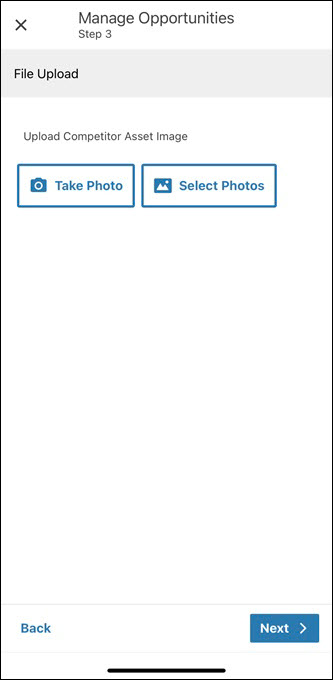

17. Click either Take Photo to capture a photo by your mobile camera or Select Photos to select photos from your mobile gallery, and then click Next. The Upload Image Choice screen is displayed.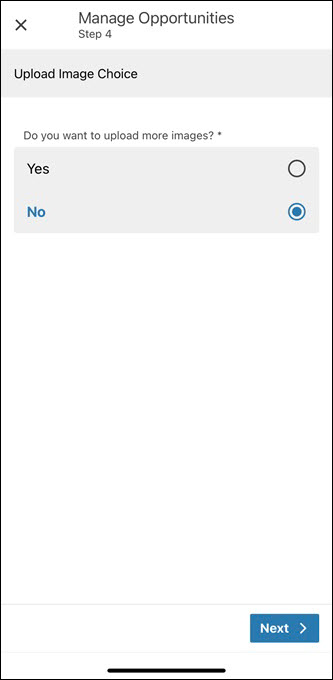

18. Select Yes to add more photos and repeat the same steps. Alternatively, select No to finish uploading images, and then click Next. The Next Steps screen is displayed informing the user that the same action can be executed again to upload images of the assets or add additional assets to the opportunity.

19. Click Next. A confirmation screen is displayed.

20. Click Finish. The opportunity is saved and you are redirected to the Work Order record screen.