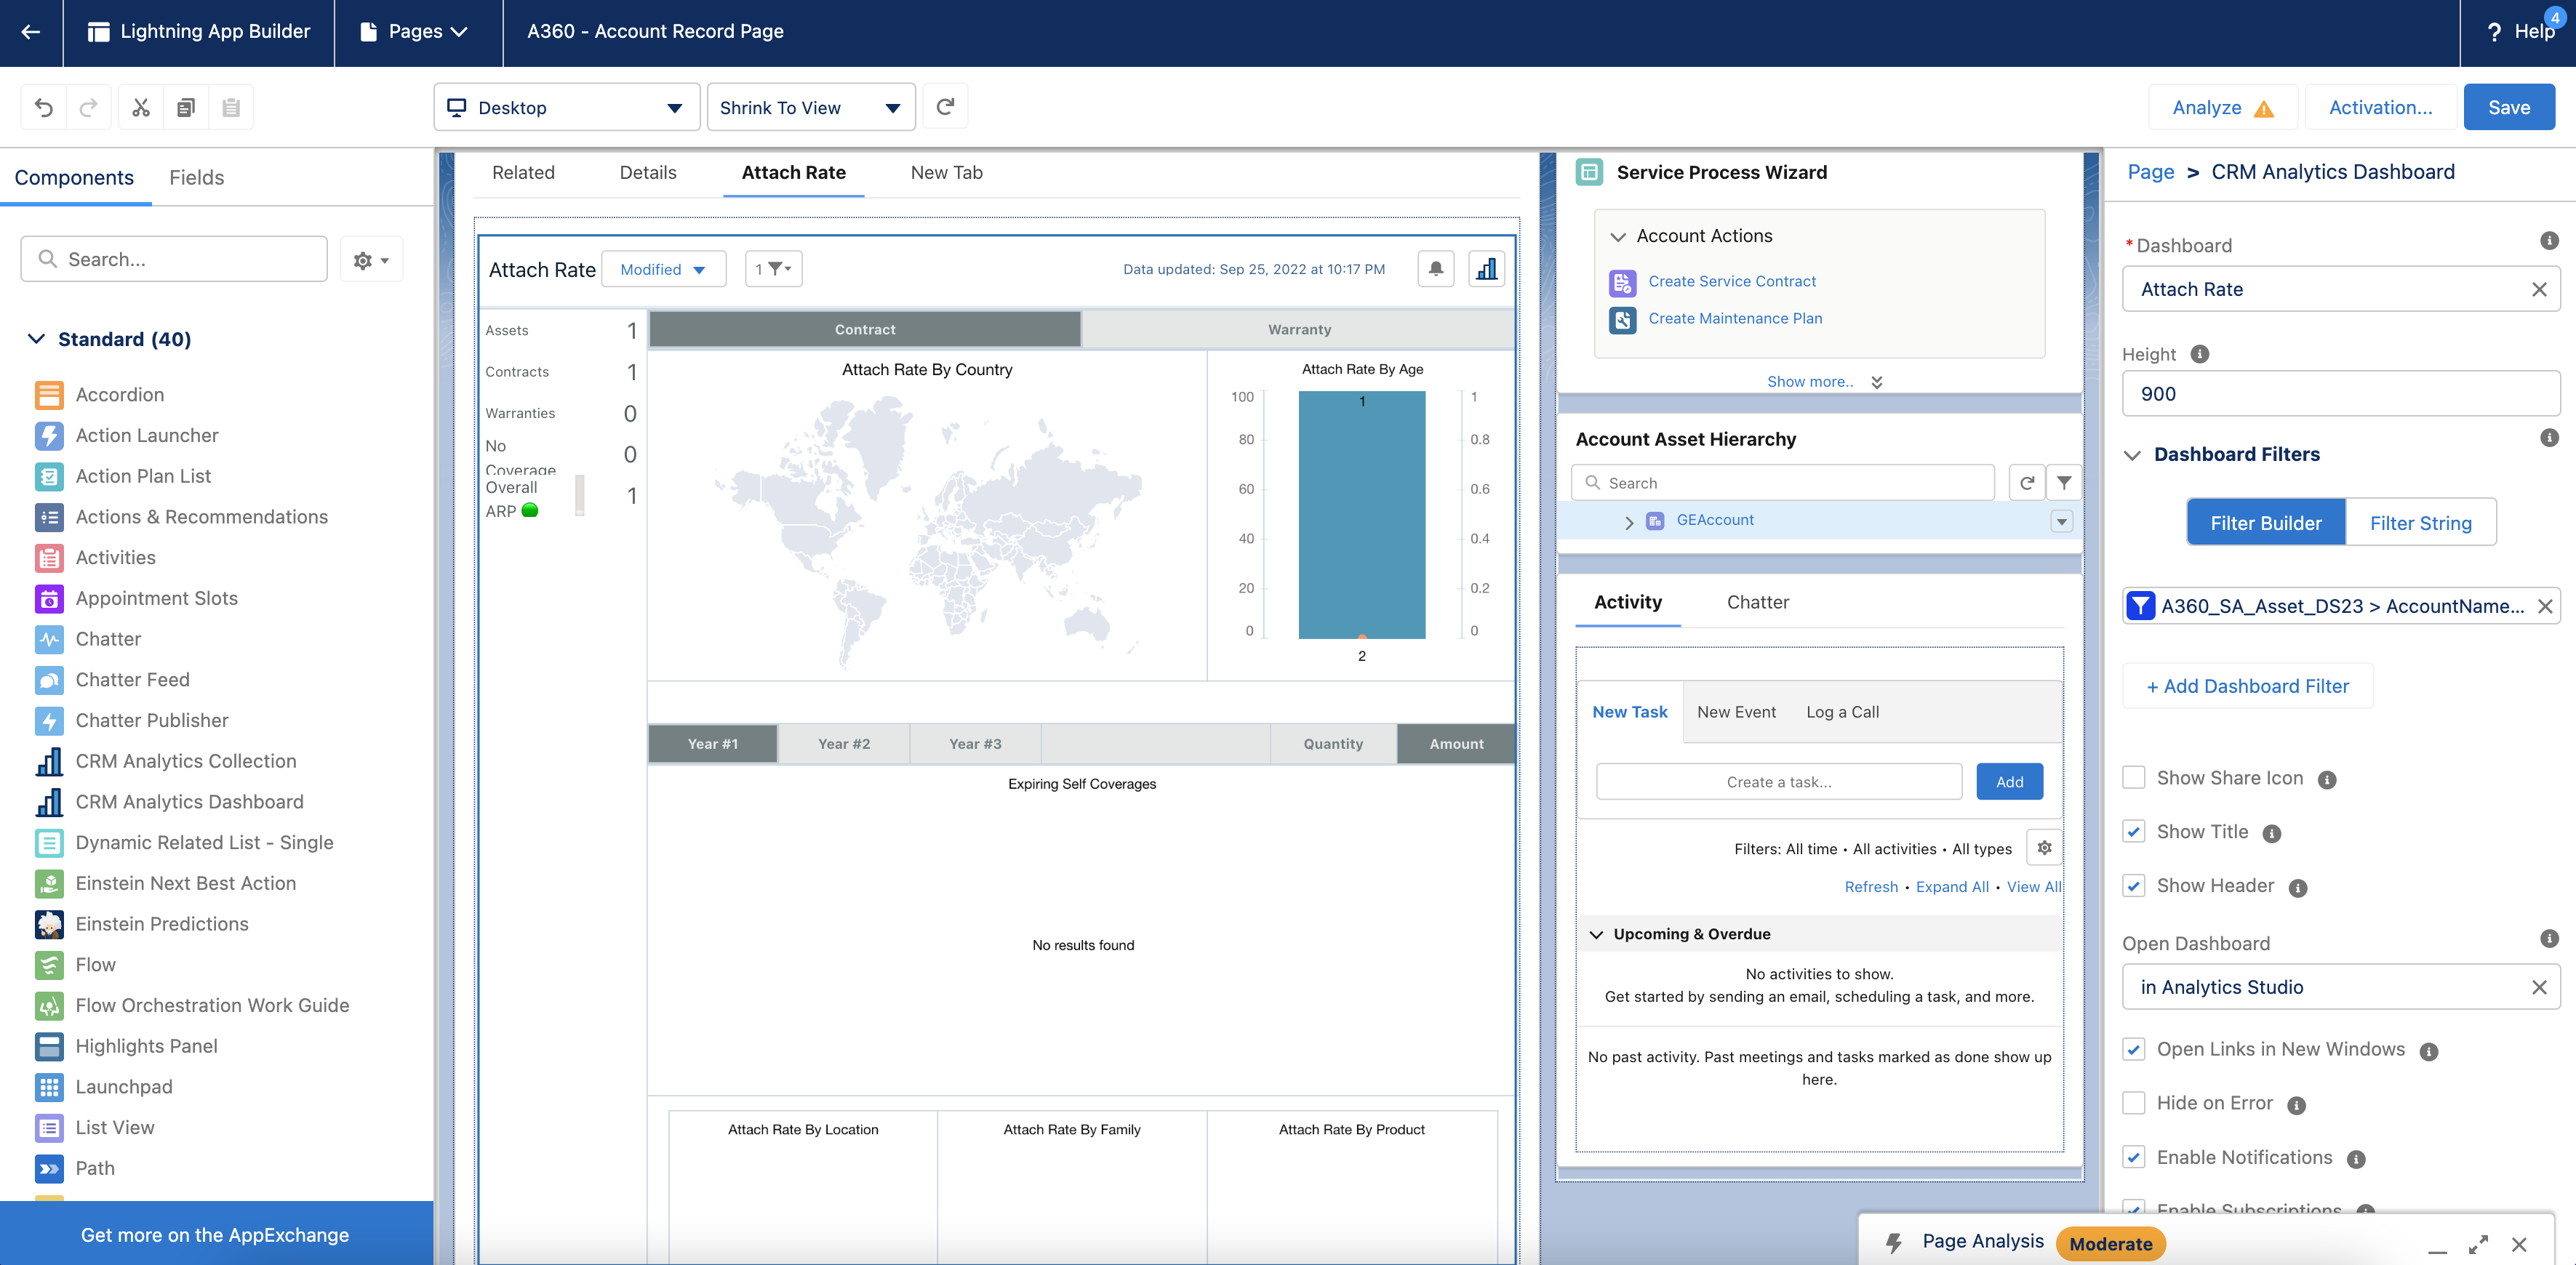
Adding Attach Rate Dashboard to Account Record
You can add the out-of-the-box Attach Rate dashboard to the Account record. It enables service leaders, account managers, and sales teams to understand coverage details and expiring renewals and identify sales opportunities at each account level.
Perform the following steps to add the Attach Rate dashboard to the Account record.
1. Log into Asset 360 Admin.
2. From the Asset 360 application, launch an Account record.
3. Navigate to Setup > Edit Page. The A360 - Account Record Page is launched in Edit mode.
4. Select the record details pane, and click Add Tab from the right-hand side panel.
5. Select the new tab from the right-hand side panel and select Custom from the Tab Label list.
6. Enter a tab name in the Custom Label field, and click Done. The tab is added to the record page.
7. Select the tab where you want to add the dashboard and perform the following.
a. From the Standard Components section on the left-hand side, drag and drop the CRM Analytics Dashboard component to the selected area.
b. Select Attach Rate from the Dashboard list.

c. Click Add Dashboard Filter and provide the following information for the Datasets filters:
▪ Data Source Field: Account Name
▪ Operator: Equals
▪ Object Field: Account > Name
Use the following configuration. {"datasets":{"A360_SA_Asset_DS22":[{"fields":["AccountName"],"filter":{"operator":"in","values":["$Name"]},"locked":null,"hidden":null}]}} |
d. Click Save. The Account record page is saved with the changes.
8. Click Activate.
9. Click the APP DEFAULT tab, and then click Assign as App Default. The Select Apps screen is displayed.
10. Select Asset 360, and then click Next. The Select Form Factor screen is displayed.
11. Click Next, and then click Save. The record page editor screen is displayed.
12. Click Save. The record page is saved successfully.
13. Click the Back button to exit from the record page editor. The new tab is added to the Account record with the dashboards.