Layout and Setting Options
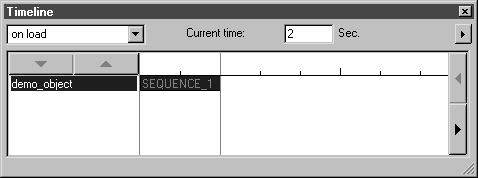
This dialog box displays the current status of the animation as it has been created in the Edit Animation dialog box. Each time a change is made in the Edit Animation dialog box, the timeline is automatically updated.
There is a pop-up menu with two options in the top left-hand corner of the box.
On Load
When this option is selected all object sequences that are played back by selecting the Show in IsoView command are displayed.
Remote Event
When this option is selected all object sequences that are initiated via an external link are displayed.
Object List
All animated objects are displayed in the left-hand column. The arrow buttons at the top of this column allow you to scroll through the object list.
Timeline
The right-hand column represents the timeline. This is where the animation sequences for all the file’s objects are depicted in chronological order.
The timeline is divided into seconds. The scale for the timeline divisions is depicted on default as specified on the Animation dialog page for the Preferences menu command.
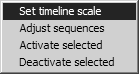
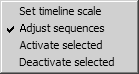
If you click on the arrow to the right, four commands appear in the pop-up menu:
• Set timeline scale
• Adjust sequences
• Activate selected
• Deactivate selected
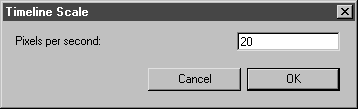
Set Timeline Scale
When Set timeline scale is selected, the following dialog box appears:
You can change the default setting here. The appearance of the timeline can be contracted or stretched out. If you increase the number of pixels, the timeline is stretched, if you enter a lower value, the timeline is contracted.
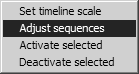
Adjust Sequences
The Adjust sequences menu command is only active if a placed file with animation sequences is selected while editing an animation. It is used to determine when animations in the placed file are to start.
If the menu command is not checked, a start point can be set for the entire placed file. This is useful when a complex animation that has been saved in a file is to be used in another. The start point is set via the Timeline dialog box.
If the menu command is checked, a start point can be set for each individual sequence in the placed file. This method is most suited for objects with several sequences, for example disassembly and assembly. If a file like this has been placed, the sequences can be moved to the relevant start point so that they fit exactly into the time lapse of the target file.
Each sequence is depicted as a bar with the name of the sequence. The length of the bar indicates the duration of the sequence. The beginning of the bar corresponds to the start time, as set in the Edit Animation dialog box. If repetitions have been set for a sequence, the period of time occupied by the repetitions is depicted in gray in the sequence bar.
Activate Selected Sequences
You must activate selected sequences before you can add new steps or actions to them.
To activate a one or more sequences:
1. Select the sequences.
2. Click the arrow button in the Timeline dialog box to open the pop-up menu.
3. Click Activate selected. All the selected sequences are activated and the lettering in their Timeline sequence bars turns red.
You can now add new steps or actions to the active selected sequences.
Deactivate Selected Sequences
To deactivate a one or more active sequences:
1. Select the active sequences.
2. Click the arrow button in the Timeline dialog box to open the pop-up menu.
3. Click Deactivate selected. All the selected active sequences are deactivated. The lettering in their Timeline sequence bars turns black.
Current Time
The current time can be any point within an animation. The red timeline indicates the currently selected time. The time is depicted as a value in the field next to Current time above the timeline. You can enter a different current time here. Alternatively, you can move the timeline by clicking on it and dragging it with the mouse. The time value indicated above changes in tandem with the movement of the timeline. The timeline is moved in seconds. If you hold down the ALT key and then move the timeline, the timeline is moved pixel by pixel. The distance in terms of seconds depends on the scaling that has been set. Once you have clicked the timeline, you can release the ALT key.
If you hold down the ALT key and then click on a sequence bar, the timeline jumps to the end of this sequence.