Splitting Automated Loss Events
An automated loss event can be split into multiple events, each with a different reason. The duration of each split event is subtracted from the duration of the original event. The total duration of the split events plus the remaining duration of the original event cannot exceed the original duration of the event that is being split. Manually entered events cannot be split.
Each automated event has a start time and does not end until a new event starts. When you split an event, the start time for the new event is inserted into the duration of the original event, based on the duration of the new event. The new event is always added to the end of the original event. Each split event is still considered to be an automated event.
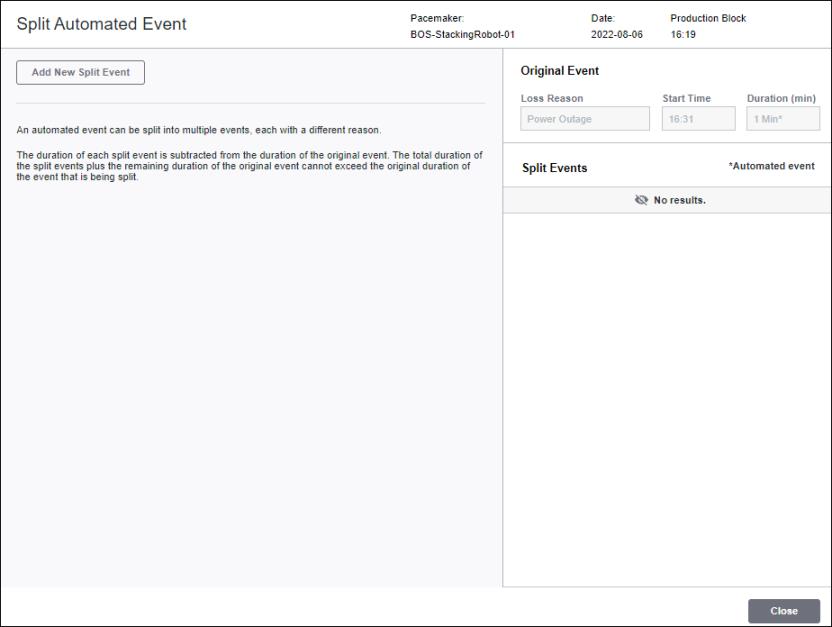
Automated events are split in the Split Automated Event window, which is accessed by clicking Split Event from the Edit Loss Event window when editing the automated event.
Example: Splitting an Event
An automated event with a duration of 60 minutes and a loss reason of Breakdown has a start time of 10:00. It ends when a new automated event starts at 11:00.

If you split the original Breakdown event and add a new event with a duration of 30 minutes and a loss reason of Electrical Stop, the start time for the new Electrical Stop event is 10:30, or 30 minutes before the end of the original event duration. The duration of the original Breakdown event is reduced to 30 minutes.

If you split the original Breakdown event again and add an new event with a duration of 15 minutes and a loss reason of Motor Failure, the start time for the new Motor Failure event is 10:15, or 15 minutes before the end time of the original event’s current duration. The duration of the original Breakdown event is reduced to 15 minutes.

Example: Deleting Split Events
From the Split Automated Event window for an automated event, you can delete any split events that have been added to the original event. Deleting a split event deletes its start time. This means that the immediately preceding event now continues until the next event start time, and the duration of the deleted event is added to the immediately preceding event. For example, if you delete the Electrical Stop event, its 30 minutes are added to the duration of the Motor Failure event. The duration of the Motor Failure event is now 45 minutes.

If you instead delete the 15 minute duration Motor Failure event, its 15 minutes are added back to the original Breakdown event. The duration of the Breakdown event is now 30 minutes.

Splitting an Automated Event
To split an automated event, complete the following steps:
1. Select the automated event from the collapsed or expanded event log. The Edit Loss Event window opens.
2. Under Impact, click Split Event.
3. On the confirmation window, click Split.
The Split Automated Event window opens, identifying the pacemaker, the date, and the start time for the production block in which the automated event occurred. Under Original Event at the top right, the Loss Reason, Start Time, and Duration (min) for the original automated event are displayed. This is the event that is being split.
An automated event can span multiple production blocks. When you are accounting for time loss for a production block, you see only the portion of that automated event which falls within the production block. When you split the automated event, you are splitting the entire automated event, not the portion that falls within a single production block. |

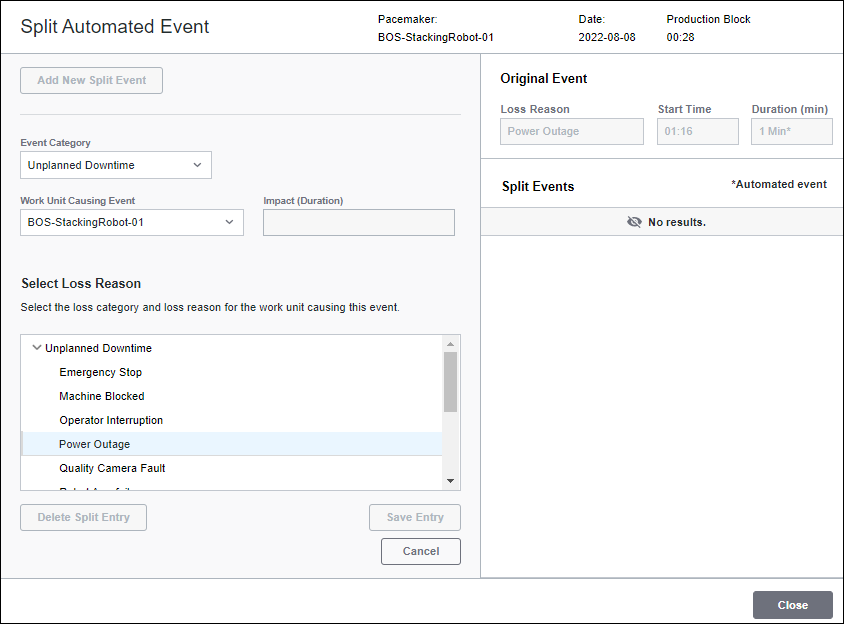
4. Click Add New Split Entry. The left pane refreshes to show the split event entry information.

5. For Event Category, select the loss category for the new split event. By default, the loss category for the original event is selected. You can change this value to another loss category, if needed.
6. For Work Unit Causing Event, select the work unit which caused the loss for the split event to occur on your pacemaker. By default, the work unit set on the original event is selected.
7. For Impact (Duration), enter the duration of the new split event.
8. Under Select Loss Reason, select the loss category and loss reason for the work unit which caused this split event. If the pacemaker is selected as the Work Unit Causing Event, you can only select reasons from the loss category matching the selected Event Category. If a work unit other than the pacemaker is selected as the Work Unit Causing Event, you can select any loss reason that is valid for the selected work unit, from any loss category.
9. Click Save Entry. The new split event is added as an entry in the Split Events list. The Duration (min) for the original event is updated to show its reduced duration.
The duration of the original event cannot be reduced to less than 1 minute. |
10. Repeat steps 4 through 9 as needed to continue adding split events.
11. You can edit the newly added split events by selecting an event in the Split Events list, and editing the work unit selection, duration, and loss reason. Click Save Entry to save the changes to the event, or click Cancel to discard the changes.
12. You can delete events from the Split Events list by selecting the event and clicking Delete Split Entry.
13. When you are done adding, editing, and deleting split events, click Close. The updated original event and new split events are saved.
Events that were split from an automated event are also considered to be automated events. They can be edited and split, but cannot be deleted from the event log. If you open the Split Automated Event window for the original event again, the events that were split off of the original event are displayed in the Split Events list and can be deleted from there.