Create a feather key and groove in one step with Creo Elements/Direct Part Library. You can even create a radial pattern of feather keys around a shaft, as shown below.
By default, feather keys are added as user-defined features and can be easily modified like other features. You can deactivate this function in the Defaults dialog found in the Modify section of the Feather Keys menu.
To add a feather key,
1. The position of the groove and key are defined on a workplane that is tangent to your cylindrical face. See
Create a workplane for keys if you do not have a workplane.
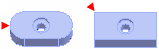
2. Click Part Library and then, in the Shaft/Hub group, click the arrow next to Feather Key.
5. Select the Shaft, which is the cylindrical part that will be grooved, or set the ShaftDia (diameter).
6. Click Position and select the position on the workplane.
7. Click Direction and select a point on the workplane in the direction you want the groove.
8. Select the type of groove to cut:
◦ Shark
◦ Disk
9. Select a Position option, which is the start point of the groove in relation to the key.
◦ Corner point
◦ Center point
◦ Support torque
10. You can click
Elongate keyway and specify a start point and direction.
11. Keyway in hub: This option also creates a groove in the hub part. Check the option then select the hub part in the viewport. The hub is the part that the key locks onto the shaft.
12. Multiple creation: To create more than one groove and key around the shaft, select Radial in this section then select the axis, enter the angle from one key to another, and enter the number of keys.
13. You can also set the following options:
◦ Workplane: If you have more than one workplane, you may need to select the correct workplane for this operation.
◦ Direction (workplane): The direction that the groove should be cut, relative to the workplane.
◦ Dimensions: Click on Width or Length to select from a list of standard parts. The Height is set when you select a width, and should not be changed manually.
14. Create key: You can create a groove without a key. You can also select a screw from the drop-down list, if the key has a screw hole.
15. The remaining fields are informational only, and cannot be changed.

 Feather Key.


 to complete the operation.