Upgrading a ThingWorx eMessage Connector to Version 2.1.0
This topic explains how to upgrade a ThingWorx eMessage Connector from version 2.0.x to version 2.1.0 when using the Connector in a ThingWorx Single-Server Environment and when using it in a ThingWorx High Availability Clustering environment. Before you begin, read the section, Best Practices for
Upgrading.
Best Practices for Upgrading
For best security practices and because Java 8 is moving to End of Life in December 2020, you should first upgrade to Oracle JDK 11 or Amazon Corretto Java 11 (Open JDK) on the machine that will run the eMessage Connector.
Before you begin the upgrade, here are some best practices to follow:
• Before you upgrade the ThingWorx Platform, export any entities you want to preserve.
• Upgrade your ThingWorx Platform computer to Java 11 and then upgrade your ThingWorx Platform to v.9.1.0 before you begin the upgrade for the Axeda Compatibility Package. You will import the extensions provided in the Axeda Compatibility Package into the upgraded platform instance.
• Similarly, upgrade the computer that will run the eMessaage Connector v.2.1.0 to use Java 11.
• After upgrading to Java 11, make sure that you set the JAVA_HOME environment variable to point to the Java 11 JDK.
• Copy any site-specific configuration values from the existing installation configuration to the new installation configuration file. Do not just copy the existing emessage-ha-sample.conf file to the new installation.
• When the upgrade is complete, import the exported entities into the new ThingWorx Platform v.9.1.0. You must re-run the permissions services, as explained in Setting Up Permissions and Visibility for the eMessage Connector. The required permissions are not automatically re-applied when importing the entities because the entities are installed as new entities, not as upgraded entities.
• As needed, create any new security entities that you may need. For assistance, refer to Create Security Entities in ThingWorx for a Connector and for Remote Access.
• As a security best practice, convert any JKS keystores to PKCS #12 keystores. For assistance, refer to Converting JKS Keystores to PKCS Keystores
Steps Overview
Upgrading to version 2.1.0 of the Axeda Compatibility Package differs from previous upgrade procedures, as follows:
1. Before upgrading ThingWorx Platform, export any entities that you have created using the entities in the Axeda Compatibility Extension (ACE) or Remote Access Extension (RAE).
2. After exporting your entities, shut down the ThingWorx Platform instances, and upgrade them to run Oracle JDK 11 or Amazon Corretto Java 11 (Open JDK).
3. Upgrade your ThingWorx Platform instances to version 9.1.x. For instructions on upgrading ThingWorx Platform, refer to the instructions for upgrading in the ThingWorx Platform 9 Help Center.
4. After downloading the Axeda Compatibility Package v.2.1.0 distribution bundle (Downloading the Distribution
Bundle) and extracting it, install the new versions of the extensions on a v.9.1.x ThingWorx Platform. Refer to Upgrading the Extensions.
5. From ThingWorx Composer v.9.1.x, create new security entities for the eMessage Connector, as explained in Create Security Entities in ThingWorx for a Connector and for Remote Access. If you exported the security entities for the Connector when you upgraded ThingWorx Platform, you should verify that they have been imported properly.
6. Upgrade the machine running the eMessage Connector to run Java 11, either Oracle JDK 11 or Amazon Corretto 11 (OpenJDK).
7. Perform a fresh installation of the eMessage Connector, using either or Upgrading from
v.2.0.x to 2.1.0 in a ThingWorx Single-Server Environment or Upgrading from 2.0.x
to 2.1.0 in a ThingWorx High Availability Clustering Environment.
8. From ThingWorx Composer, you must run the permissions services for the eMessage Connector, as explained in Setting Up Permissions and Visibility for the eMessage Connector. The services provided in v.2.1.0 have changed in this release and the eMessage Connector will not work as expected if you do not run the updated permissions services.
Downloading the Distribution Bundle
To download the distribution bundle for your operating system, follow these steps:
2. Select the Product Family, THINGWORX CONNECTION SERVICES.
3. On the download page for the ThingWorx Connection Services Product Family, the releases are numbered by the related release of ThingWorx Platform. To upgrade, expand the Release 9.1 node.
4. Expand the node, ThingWorx Axeda Compatibility Package, and then the node, Most Recent Datecode.
5. Click HTTPS to download the distribution bundle.
6. Extract the downloaded file to an appropriate location.
Upgrading the Extensions
All of the extensions in the ThingWorx Axeda Compatibility Package have been upgraded to be compatible with Java 11. This includes the Axeda Compatibility Extension (ACE), Connection Services Extension (CSE), Remote Access Extension (RAE), ThingWorx Utilities Core Extension, and ThingWorx Utilities Software Content Management (SCM) Extension.
|
|
This release of the Axeda Compatibility Package does not require and therefore does not include a Migrator for the Axeda Compatibility Extension (ACE). If you are running a version prior to v.2.1.0 and require the Migrator, first upgrade to ACP v.1.3.x and run the Migrator for that version. Then upgrade to v.2.1.0. For instructions on upgrading to 1.3.x, refer to Upgrading the eMessage Connector from v.1.2.7 to v.1.3.1/v.1.3.2. For instructions on running the Migrator, refer to Upgrading the Axeda Compatibility Extension (ACE) from Version 2.4.17.
|
To upgrade the extensions provided in the Axeda Compatibility Package, v.2.1.0, involves these steps:
1. Import the new extensions into the ThingWorx Platform. For assistance with this step, refer to Importing the Extensions (CSE, RAE, and ACE).
|
|
When installing ACE, the following error will appear: 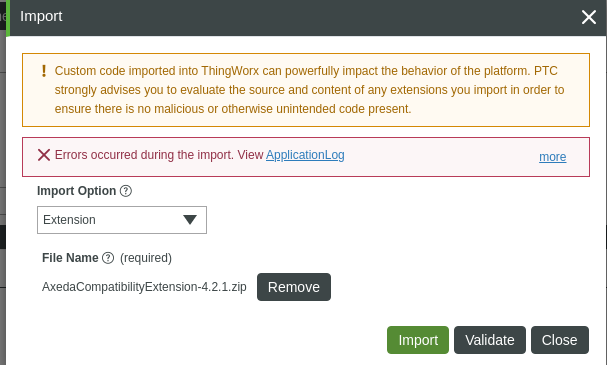 If you click the more link to see the ApplicationLog, the following additional information appears:  You can ignore the error and install the rest of the extensions: • thingworx_utilities_core-9.1.0-78.zip • thingworx_utilities_scm-9.1.0-78.zip |
2. Restart the ThingWorx Platform.
3. Import your entities back into the platform.
4. After the upgrade is complete, you must run the permissions services provided in the eMessageServices Thing. Running these scripts is required to grant runtime permissions to new services provided in this release. For example, the GetThingNameAndIdentifierByModelAndSerial services was updated to call the QueryImplementingThingsWithData service. The eMessage Connector does not have Execute permissions on this service until the upgraded permissions services are run.
Upgrading from v.2.0.x to 2.1.0 in a ThingWorx Single-Server Environment
These are the instructions for upgrading the ThingWorx eMessage Connector from v.2.0.x to v.2.1.0 when the eMessage Connector connects to a ThingWorx Platform single-server environment.
1. If you want to but have not yet upgraded to Java 11, you must do so before attempting to install the 9.1.x version of the eMessage Connector. It is recommended that you perform a fresh installation of Java 11 and then a fresh installation of the Connector. The Oracle Java SE Development Kit 11 is available for download at https://www.oracle.com/java/technologies/javase-jdk11-downloads.html. The Amazon Corretto 11 (OpenJDK 11) is available for download at https://docs.aws.amazon.com/corretto/latest/corretto-11-ug/downloads-list.html.
|
|
Make sure you set the JAVA_HOME environment variable to point to the new JDK installation.
|
2. Navigate to the <emessage_connector_install>/conf directory of the new installation, and make a backup copy of the emessage-ha-sample.conf configuration file. Then open the emessage-ha-sample.conf file in a text editor.
3. If the currently installed eMessage Connector is using an encrypted configuration file and you want to copy settings from it into the new configuration file, decrypt the existing configuration file, following the decrypting instruction in Step 5 of the procedure in Encrypting the Configuration File.
|
|
You can create a new configuration file by following the instructions in to create a new configuration file. Then follow the instructions in Minimal Configuration to Connect to a Single-Server ThingWorx
Platform Using SSL/TLS. Then encrypt the new configuration file.
|
4. To copy settings from the decrypted configuration file, open it in a text editor.
5. If TLS is used for connections between the eMessage Agent devices and the eMessage Connector, convert the JKS keystore to a PKCS#12 keystore, following the instructions in Converting JKS Keystores to PKCS Keystores.
|
|
If you must continue using a JKS keystore, set the cx-server.protocol.ssl.key-store.type property to jks in the configuration file and skip the rest of this step. Using a JKS keystore is discouraged because it is less secure format than PKCS#12.
|
6. In the new configuration file, update the cx-server.protocol.ssl.key-store.file property in the configuration file to point to the PKCS#12 keystore.
7. If the password has changed, update the cx-server.protocol.ssl.key-store.password property in the configuration file.
8. Copy any site-specific settings from your existing emessage-ha-sample.conf file. If you have been using the file transfer capabilities, you must specify the location for file downloads. The following table lists additional settings that you may want to migrate and the help topic that explains them:
|
Settings
|
Help Topic
|
|---|---|
|
Location for file downloads REQUIRED
|
|
|
Location for file uploads REQUIRED
|
|
|
Any additional configuration for file transfers
|
|
|
Property settings for Remote Access
|
|
|
Property settings for metrics reporting
|
Later, after completing the upgrade, check the TokenPropertyAuthenticator on the platform. For instructions on its configuration, refer to Configuring the TokenPropertyAuthenticator (eMessage Connector).
9. Save the configuration file.
10. To encrypt the configuration file again, follow the instructions in Setting Up an Encrypted Configuration File for an eMessage
Connector.
11. If you created a new configuration file, be sure to update the environment variables to point to the location of the new configuration file. For assistance with this step, refer to Setting Environment Variables for an eMessage Connector.
12. After setting the environment variable, refer to Setting Up Permissions and Visibility for the eMessage Connector to set the required permissions and visibility before starting the Connector.
13. Ensure that the extensions provided with the Axeda Compatibility Package, v.2.1.0, have been imported to the ThingWorx Platform. For assistance, refer to Importing the Extensions (CSE, RAE, and ACE) and for SCM functionality to Importing ThingWorx Utilities Core and the SCM Extension
14. Assuming that the Axeda Compatibility Extension (ACE) v.4.2.2 has been imported, log in to ThingWorx Composer on the ThingWorx Platform instance where you imported the extension. You need to verify the TokenPropertyAuthenticator settings on the platform. For instructions, refer to Configuring the TokenPropertyAuthenticator (eMessage Connector). For additional information, refer to
15. If you have not already, shut down the v.2.0.x eMessage Connector.
16. Start the v.2.1.0 eMessage Connector. For assistance, refer to Starting the eMessage Connector and Running a Quick Test.
17. Verify that the eMessage Connector successfully connected to ThingWorx by confirming it appears in the ThingWorx Composer list of Connection Servers. In ThingWorx Composer, click the  icon (Monitoring menu) and then select Connection Servers to display the page.
icon (Monitoring menu) and then select Connection Servers to display the page.18. After the upgrade is complete, you must run the permissions and visibility scripts for the Connector. Refer to Setting Up Permissions and Visibility for the eMessage Connector. Running these scripts is required to grant runtime permissions to new services provided in this release and to re-apply permissions not preserved upon export/import for an upgrade.
19. Run the Smoke Test, as explained in Running the Smoke Test
Upgrading from 2.0.x to 2.1.0 in a ThingWorx High Availability Clustering Environment
These instructions explain how to upgrade the eMessage Connector from version 2.0.x in a ThingWorx single-server environment to version 2.1.0 in a ThingWorx High Availability Clustering environment.
1. If you want to but have not yet upgraded to Java 11, you must do so before attempting to install the 9.1.x version of the eMessage Connector. It is recommended that you perform a fresh installation of Java 11 and then a fresh installation of the Connector. The Oracle Java SE Development Kit 11 is available for download at https://www.oracle.com/java/technologies/javase-jdk11-downloads.html. The Amazon Corretto 11 (OpenJDK 11) is available for download at https://docs.aws.amazon.com/corretto/latest/corretto-11-ug/downloads-list.html.
Make sure you set the JAVA_HOME environment variable to point to the new JDK installation. |
2. Navigate to the conf subdirectory of the new eMessage Connector installation, and make a copy of the emessage-ha-sample.conf file and rename it to emessage-ha-sample.conf. Then open it in a text editor.
3. If the currently installed eMessage Connector is using an encrypted configuration file, decrypt it following the decrypting instruction in Encrypting the Configuration
File, and open the decrypted file in a text editor. You can use it to copy settings into the new configuration file.
4. If TLS is used for HTTP connections between the Axeda Agent devices and the eMessage Connector, convert the JKS keystore to a PKCS#12 keystore, following the instructions in Converting JKS Keystores to PKCS Keystores.
If you must continue using a JKS keystore, set the cx-server.protocol.ssl.key-store.type property to jks in the configuration file and skip the rest of this step. Using a JKS keystore is discouraged because it is less secure format than PKCS#12. |
5. In the new configuration file, update the cx-server.protocol.ssl.key-store.file property in the configuration file to point to the PKCS#12 keystore.
6. If the password has changed, update the cx-server.protocol.ssl.key-store.password property in the configuration file.
7. Set the following properties to enable service discovery:
cx-server {
. . .
platform.transport = "websockets_active_active"
transport.websockets.service-discovery.enabled = true
. . .
}
8. Add the hosts and ports of the ZooKeeper instances to which the eMessage Connector should connect as a comma-separated list of {host}:{port}, as shown in the following example:
cx-server {
discovery {
connectionString = "zookeeper-1:2181,zookeeper-2:2181,zookeeper-3:2181"
}
}
9. If ZooKeeper is configured to use SSL/TLS, enable the eMessage Connector to connect to ZooKeeper securely by following the instructions in the section, "Configuring the Connection Server," in the topic, Configuring SSL/TLS for ZooKeeper in the ThingWorx Platform 9 Help Center. The instructions for the ThingWorx Connection Server apply to the eMessage Connector.
10. If Zookeeper is configured to use Simple Authentication and Security Layer (SASL), enable the SASL support in the eMessage Connector by uncommenting and setting the following properties:
cx-server {
. . .
#transport.websockets.discovery {
# sasl-enabled = true
# sasl-krb5-conf-file = /path/to/kerberos-conf
# sasl-jaas-file = /path/to/jaas-conf
#}
}
For information about configuring SASL for ZooKeeper, refer to ZooKeeper and SASL Client-Server mutual authentication. |
11. The eMessage Connector needs to be configured with the service name used to look up the ThingWorx Platform instances in ZooKeeper and to determine whether to connect securely to the registered ThingWorx Platform instances.
◦ To connect securely with SSL/TLS to the ThingWorx Platform instances, uncomment and set the following properties:
cx-server {
#transport.websockets.service-discovery.tls-enabled = true
#transport.websockets.service-discovery.service-name = "thingworx-https"
}
◦ To connect without SSL/TLS to the ThingWorx Platform instances, uncomment and set the following properties:
cx-server {
# transport.websockets.service-discovery.tls-enabled = false
# transport.websockets.service-discovery.service-name = "thingworx-http"
}
By default the ThingWorx Platform uses the thingworx-http service name when registering its HTTP endpoint information in ZooKeeper and the thingworx-https service name when registering its HTTPS endpoint information. If the ThingWorx Platform is configured to use different service names, be sure to use the correct service name for the eMessage Connector service-discovery.service-name value. |
For best security practices, always use SSL/TLS to connect securely to the ThingWorx Platform instances. |
If SSL/TLS is used to connect securely to the ThingWorx Platform instances and the SSL/TLS certificates presented by the ThingWorx Platform instances do not contain the instance’s IP address that is registered in ZooKeeper, you must disable host name verification by uncommenting and setting the following property to false, as shown here:
cx-server {
. . .
transport.websockets.connections.verifyHostName = false
. . .
}
The IP address of a ThingWorx Platform instance can be set in the instance’s SSL/TLS certificate either in Subject Common Name (CN) field or in the Subject Alternative Name field. The IP address that the ThingWorx Platform registers in ZooKeeper is either the first site-local IP address, if found, or the first non-loopback IP address found on the available network interfaces. |
13. Copy any site-specific settings from your existing emessage-ha-sample.conf file. If you have been using the file transfer capabilities, you must specify the location for file downloads and file uploads. The following table lists additional settings that you may want to migrate and the help topic that explains them:
Settings | Help Topic |
|---|---|
Location for file downloads | |
Location for file uploads | |
Any additional configuration for file transfers | |
Property settings for Remote Access | |
Property settings for metrics reporting |
14. After setting the properties, save and close the configuration file.
15. To encrypt the configuration file again, follow the instructions in Setting Up an Encrypted Configuration File for an eMessage
Connector.
16. If a new configuration file was created, be sure to update the environment variables to point to the new configuration file location. For assistance with this step, refer to .
17. After setting the environment variables, refer to Setting Up Permissions and Visibility for the eMessage Connector to set the required permissions and visibility before starting the Connector.
18. If you have not already, shut down the v.2.0.x eMessage Connector.
19. Ensure that the extensions provided with the Axeda Compatibility Package, v.2.1.0, have been imported to the ThingWorx Platform. For assistance, refer to Importing the Extensions (CSE, RAE, and ACE).
20. When you are upgrading the Axeda Compatibility Extension (ACE), an error will appear. You can ignore it and continue to upgrading the Utilities Core and SCM extensions. However, make sure that after upgrading the extensions you run the permissions services provided in the eMessageServices Thing. Running these scripts is required to grant runtime permissions to new services provided in this release. For example, the GetThingNameAndIdentifierByModelAndSerial services was updated to call the QueryImplementingThingsWithData service. The eMessage Connector does not have Execute permissions on this service until the upgraded permissions services are run.
21. Assuming that the Axeda Compatibility Extension (ACE) v.4.2.2 has been imported and that you have run the permissions scripts for the eMessage Connector, log in to ThingWorx Composer on the ThingWorx Platform instance where you upgraded the extensions. You need to verify the TokenPropertyAuthenticator settings on the platform. For instructions, refer to Configuring the TokenPropertyAuthenticator (eMessage Connector).
22. Start the v.2.1.0 eMessage Connector. For assistance, refer to Starting the eMessage Connector and Running a Quick Test.
23. Verify that the eMessage Connector successfully connected to ThingWorx by confirming it appears in the ThingWorx Composer list of Connection Servers. In ThingWorx Composer, click the  icon (Monitoring menu) and then select Connection Servers to display the page.
icon (Monitoring menu) and then select Connection Servers to display the page.24. After the upgrade is complete, you must run the permissions and visibility scripts for the Connector. Refer to Setting Up Permissions and Visibility for the eMessage Connector. Running these scripts is required to grant runtime permissions to new services provided in this release and to re-apply permissions not preserved upon export/import for an upgrade.
25. Run the Smoke Test, as explained in Running the Smoke Test