Task 1. Generate a Protrusion from a 2D Sketch
-
Start Pro/ENGINEER Wildfire 4.0 Schools Edition if necessary.
-
If Pro/ENGINEER is already running, close all windows then remove all objects from session using File > Erase > Not Displayed...
-
File > Set Working Directory... , browse to \HANDS-ON_WF4\02-PART_MODELING
-
Select the New
 icon on the main toolbar at the top left of the screen. The New object dialog opens.
 -
Accept the default settings in this dialog and select OK.

Default templates are used when a new part or assembly is created. The default templates are an initial design model that contains default features, layers, views, parameters and units.
-
Select the Sketch Tool
 icon on the right toolbar to create a sketch.

The Sketch Tool allows the user to define a shape using 2-D entities that can be used later to create a sketched feature
-
The Sketch dialog opens, and in the message area located at the bottom left of the screen, you are prompted to select a plane or surface to define sketch plane.
-
Select the datum plane named TOP as the sketch plane, then select Sketch from the Sketch dialog in the upper right corner of the screen. This opens the sketch tool.
-
Select the Create Rectangle
 tool from the sketch toolbar on the right of the screen.
 -
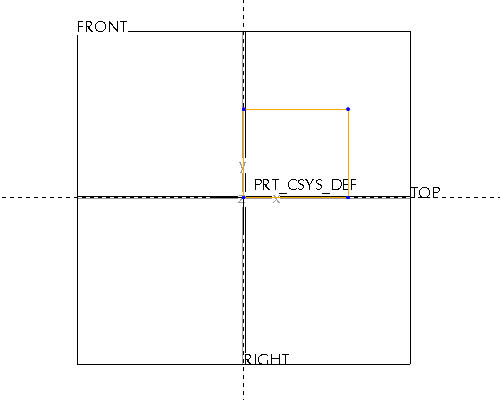
Left select once at that center of the intersecting datum planes to begin sketching a rectangle. Move the cursor diagonally up and right and then left select once again to complete the rectangle as shown below.

-
Select the Select Item
 tool.
tool.

The system automatically creates default dimensions to define the shape. These "weak" dimensions can be strengthened to establish design intent so that the model can be modified with predictable results.
-
Double click the horizontal dimension and modify the value to 30.
-
Double click the vertical dimension and modify the value to 20.
-
Select the Sketch Complete
 icon to complete the sketch.
 -
Press CTRL+D on the keyboard to return to the default orientation of the model.
-
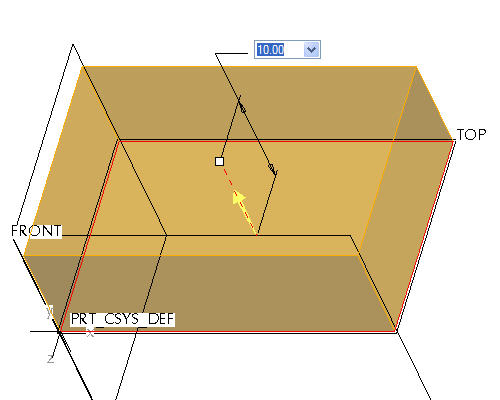
With the sketch still highlighted, select the Extrude
 tool to begin extruding the sketch that was just completed.

An extruded feature is a sketched feature that extrudes a sketch perpendicular to a sketching plane to create a protrusion, cut or surface.
-
Double click the extruded depth value on the screen and modify it to 10.

-
Select Complete Feature
 from the dashboard in the lower right hand corner of the screen.
