New CAD Document
The New CAD Document command is available either from SOLIDWORKS or from the Workspace File menu. This command offers an alternative to the native > command in SOLIDWORKS. It allows you to specify attributes according to Windchill rules, such as entering attributes according to the list of values. (In some cases, attributes can be used to drive auto-numbering using Object Initialization Rules (OIRs); in addition, some attributes are "required" or have other Windchill constraints which require Windchill access.)
To create a new CAD document:
1. In SOLIDWORKS, select > . Alternatively, select > > from the Workspace Actions menu. The New CAD Document window opens.
2. Select a value in the
Context box. You can also click

to search for the context name.
3. Select values in the Authoring Application, Category, Type, and Template Name boxes. Based on the selected template, the Attributes section in the New CAD Document window opens.
| The Windchill Workgroup Manager out-of-the-box templates are provided as samples. However, it is recommended to create your own templates. (For more information on creating templates, see Creating a CAD Document Template.) If you use an out-of-the-box template, you may receive the warning, “The file format was created in a previous version, and will be updated.” To suppress this warning, you can either use SOLIDWORKS functionality to correct the file version, or update the template to match the current CAD version. |
| In the Template Name box, you can select a template and click Default to set a default template. |
4. Specify values for the various attributes like Name, File Name, Revision, Description, and Location.
5. Select the Create and Associate Part check box to create an associated part with the new CAD document.
| We recommend that you associate a part with a CAD document during object creation, and not when you create a structure. |
6. Select the Open in Authoring Application check box to open the new CAD document in SOLIDWORKS.
7. Click OK to complete the task. A CAD document is created in the active Workspace.
Using custom templates in SolidWorks
The Windchill File System allows you to store custom templates created in SOLIDWORKS in any Windchill Commonspace folder. You can later use these templates to create the supported file types (for example, part, assembly, or drawing) in SOLIDWORKS.
To use a custom template, follow these steps:
1. Create a custom template and store it in a Windchill library in a folder.
| • You can customize an existing template. • To store the custom templates in Windchill Commonspace folder use either the Save to Workspace or Import to Workspace. |
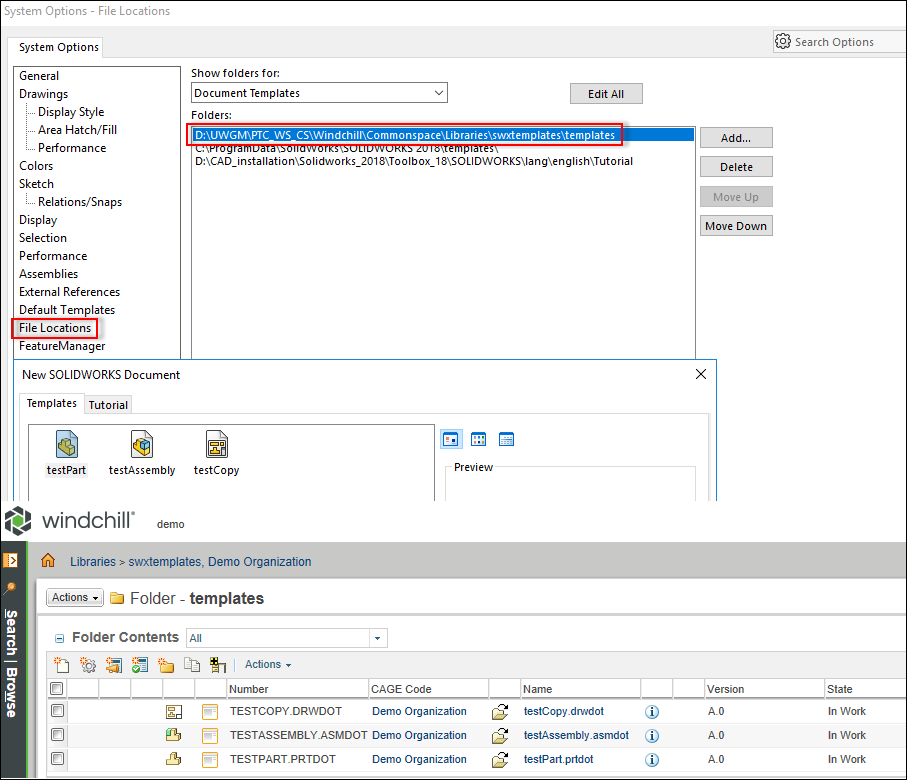
2. In SOLIDWORKS, click > . The System Options window opens.
3. Select File Locations.
4. In the Show folders for box, select Document Templates.
5. Click Add and in the Windchill file system, browse to the library path in the Commonspace folder. This is where the custom templates are checked in.
6. Select New SOLIDWORKS Document. The custom templates that are stored in Windchill appear.
7. See the example that follows:
8. You can create new CAD files using the custom templates that are stored in Windchill.