Mapping SolidWorks Toolbox Properties to Windchill Global Attributes
This section outlines the steps needed to set up mapping of SOLIDWORKS Toolbox properties to Windchill global attributes.
Background
• Windchill is designed to work with the SOLIDWORKS Toolbox Create Parts option, where each Toolbox part is created as an individual file (rather than as configurations within a single file). Even though parts are created as individual part files, the properties of Toolbox parts are still created as configuration specific, rather than custom properties, which apply to the whole document/file.
• Windchill does not map configuration-specific properties to the Windchill CAD Document representing the document/file because in the general use case for normal parts and assemblies, there can be multiple configurations in a single file, in which case it is not possible to determine which configuration, if any, should have its properties propagated to the Windchill CAD Document that represents the whole file. In cases where configurations represent actual parts, Windchill allows users to expose the configurations as CAD Documents via the Family Table mechanism, and the configuration-specific attributes are populated to the relevant CAD Document representing that specific configuration.
• For Toolbox parts using the Create Parts option, there is only one configuration in a given part file, and therefore the properties on the configuration do apply to the whole document. There is no point in exposing the configuration as a Family Table instance, since this would create two CAD Documents for the same business object.
• The solution is to create a custom property that is linked to the configuration-specific property. These Custom properties on Toolbox parts will be mapped to Windchill in the same way as custom properties on any other SOLIDWORKS part/assembly/drawing.
Setting Up Windchill and SolidWorks Toolbox to Map Toolbox Attributes to Windchill
The following steps outline how to setup SOLIDWORKS and Windchill so that SOLIDWORKS Toolbox properties are mapped to Windchill global attributes. The example in the steps below will use the Toolbox property Material, that needs to be mapped to a Windchill global attribute called Material.
|
|
Set up the SOLIDWORKS Toolbox to use the Create Parts option, and configure Windchill preference to specify a Windchill location for SOLIDWORKS Toolbox library parts. See SolidWorks Toolbox Setup with Windchill for instructions. |
Creating SolidWorks Toolbox Properties in the Normal Way Using Toolbox Configuration
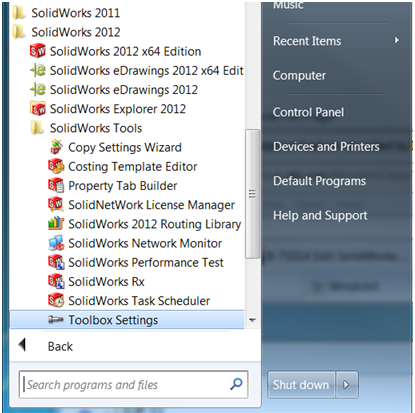
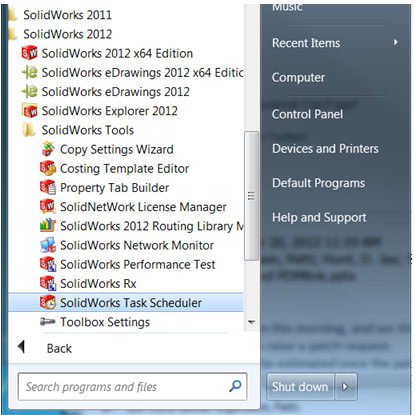
1. From the Windows Start menu, navigate to > > , or select > from within SOLIDWORKS.
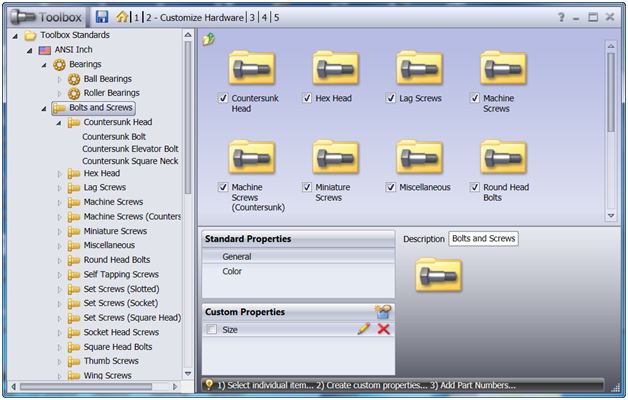
2. Select the level you want to apply the attribute to and select Add New Custom Property.
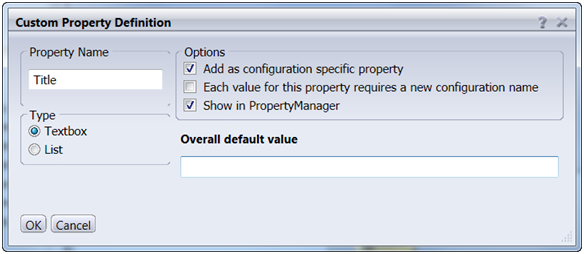
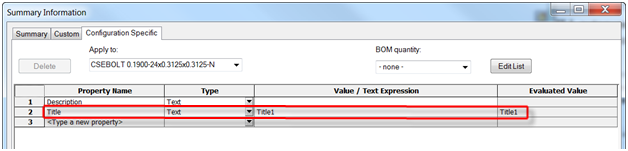
3. Define the Property Name and Options (in this example, it is assumed that different values are applied to each Toolbox part rather than a constant value to all parts), and select the Add as configuration specific property and Show in property manager options. Select OK when you are finished.
4. Apply the property to the tree selection.
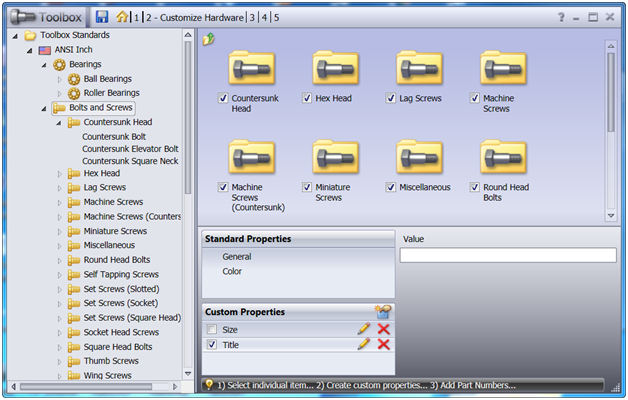
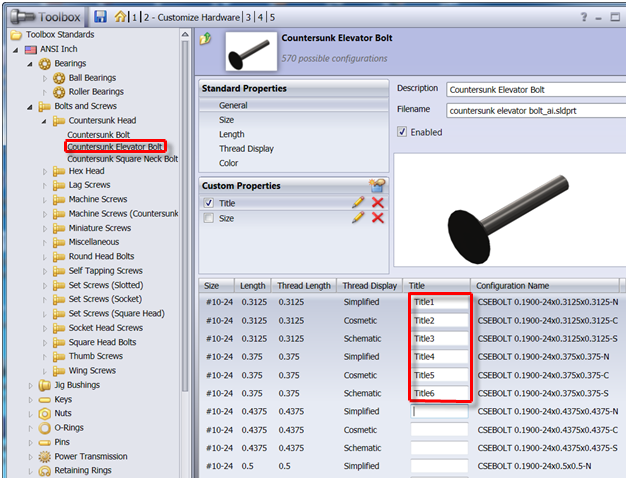
5. To set the individual properties for each different part configuration, select the part category in the Toolbox Standards Tree and enter different values in the fields provided.
6. Save your changes and close the Toolbox configuration window.
Create Custom Properties that Link to Configuration Properties
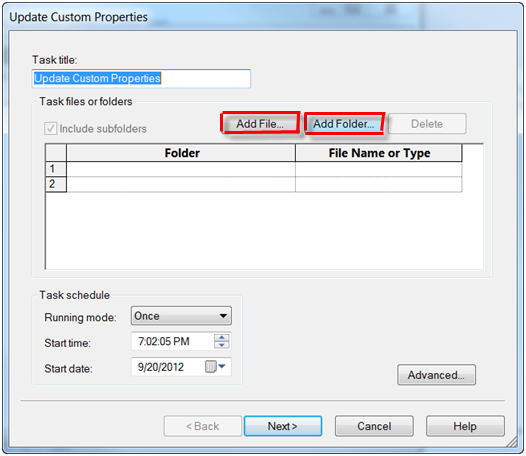
1. Launch the SolidWorks Task Scheduler.
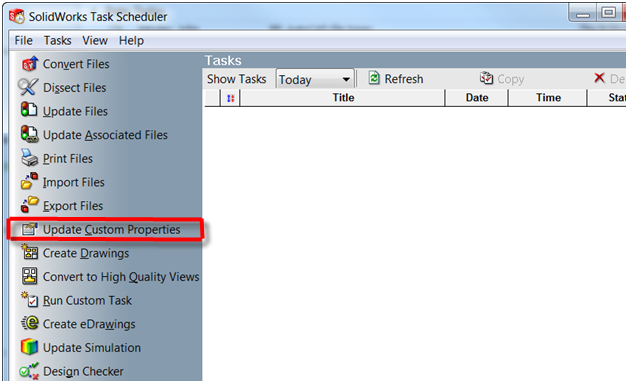
2. Select Update Custom Properties.
3. Select Add Folder or Add File depending on how widely you want to apply the property.
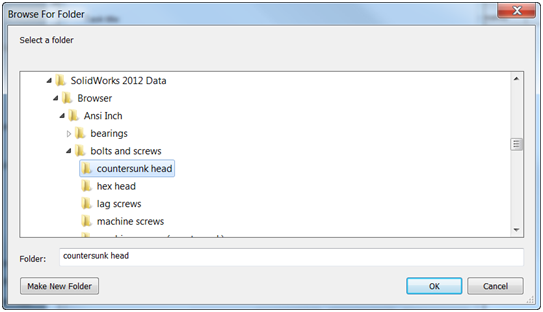
4. Select the Folder or File (s) you want to apply the property to and click OK.
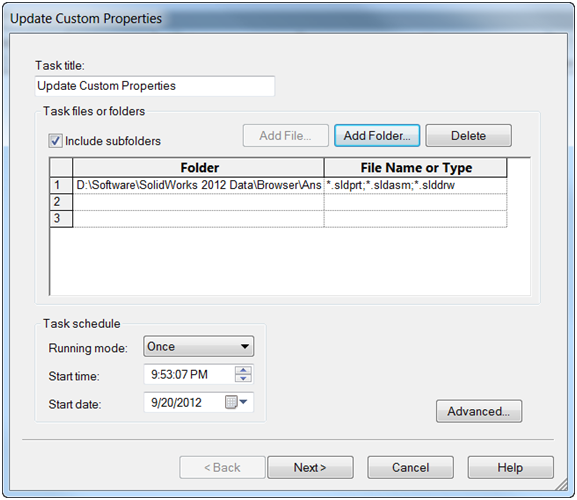
5. Specify options for the task (such as when you want it to run), or include subfolders. If you want the task to run now simply accept the defaults. Select Next.
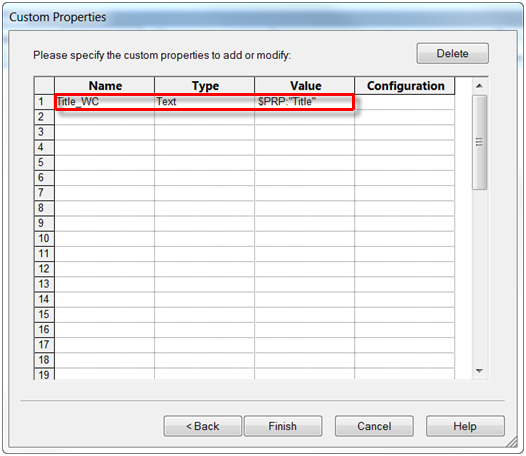
6. Specify the list of Custom Properties you want to create and link to the Configuration Specific properties.
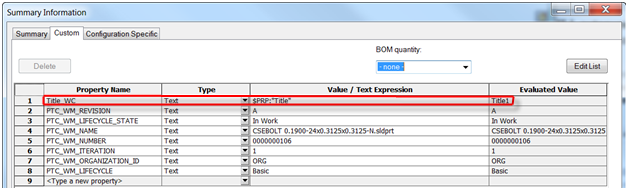
◦ Name — The name(s) of the attributes you want to add as custom properties. PTC recommends that you name these attributes the same as the Configuration Specific (with the _WC suffix) to indicate that these are the attributes that will be mapped to Windchill.
◦ Type — Text
◦ Value — The expression that links the custom property to the Configuration Specific property, $PRP:”config specific attribute name”.
7. Click Finish. The task will run and complete.
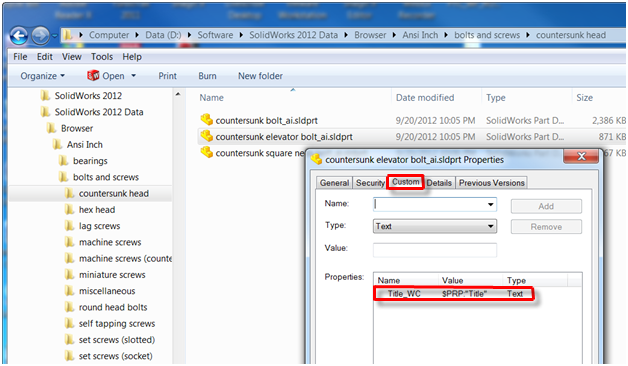
8. Once completed, right-click on the folder and select > to see that the custom properties have been added to the base Toolbox parts.
Create Global Attributes in Windchill and Map to SolidWorks Custom Properties
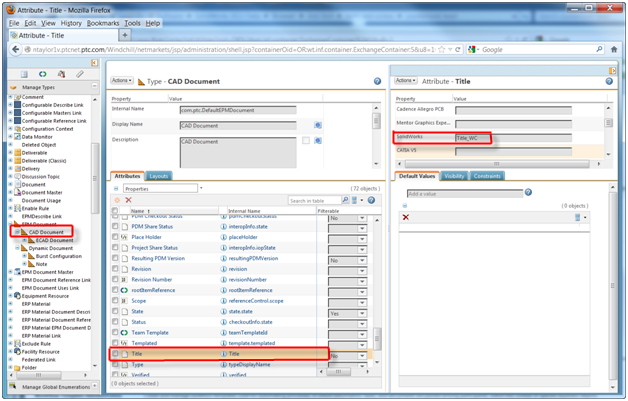
1. Create Global Attributes in Windchill corresponding to the properties you want to map from SOLIDWORKS Toolbox parts.
2. Add Attribute to the CAD Document type and specify the name of the SOLIDWORKS Custom Property you want to populate the Windchill Global Attribute (in this example, “Title_WC”.).
Verification - Drag and Drop Toolbox Part Into Assembly
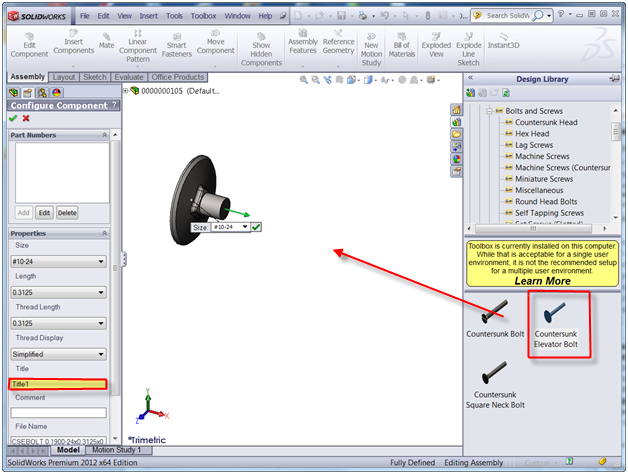
1. Start SOLIDWORKS linked to Windchill Workgroup Manager, and drag-and-drop a Toolbox part into an assembly.
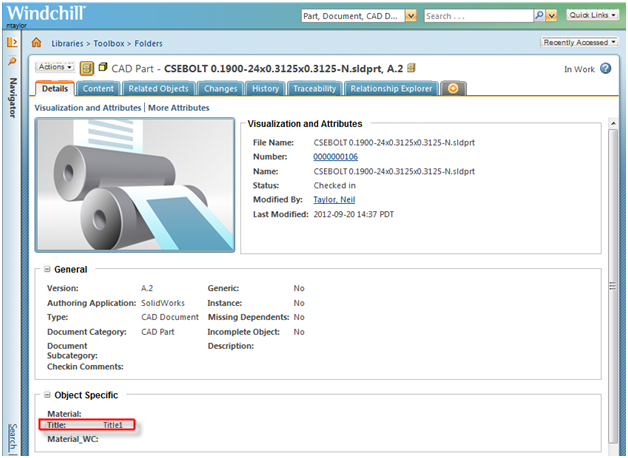
2. The Toolbox part will be automatically checked in to Windchill, and the custom attribute will be populated to the Windchill attribute.
3. When you open the Toolbox part in SOLIDWORKS, you will see the configuration-specific attribute has been linked to the custom property.
4. Mapping of SOLIDWORKS Toolbox properties to Windchill is now complete.