Sample CAD-driven Methodology Flow
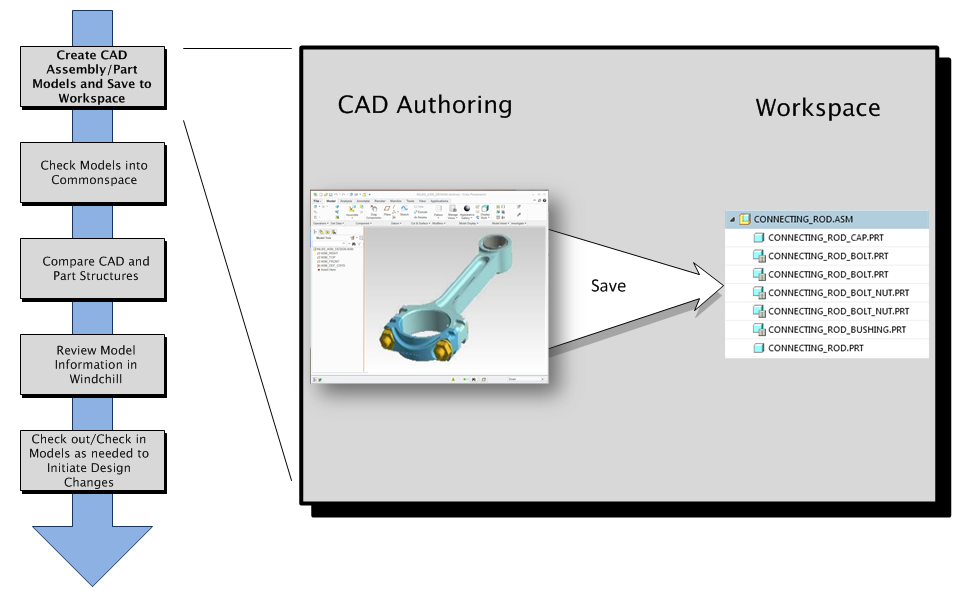
Step 1 — Create CAD Assembly and Component Part Models
You begin the CAD-driven flow in your authoring application by creating CAD assembly and component part models and saving them to your workspace.
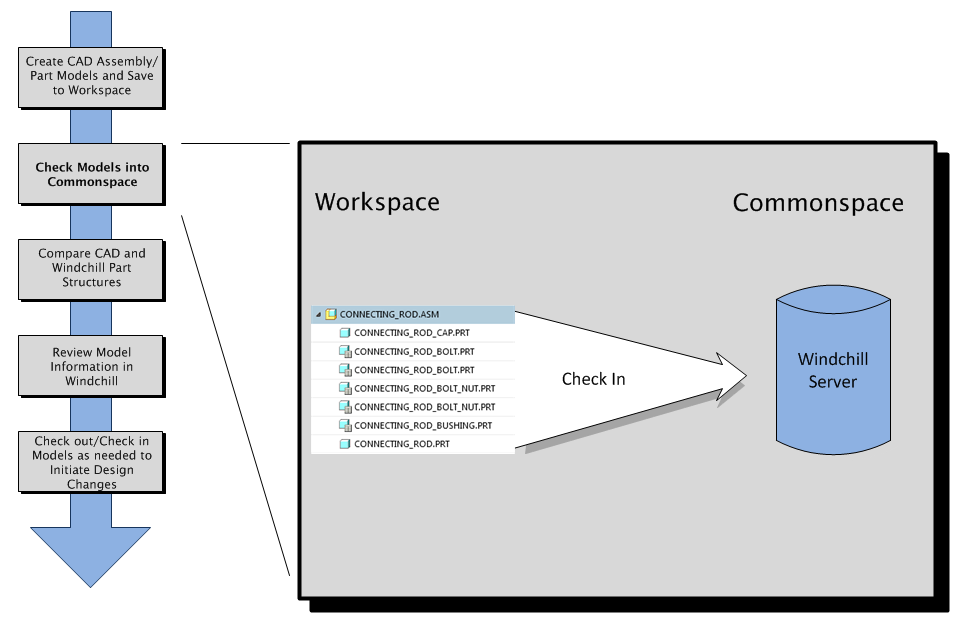
Step 2 — Check the CAD Models into Windchill
From the workspace, you check your CAD structures into the Windchill commonspace with the auto associate option enabled to build analogous enterprise product structures composed of Windchill parts. Once in the commonspace, your CAD data is available to other Windchill users across the enterprise that have permission to access it.
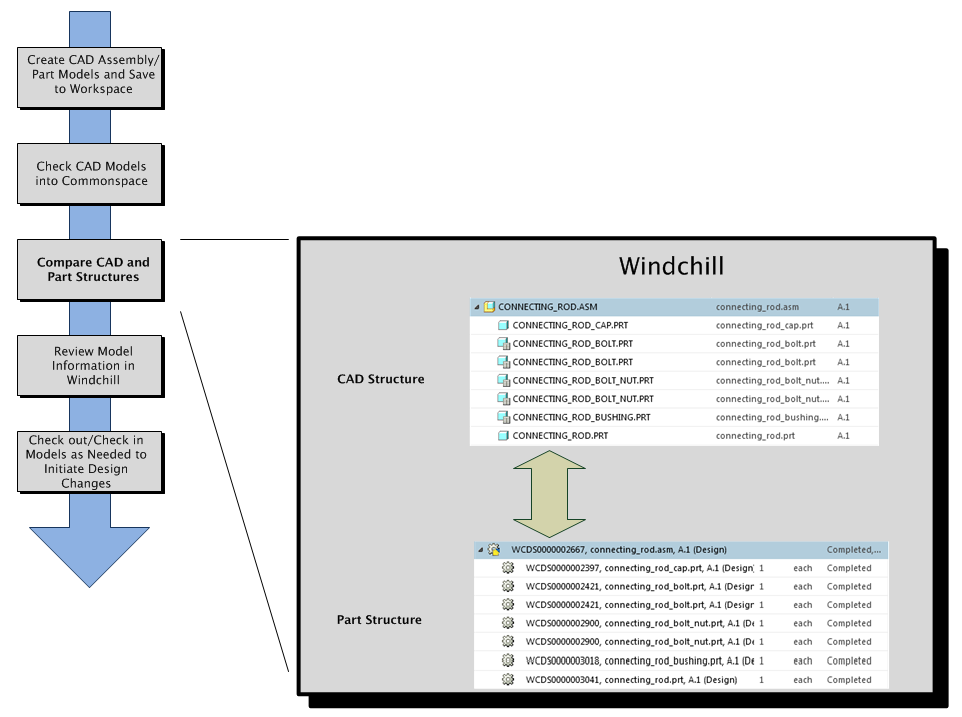
Step 3 — Compare CAD and Part Structures
From Windchill, you can compare the CAD and part structures to check for and resolve differences.
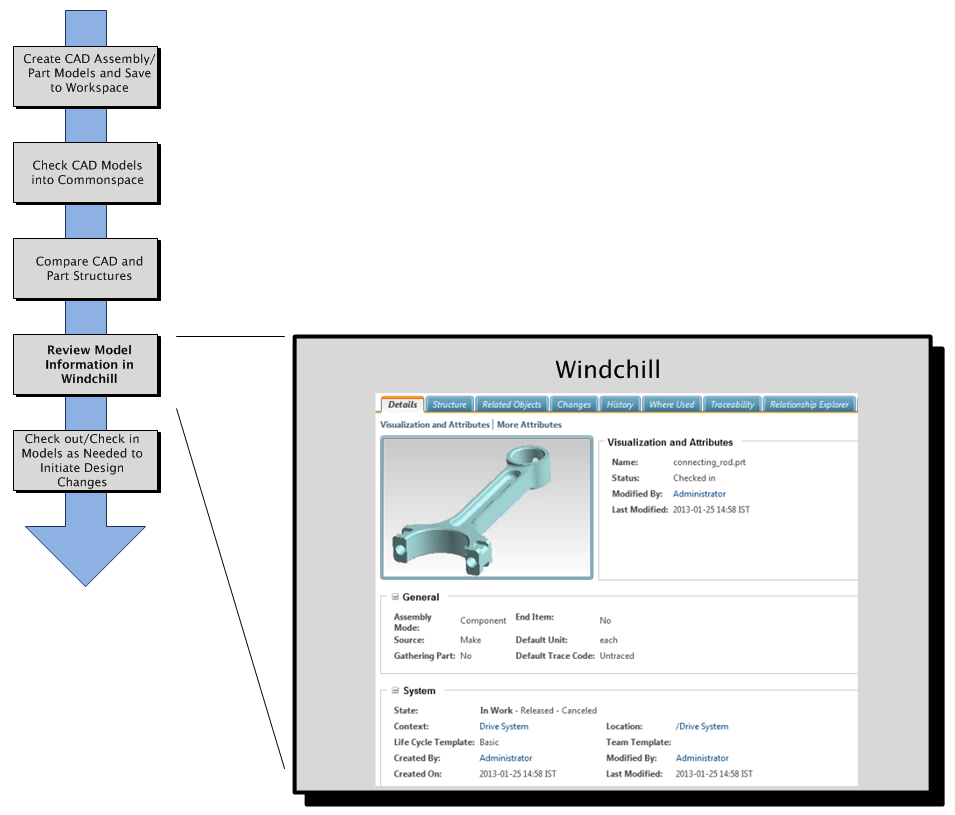
Step 4 — Review Model Information in Windchill
From Windchill, you can filter the CAD structure, preview the structure using a lightweight viewer, and review model information.
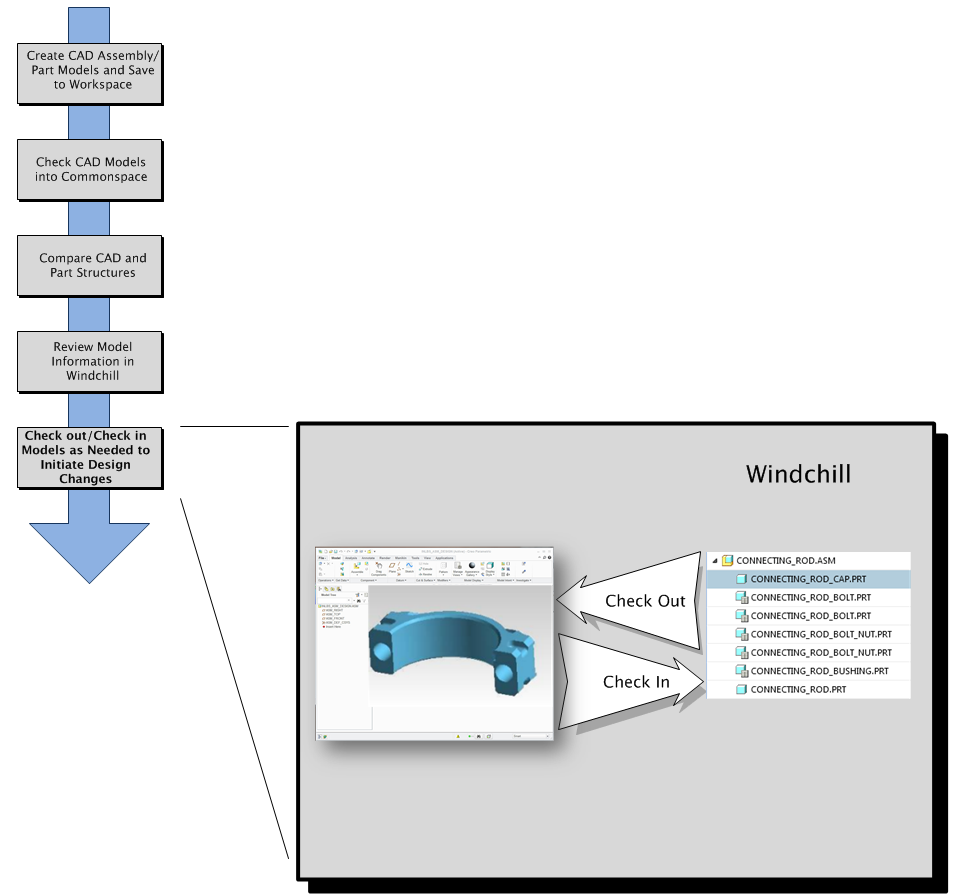
Step 5 — Check out/Check In Models as Needed to Initiate Design Changes
From your authoring application or workspace, you can check models out of Windchill, open them in your authoring application, make design changes, and check the models back into Windchill to update your CAD document structure and optionally your Windchill product structure.