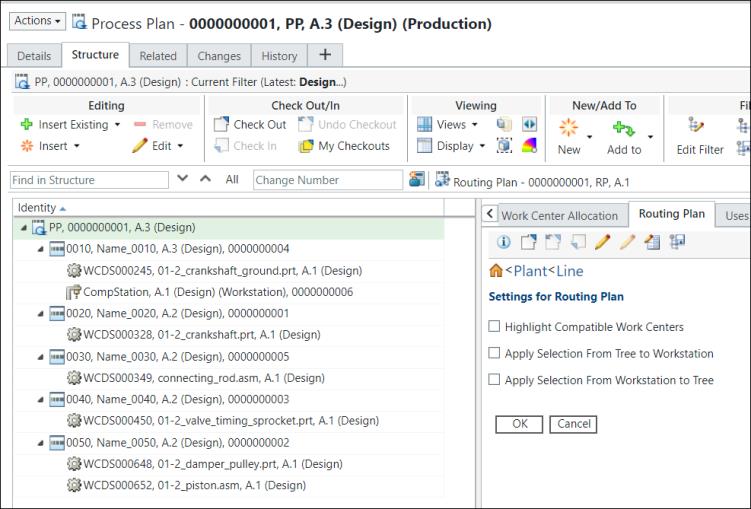
Routing Plan Information Page
The routing plan information page displays information related to the routing plan. You can access the information page of a routing plan by clicking the information icon  .
.

From the information page, you can perform actions on a routing plan, view the object attributes and any related information.
For an overview of the information page, see About Information Pages and Customizing Information Page Tabs. You can customize the layout and add new attributes according to your business requirement. For more information about attribute layout, see Layouts Tab and Editing Attribute Layouts.
Actions
Information pages contain a list of applicable actions in a menu to the left of the object identification line. For more information about a list of common actions available in Windchill, see Common Actions.

The availability of these actions depends on the status of the routing plan, as well as on your access to it. For example,
• If an object is checked-out, the Check Out action is not available, but Check In and Undo Check Out appear in the actions list.
• You may not have access to the Revise action.
The following actions may be of particular interest for this object:
Action | Description | ||
|---|---|---|---|
Check In | Opens the Check In window. | ||
Check Out | Opens the Check Out and Add to Workspace window. | ||
Check Out and Edit | Select Check Out and Edit to modify the value of one or more of the following attributes: • Description • Plant For more information, see Editing a Routing Plan. If defined, the custom attributes can also be edited. | ||
Undo Check Out | Opens the Undo Check Out window. | ||
Edit | Opens the Edit window. | ||
Revise | Opens the New Revision window. | ||
New | Helps you to create new entities.  | ||
Move | Opens the Move window where you can specify a new location for the object. | ||
Reassign Life Cycles | Opens the Reassign Life Cycle window where you can reassign a life cycle or set a starting life cycle state for an object. | ||
Set State | Opens the Set State window where you can set a life cycle state. | ||
Delete | Opens the Delete window where you can delete the object from the database. | ||
Display Related Manufacturing Objects | Opens the Display Related Manufacturing Objects report, providing access to the Object List table. The Object List table allows you to view, collect, and associate additional related objects to the given object. | ||
Associate Distribution Targets | Opens the Find Distribution Targets window where you can search for and select the distribution targets that are to be used when publishing an object to an ERP system. | ||
Send To Distribution Target | Opens the Send To Distribution Target window where you can publish the object to an associated distribution target.
| ||
Subscribe | Opens the Subscribe window where you can request notice of events that affect the object. | ||
Edit Access Control | Opens the Edit Access Control window where you can set ad hoc access permissions. |
For more information about status indicators, see Object Status.
Tabs
The following tabs are viewable on the routing plan information page. You can customize the tabs that appear on each object information page to display the information most useful to you. For more information, see Customizing Information Page Tabs.
Administrators may have modified the tabs that are viewable to you. |
Tab | Description |
|---|---|
Details | Contains some basic information about the routing plan. Typically, the Details tab lists system attributes. See Object Attributes for a list of common attributes available in Windchill. |
Related Objects | Displays tables that list other objects that the current routing plan is related to. For more information, see Related Objects Information Tables and Using the Related Objects Tab. |
Changes | Displays the Associated Changes table that provides information regarding any change processes in which the routing plan is involved. |
History | Displays the Version History, Rename History, and Save-As History for the routing plan. |
To view and use the Effectivity table, you must customize a tab. Select > > on the information page of the object. For more information, see Effectivity Table.