Tagging the Related Assemblies in the Process Plan Browser
You can use the  Assign Part Tags action to assign a part tag to an object. The system uses the part tags to filter a process plan structure when multiple parts or assemblies are related to a process plan. Once a part tag is assigned, you can use a filter to display only those objects that match the tag. You can assign part tags to the following objects:
Assign Part Tags action to assign a part tag to an object. The system uses the part tags to filter a process plan structure when multiple parts or assemblies are related to a process plan. Once a part tag is assigned, you can use a filter to display only those objects that match the tag. You can assign part tags to the following objects:• Operations
• Documents
• Resources
Business Use Case
You can use a single process plan to allocate the child parts from multiple assemblies. A single process plan can cater to all the needs of the related assemblies. In order to view the allocated child parts from the same assembly, you can use the part tags filter functionality in MPMLink. You can assign the part tag to the operation, resources, or to documents. Then you can do the filtering and check the work instructions or the assembly context.
Using the Assign Part Tags Action
Consider the following points related to the part tags functionality in the Process Plan Browser:
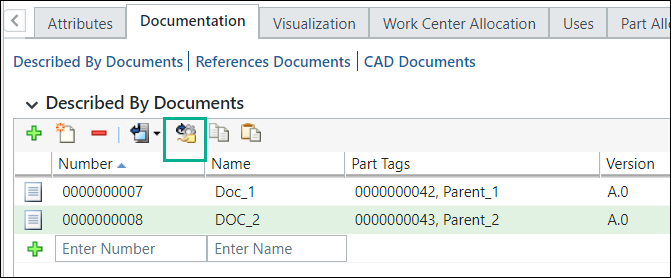
• The Assign Part Tags action is available on the toolbars of the Uses, Processing Resources, and Documentation tabs of the Process Plan Browser:
Assign Part Tags action is available on the toolbars of the Uses, Processing Resources, and Documentation tabs of the Process Plan Browser:• The Assign Part Tags dialog box opens when you select an object and launch the Assign Part Tags action. This dialog displays the part master information.
Assign Part Tags action. This dialog displays the part master information.• You can add the Part Tags column in the process plan tree structure. This column displays information about the assigned part tags. You can also assign multiple part tags to an object. The Part Tags column displays the multiple part tags separated by a semicolon. You can also add the Part Tags column in the three tabs mentioned above. OOTB, the Part Tags column is not available. You must add the column. For more information, refer Customizing Table Views and Creating and Editing New Table View.
Launch Points of Assign Part Tags Action
The Assign Part Tags action is available on the toolbars of the following tabs of the Process Plan Browser:
Assign Part Tags action is available on the toolbars of the following tabs of the Process Plan Browser:• Uses — Use the Assign Part Tags action in this tab to assign part tags to operations.

• Processing Resources — Use the Assign Part Tags action in this tab to assign part tags to resources such as tools, skill, and so on.

• Documentation — Use the Assign Part Tags action in this tab to assign part tags to documents such as referenced by, described by and so on.
• For operations, you can also use the drag and drop functionality to assign part tags. You can drag the related assembly from the tree picker and drop it directly on the operation. The drag and drop functionality to assign part tags is not available for resources and documents.
About the Assign Part Tags Dialog Box
The Assign Part Tags dialog box opens when you select an object and launch the Assign Part Tags action. Consider that the following structure is present in the Process Plan Browser:
Assign Part Tags action. Consider that the following structure is present in the Process Plan Browser: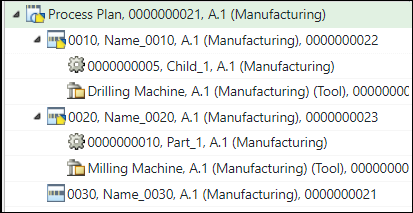
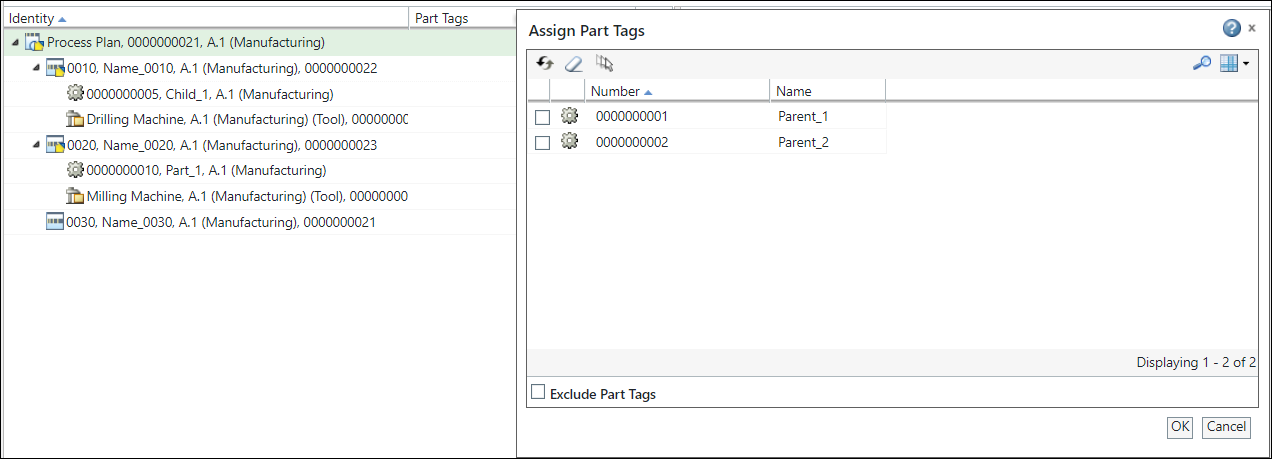
1. Select an operation 0010.
2. Select the Uses tab.
3. Click the Assign Part Tags action present on the Uses tab toolbar.
Assign Part Tags action present on the Uses tab toolbar.4. The Assign Part Tags dialog box opens. In this case, the image displays two different master entities as the part tags. That is, Parent_1 and Parent_2.
5. Select the part tags based on your business requirements.

6. Click OK to close the Assign Part Tags dialog box. The information in the Uses tab is updated.
Similarly, you can assign part tags to other valid entities.
After you assign the part tag to an entity, the system checks out the parent entity. For example, if you assign the part tag to an operation, the system checks out the process plan. If you assign the part tag to a sub-operation, the system checks out the parent operation. |
The information in the Uses is updated. 
Filtering the Related Assemblies Based on Applied Part Tags
The Part Tag Filter tab present in the Edit Filter dialog box displays the branch information.
Consider that the following structure is present in the Process Plan Browser:

The part tags are applied to the various entities in the process plan.
1. Select the process plan.
2. Click  Edit Filter action available in the Filter section of the Structure tab toolbar to open the Edit Filter dialog box. You can view the Part Tag Filter tab in the Edit Filter dialog box.
Edit Filter action available in the Filter section of the Structure tab toolbar to open the Edit Filter dialog box. You can view the Part Tag Filter tab in the Edit Filter dialog box.3. Select the Part Tag Filter tab. It displays the branch information.
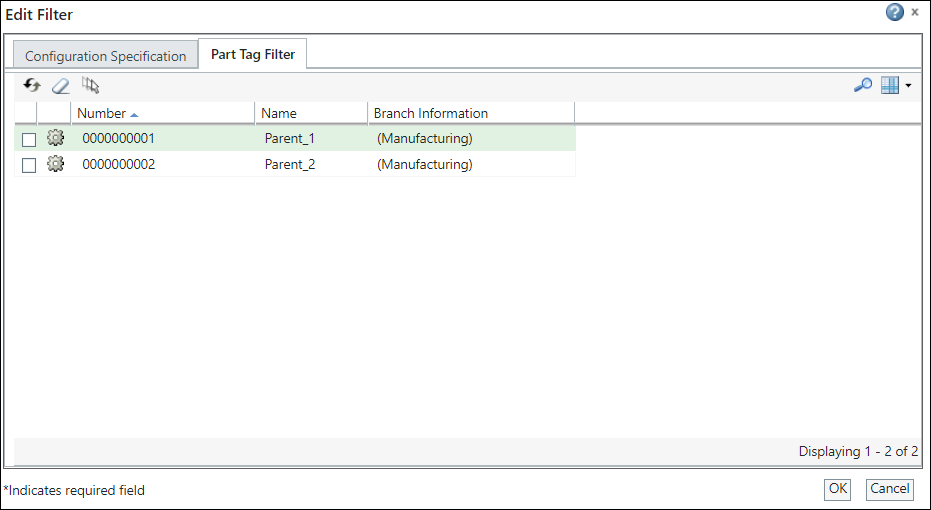
4. Select the part tags based on your business requirements. In this case, 000000001 is selected.
5. Click OK to close the Edit Filter dialog box.. The process plan tree structure is updated based on the applied filters.

6. Optionally, you can also use the Generate Work Instructions action in the Process Plan Browser to generate a work instruction.
The system displays the various entities in the work instruction according to the applied part tags. For more information, see Generating a Work Instruction.
Relating Alternate BOMs to a Process Plan
Alternate BOMs provide a different way to produce a product. They include a list of all parts and their quantities required to build the product or assembly using the same manufacturing part number as an existing BOM. For more information, see Creating Alternate BOMs. You can relate alternate BOMs to a process plan. You can view the records of the related alternate BOMs in the Related tab of the Process Plan Browser.
For more information, see Use Cases: Tagging Alternate BOMs to Operations.
Key Points
• If you have applied any part tags, the report generated using the Generate Inconsistency Report action displays the reports according to the applied part tags.
• The system displays the part allocation status according to the applied part tags. For more information, see Allocating Parts.
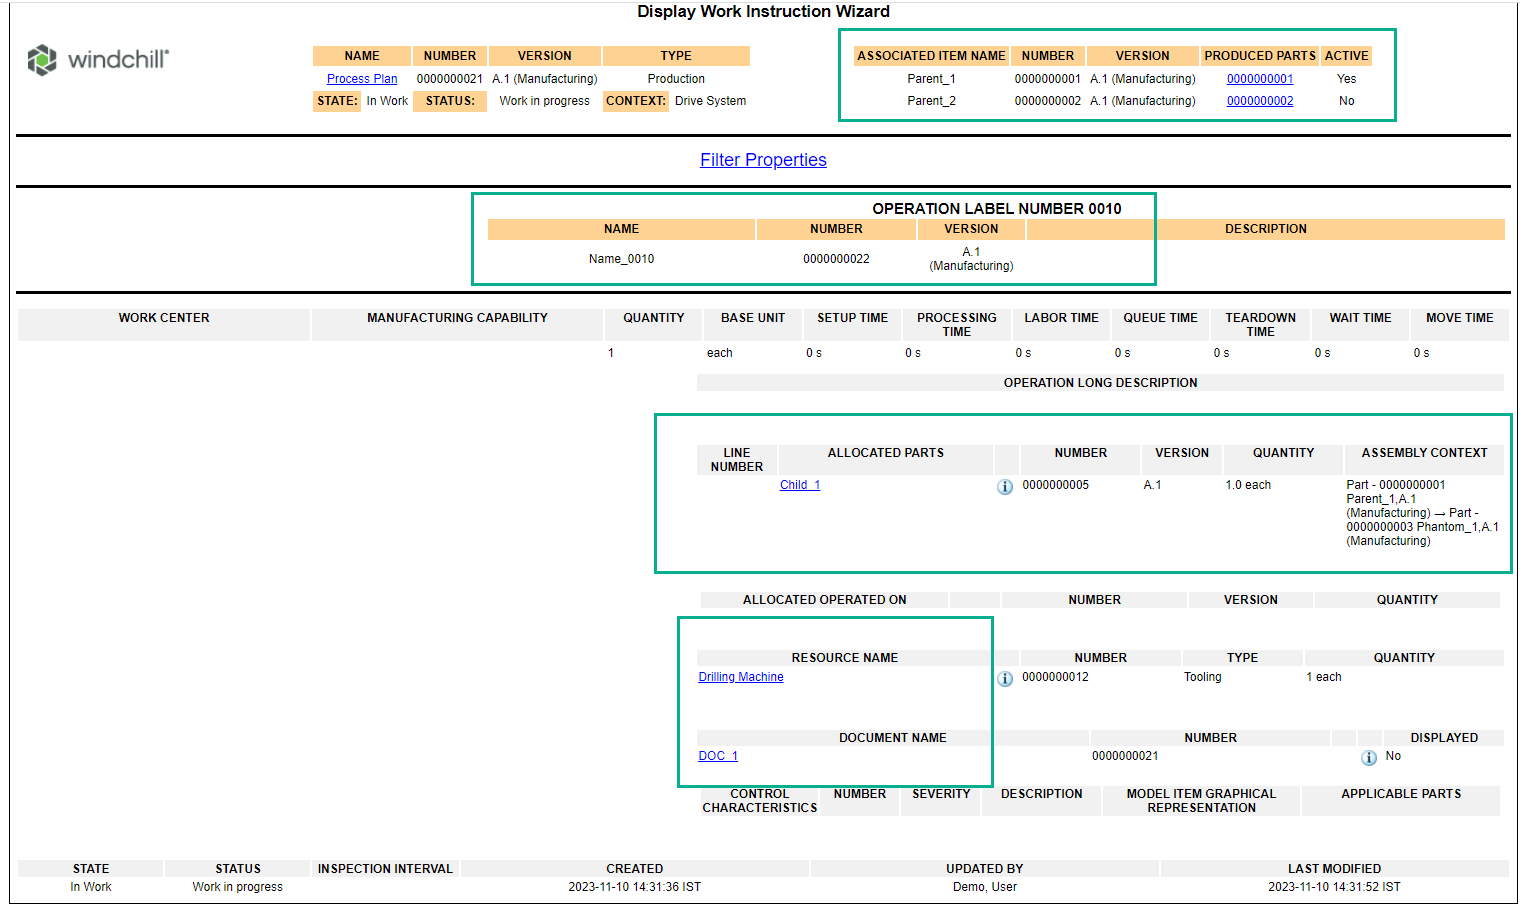
The Assembly Context column in the Part Allocation tab of the Process Plan Browser displays complete path for allocated parts. The system uses an arrow (->) to separate multiple path entities. Refer the following image: 
The path starts form the related assembly root node and ends at the immediate assembly of the allocated part.
• When you use the Save As action in the Process Plan Browser, the part tag information is also copied over. For more information, see Duplicating a Process Plan Using Save As Action.
• You can use the Generate Work Instructions action in the Process Plan Browser to generate a work instruction. One or more assemblies can be related to a process plan. If you apply one or more part tags and generate a work instruction from the Process Plan Browser, the work instruction is generated directly. In this case, you are not required to pick the related assembly. The system displays the various entities in the work instruction according to the applied part tags. For more information, see Generating a Work Instruction.
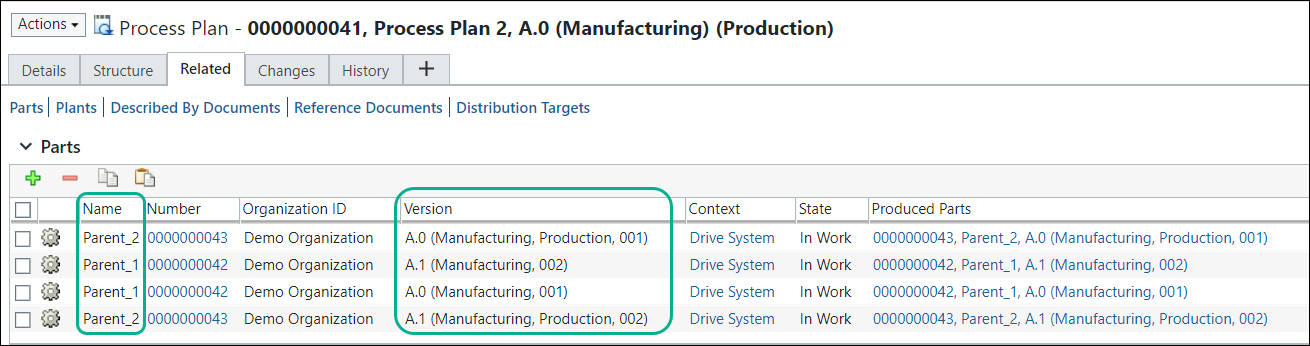
• You associate multiple versions of the same branch or master to the process plan. After associating, you can launch the Assign Part Tags action. In this case, the system displays only the master information for the related assemblies. However, the Part Tag Filter tab present in the Edit Filter dialog box displays the branches information for the related assemblies.