Creating Azure Resources for On-prem Environment
This topic is intended for the Windchill on-prem System Administrator.
Overview
The Windchill AI Assistant plugin requires several Microsoft Azure services to deliver AI‑powered capabilities in an on‑premises environment.
The plugin uses the following Azure services:
• Azure AI Search—Indexes and searches documents
• Azure AI Foundry—Provides chat completion and document vectorization
• Azure Storage—Temporarily stores ingested documents
• Azure Monitor—Collects audit logs and monitoring metrics
• Microsoft Entra ID—Manages service principals and role-based access control (RBAC)
• Azure Networking—Provides network connectivity for virtual network deployments (optional)
You deploy all required Azure services using infrastructure as code (IaC) with Azure Resource Manager (ARM) templates.
The plugin authenticates to Azure AI Search, Azure AI Foundry, and Azure Storage by using Microsoft Entra ID service principals. Access is controlled through RBAC.
You can deploy Azure AI Search, Azure AI Foundry, and Azure Storage using one of the following options:
• Public endpoints—Protected by IP-based firewall rules to restrict access to approved client IP ranges
• Private endpoints—Deployed within a virtual network with no public internet access
The deployment owner is responsible for reviewing and configuring network access to meet the organization’s security and compliance requirements.
Prerequisites
Before you deploy Azure resources for the Windchill AI Assistant plugin, ensure that the following prerequisites are met:
• Install Python 3.10.0 or later on the deployment system.
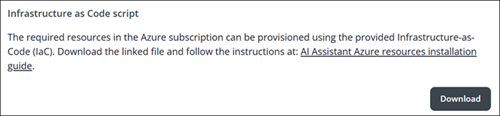
• Download the AI_Assistant_Plugin_Azure_IaC.zip file.
Follow these steps to download the Infrastructure as Code (IaC) script:
a. In Plugin Manager, right‑click Windchill AI Assistant and select Configure Plugin.
The Windchill AI Assistant Configuration window opens.
b. In the Infrastructure as Code script section, click Download.
 | Use the Azure resources created with this procedure exclusively for the Windchill AI Assistant plugin. |
Procedure
 | Long commands in the following steps may be split across multiple lines for readability. Before running them, combine them into a single line or use line‑continuation characters, depending on your shell. |
To create the required Azure resources, follow these steps:
Step | Task |
|---|---|
1 | |
2 | |
3 | |
4 | |
5 | |
6 | |
7 |
Step 1: Install Azure CLI and Verify Python
Install Azure Command-Line Interface (CLI) version 2.78 or later, and ensure that Python 3.10.0 or later is available on the deployment system.
• Use the az command to communicate with Azure during deployment.
• Use the python3 command to run the deployment helper script.
For installation instructions specific to your operating system, see the official Azure CLI installation documentation.
| | In some Windows environments that use locale-specific encodings (such as CP1252), a known Azure CLI issue can cause certain Unicode characters to be omitted from command output. If this issue is detected, the helper scripts display an error message. To resolve the issue, use one of the following workarounds: • Configure Azure CLI to run in UTF-8 mode. • Change the Windows system encoding to UTF-8. |
Step 2: Create an Azure Resource Group
Create an Azure resource group to host the Windchill AI Assistant resources. For more information, see Manage Resource Groups.
| | The Azure Resource Manager (ARM) template is deployed into this resource group. |
Step 3: Create a Service Principal
Create a Microsoft Entra ID service principal to authenticate the plugin to Azure resources. To improve isolation when multiple environments share the same Azure resource deployment, create a separate service principal for each environment.
To create a service principal, follow these steps:
1. On a system where Azure CLI is installed, open a terminal or command prompt.
2. Log in using an identity that can create Microsoft Entra ID service principals.
3. Run the following command:
az ad sp create-for-rbac
--display-name "<Display name>"
--display-name "<Display name>"
For <Display name>, specify the required display name, for example, wcaiassistant-onprem-sp.
The command returns output similar to the following:
{
"appId": "<client-id>",
"password": "<client-secret>",
"tenant": "<tenant-id>"
}
"appId": "<client-id>",
"password": "<client-secret>",
"tenant": "<tenant-id>"
}
4. Securely store the client ID, client secret, and tenant ID. These values are required during plugin configuration.
5. To obtain the service principal object ID, run the following command:
az ad sp show --id <client-id> --query id -o tsv
The object ID is required during IaC configuration.
Step 4: Sign In Using Azure CLI and Verify Required Roles
1. On a system where Azure CLI is installed, open a terminal or command prompt.
3. Ensure that the signed‑in user or service principal has the Contributor role or, at a minimum, the following roles assigned in the resource group:
◦ Reader
◦ Cognitive Services Contributor
◦ Cognitive Services OpenAI User
◦ Search Service Contributor
◦ Storage Account Contributor
◦ Network Contributor (required only when deploying to a virtual network)
4. Ensure that the signed‑in user or service principal is assigned the Role-Based Access Control administrator role for the resource group.
Step 5: Prepare the ARM Template and Parameter File
Use the following procedure to prepare the Azure Resource Manager (ARM) template and parameter file required for deploying the Windchill AI Assistant.
1. Copy the following files to a local working directory:
◦ pymodules—Directory containing Python modules used by the deployment script.
◦ deploy-wcaia.py—Deployment helper script.
◦ remove-wcaia-index.py—Script that removes an index.
◦ show-plugin-configuration-for-index.py—Plugin configuration helper script.
◦ wcaia.json—ARM template file.
◦ wcaia.parameters.json—Parameter file.
2. Open wcaia.parameters.json and provide values for the required parameters. For more information, see ARM Template Reference Information.
Step 6: Define a Unique Deployment Name
Define a globally unique deployment name. The deployment name is used as a prefix for Azure resource names.
The deployment name must meet the following requirements:
• Contains only lowercase letters and numbers.
• Contains a maximum of 20 characters.
Examples:
• acmeaidev
• companywcaiprod
• ai2025subscracme
Step 7: Create Azure Resources
Navigate to the directory that contains the ARM template files and the deployment helper script, and then run the following command to create the required Azure resources:
python3 deploy-wcaia.py
--resource-group ${RESOURCE_GROUP}
--deployment-name ${DEPLOYMENT_NAME}
--resource-group ${RESOURCE_GROUP}
--deployment-name ${DEPLOYMENT_NAME}
Where:
• ${RESOURCE_GROUP} is the name of the Azure resource group.
• ${DEPLOYMENT_NAME} is the unique template deployment name.
Add the --dry-run argument to perform a read-only server-side validation. Add the --yes argument to skip the interactive approval step.
| | In rare cases, transient race conditions internal to the Azure deployment process can cause the script to stop and report an error. If this occurs, clean up any partial installations and then rerun the deployment script. |
Generating the Plugin Configuration File
After a successful deployment, run the deployment helper script to generate the plugin configuration file. Two output formats are available: JSON and text. The text format is useful for reviewing the values. Use the JSON format when configuring the plugin to avoid copy-and-paste errors:
python3 show-plugin-configuration-for-index.py
--resource-group ${RESOURCE_GROUP}
--deployment-name ${DEPLOYMENT_NAME}
--index ${INDEX_NAME}
--format json
--output-to-file ${JSON_FILE}
--resource-group ${RESOURCE_GROUP}
--deployment-name ${DEPLOYMENT_NAME}
--index ${INDEX_NAME}
--format json
--output-to-file ${JSON_FILE}
Where:
• ${RESOURCE_GROUP} and ${DEPLOYMENT_NAME} match the values used in the deployment command.
• ${INDEX_NAME} is the name of the Azure AI Search index to configure in the plugin.
• ${JSON_FILE} is the file name of the generated configuration (use a .json extension).
For more information, see Configuring the Windchill AI Assistant Plugin.
| | Service principal client secrets are not stored in the configuration. The system prompts you to enter the client secret when you import the configuration. If the client secret is no longer available, create a new client secret in the Azure portal before continuing with plugin configuration. |
The following example shows a typical text-format plugin configuration file. Actual values depend on your environment.
====================================
Windchill AI Assistant Configuration
Azure OpenAI
Endpoint
https://examplewcaia-ai-foundry.openai.azure.com/
Deployment
gpt-5.4-mini
Authentication Mode -- take from shared authentication configuration below
Azure Storage
Endpoint
https://examplewcaiadti.blob.core.windows.net/
Container Name
index1
Resource ID
/subscriptions/00000000-0000-0000-0000-000000000000/resourceGroups/example-wcaia-rg/providers/Microsoft.Storage/storageAccounts/examplewcaiadti
Authentication Mode -- take from shared authentication configuration below
Azure AI Search
Endpoint
https://examplewcaia-ai-search.search.windows.net
Index Name
index1
Authentication Mode -- take from shared authentication configuration below
-------------------------------------
(shared authentication configuration)
Authentication Mode
Service Principal
Tenant ID
11111111-1111-1111-1111-111111111111
Client ID
22222222-2222-2222-2222-222222222222
Client Secret -- Only accessible after creation. If needed, create a new secret based on:
-- Service Principal (App Registration) name: example-wcaia-sp
-- Service Principal (App Registration) ID: 33333333-3333-3333-3333-333333333333
-- Azure Portal: https://portal.azure.com/#view/Microsoft_AAD_RegisteredApps/ApplicationMenuBlade/~/Credentials/appId/22222222-2222-2222-2222-222222222222
Windchill AI Assistant Configuration
Azure OpenAI
Endpoint
https://examplewcaia-ai-foundry.openai.azure.com/
Deployment
gpt-5.4-mini
Authentication Mode -- take from shared authentication configuration below
Azure Storage
Endpoint
https://examplewcaiadti.blob.core.windows.net/
Container Name
index1
Resource ID
/subscriptions/00000000-0000-0000-0000-000000000000/resourceGroups/example-wcaia-rg/providers/Microsoft.Storage/storageAccounts/examplewcaiadti
Authentication Mode -- take from shared authentication configuration below
Azure AI Search
Endpoint
https://examplewcaia-ai-search.search.windows.net
Index Name
index1
Authentication Mode -- take from shared authentication configuration below
-------------------------------------
(shared authentication configuration)
Authentication Mode
Service Principal
Tenant ID
11111111-1111-1111-1111-111111111111
Client ID
22222222-2222-2222-2222-222222222222
Client Secret -- Only accessible after creation. If needed, create a new secret based on:
-- Service Principal (App Registration) name: example-wcaia-sp
-- Service Principal (App Registration) ID: 33333333-3333-3333-3333-333333333333
-- Azure Portal: https://portal.azure.com/#view/Microsoft_AAD_RegisteredApps/ApplicationMenuBlade/~/Credentials/appId/22222222-2222-2222-2222-222222222222