Setting Up GitHub for Collaboration
Before you can begin working with others on Vuforia Studio projects in GitHub, a few basic steps need to be completed.
Create a Project in Vuforia Studio
|
|
If you have an existing project you want to use to collaborate on, you can skip this section.
|
1. Open Vuforia Studio.
2. On the My Projects page, click the green plus icon to create a new project.

3. Select the template you want to use, enter a project name, and an Experience Service URL.
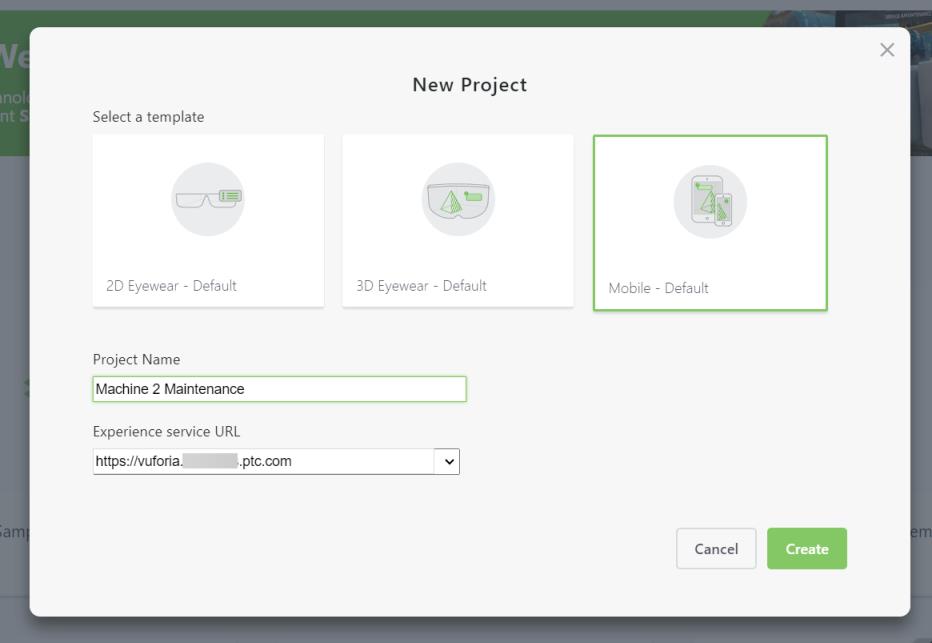
4. Click Create.
Create a Repository in GitHub
1. Open GitHub Desktop and select >
2. Enter the appropriate information on the Create a new repository window.
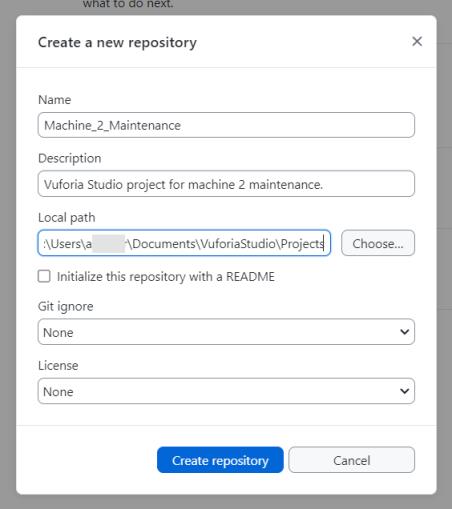
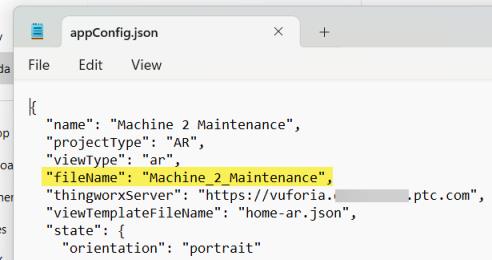
◦ Name—We recommend using the exact value of the fileName entry in the appConfig.json file as your new repository name. To locate the value of fileName, navigate to > > > . Then, open the appConfig.json file, and locate the value for fileName.
◦ Description—Provide any additional information about the project or repository.
◦ Local path—Click Choose... and navigate to Projects folder in the VuforiaStudio directory. For example, C:\Users\<username>\Documents\VuforiaStudio\Projects.
3. Click Create repository.
Publish the Repository
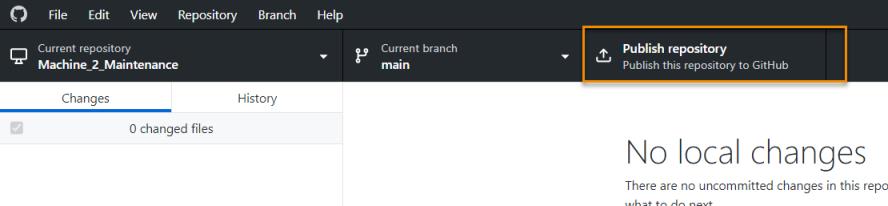
Once the repository has been created, you are the only one that can see it because it only exists on your computer. In order for others to be able to use the repository, you’ll need to publish it to GitHub so that others can access it.
1. Click Publish repository.
2. On the Publish repository window, make sure Name and Description are correct. By default, the Keep this code private checkbox is selected; this option allows you to choose whether or not other GitHub users can view your code. When the checkbox is selected, your code will not be publicly available.
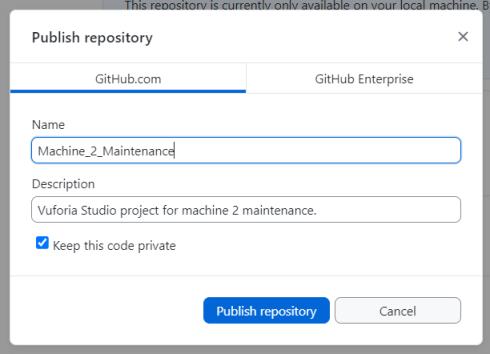
3. Click Publish repository. Once published successfully, the repository will be available on GitHub.com.
|
|
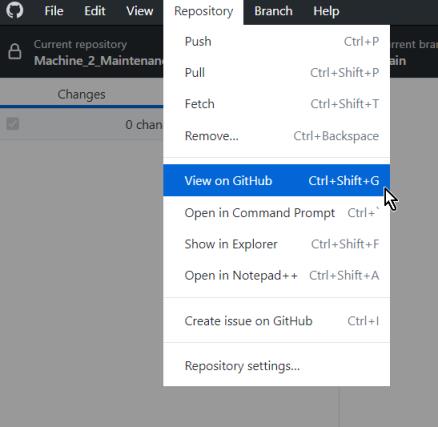
You can access your repository from within GitHub Desktop by selecting > or using the Ctrl+Shift+G keyboard shortcut.
 |
Invite Others to Collaborate
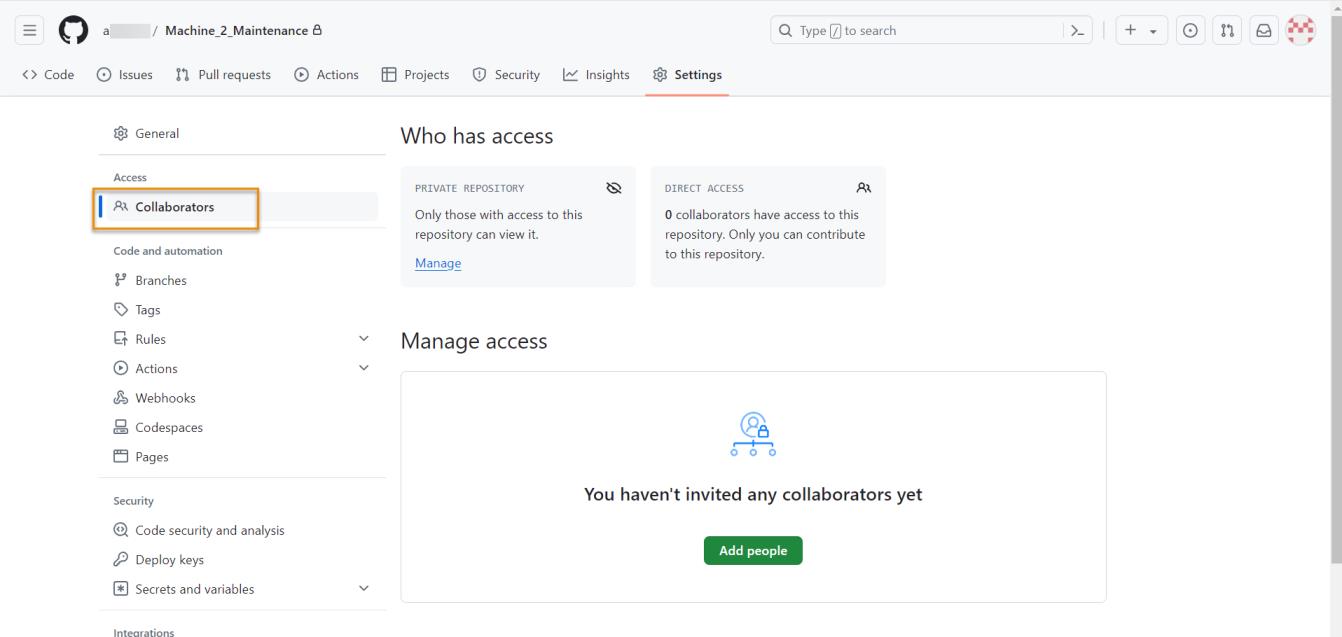
If the code in the repository is private, you will need to invite other users to collaborate.
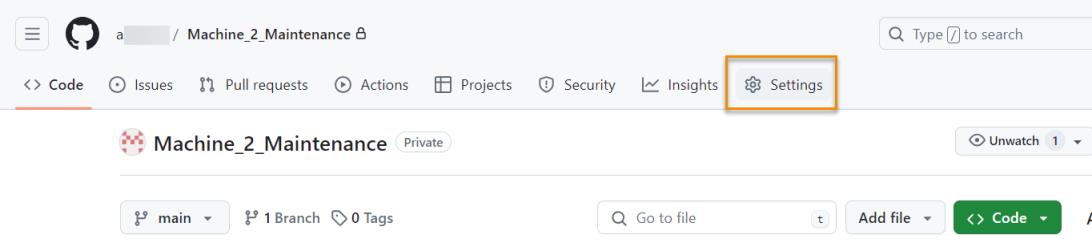
1. Click Settings.
2. On the Settings tab, click Collaborators. From here, you can manage who has access to the repository; you’ll want to add all users that will act as collaborators to the project. For more information about managing access, see Managing teams and people with access to your repository in GitHub Docs.
Clone a Repository (For users invited to collaborate)
Once you have been given access to a repository, you will need to clone the new repository to your local computer before you can start working.
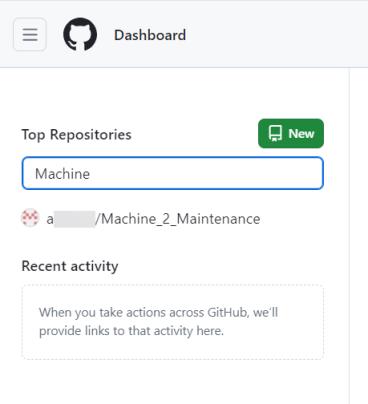
1. Go to github.com and sign in to your account.
2. Under Top Repositories, search for the repository you were invited to.
3. On the Code tab of the repository, click the Code drop-down menu.
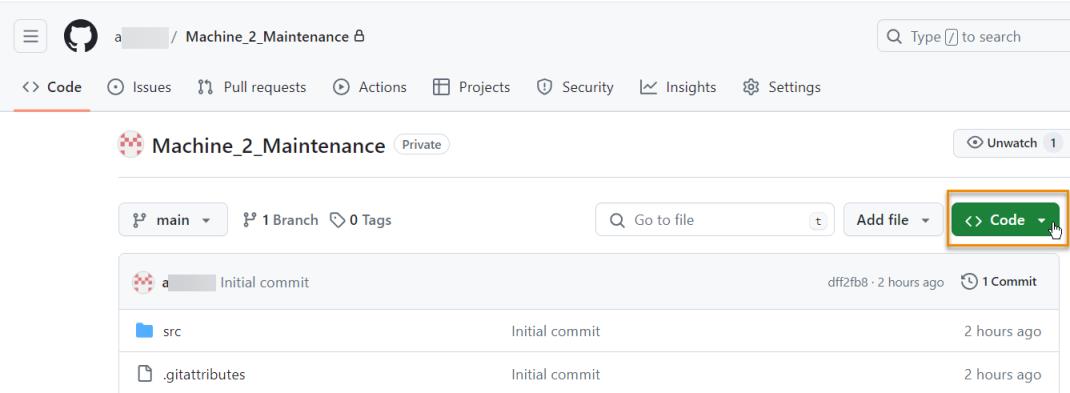
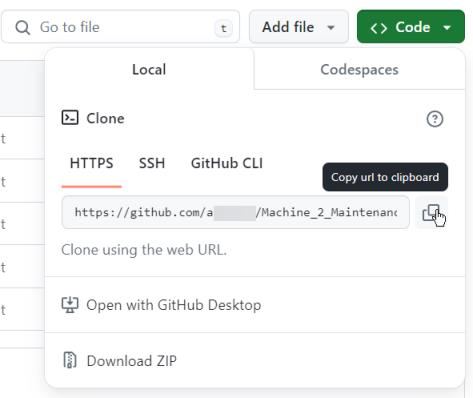
4. Click the copy icon next to the URL.
5. Open GitHub Desktop and select > .
6. Select URL from the tabs at the top of the window.
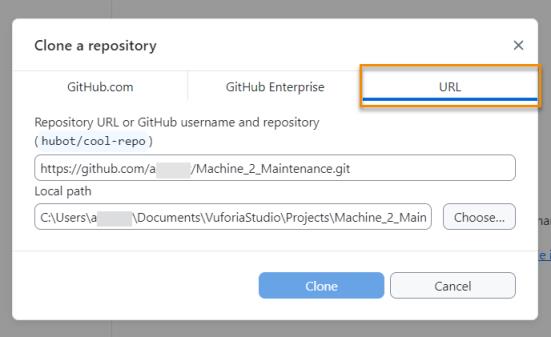
◦ Repository URL or GitHub username and repository—paste the repository URL that you copied in step 4.
◦ Local Path—navigate to your Vuforia Studio Projects directory.
|
|
Once you select the Projects folder, based on the name of the repository, the path will update. For example, C:\Users\<username>\Documents\VuforiaStudio\Projects will automatically become C:\Users\<username>\Documents\VuforiaStudio\Projects\Machine_2_Maintenance.
|
7. Click Clone. Once cloning is complete, the repository will appear in GitHub Desktop.
For a brief example workflow of collaborating on Vuforia Studio projects using GitHub, see Example Collaboration Workflow.