Create an App Integration for Experience Service in Okta
1. Sign in to the Okta Admin Console.
2. Navigate to > > .
3. On the Create a new application integration window, select the following options and then click Next:
◦ Sign-in method—select OICD – OpenID Connect
◦ Application type—select Web Application
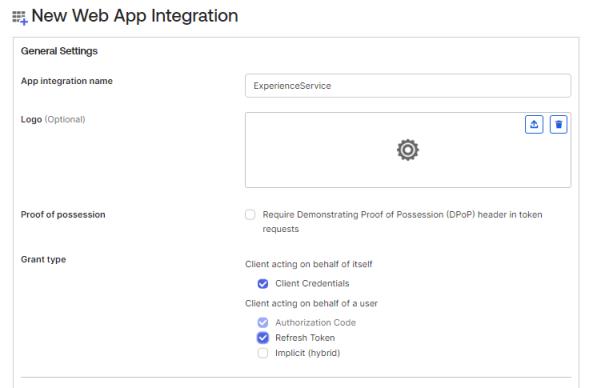
4. Under General Settings, enter and select the following:
◦ App integration name—enter an appropriate name for the new integration (for example, ExperienceService)
◦ Grant type:
▪ Client acting on behalf of itself—select the Client Credentials checkbox
▪ Client acting on behalf of a user—select the Authorization Code and Refresh Token checkboxes
◦ Assignments:
▪ Controlled access—select Allow everyone in your organization to access
▪ Enable immediate access—select the Enable immediate access with Federation Broker Mode
5. Click Save.
6. On the Sign On tab, scroll down to Sign On Policy, and click Add Rule.
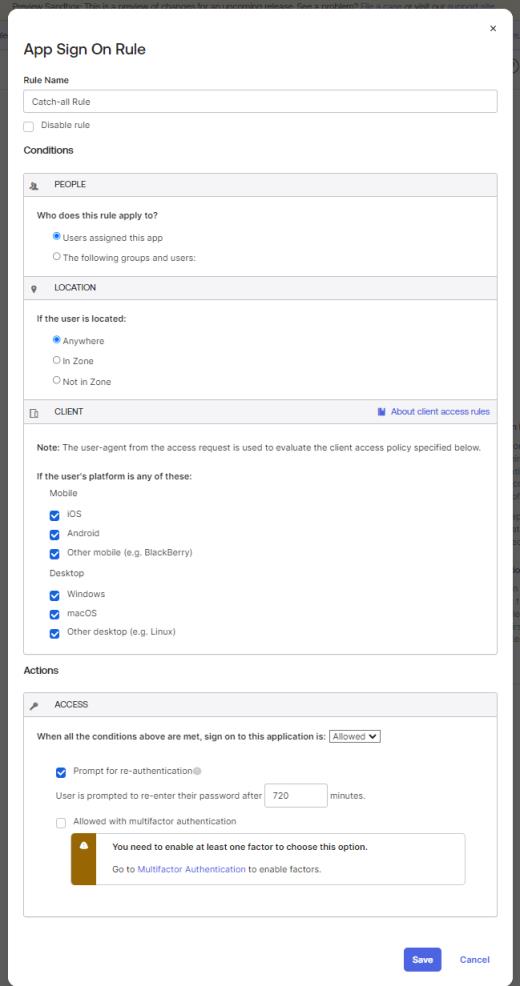
7. In the Rule name field, enter Catch-all Rule, and select the options as shown below. Click Save.
8. In the left navigation pane, navigate to > .
9. On the Authorization Servers tab, click Add Authorization Server. Enter the following information in the Add Authorization Server window, and click Save:
◦ Name—enter a name for the server (for example, StudioAuthServer)
◦ Audience—enter the audience (for example, VuforiaStudio)
◦ Description—enter a description for the server (for example, Vuforia Studio and Experience Service)
10. Navigate to > . On the Authorization Servers tab, select the name of the server you just created, and then select the Scopes tab.
Click Add Scope and enter or select the information shown below, and then click Create.

11. Add another scope for the Experience Service, and specify the following, and then click Create:
◦ Name—enter vuforia.ves.es
◦ Display phrase—enter Experience Service Scope
◦ Description
—enter Experience Service Scope
◦ User consent—select Implicit
◦ Block services—checkbox will be greyed out
◦ Default scope—leave this checkbox unchecked
◦ Metadata—select the Include in public metadata checkbox
You should now see both scopes for the authorization server.

12. Next, select the Access Policies tab for the authorization server you created. Click Add New Access Policy. Enter or select the following in the Add Policy window, and click Create Policy:
◦ Name—enter Studio Access
◦ Description—enter Studio Access
◦ Assign to—select All clients
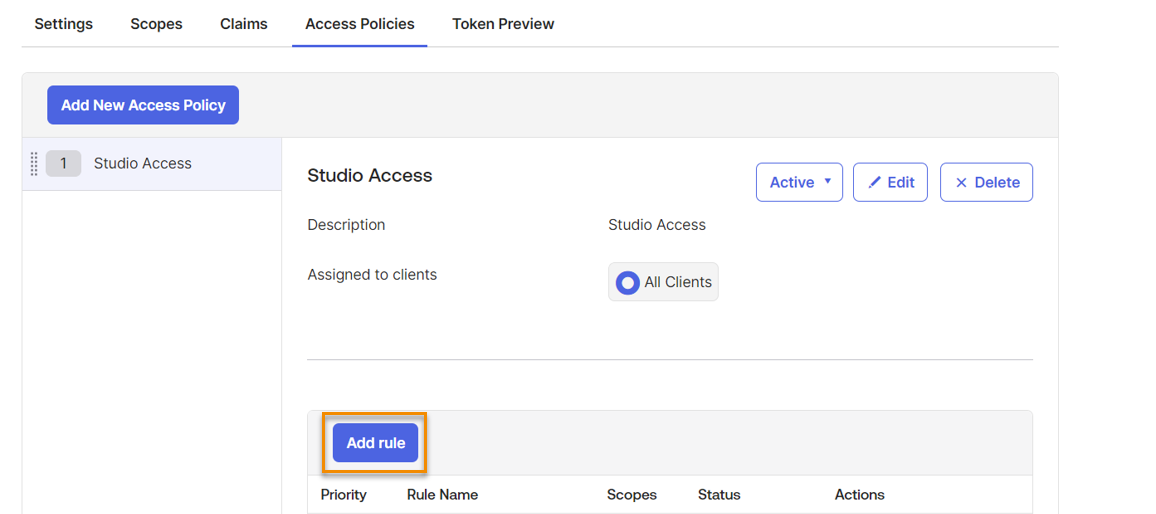
13. Once the Studio Access access policy has been created, click Add rule.
14. Enter or select the information in the Add Rule window as shown below:
