Add Markers to a Model in a Step
Markers allow the author of a procedure to better define locations and parts on a 3D model that a user should focus on. Also, whenever you add a marker to a model, a custom viewing position will be created to help a user better identify where they should be looking on the model.
|
|
You can include up to 8 markers per step, but all markers on a model will be displayed at the same time.
|
Types of Markers
Once you have a product state that you’re ready to use in your procedure, you can add a marker to the model. The following table describes the different types of markers that are available for 3D models.
|
Marker Type
|
Description
|
How to Add the Marker
|
||
|---|---|---|---|---|
|
Point of Interest (POI) marker
 |
Allows a location on a part to be defined as a point of interest.
POI markers can be helpful if you need to draw someone’s attention to a particular location on a part.
|
1. Navigate to the EDIT tab of a procedure that contains a 3D model.
2. Click on the step that you want to add the model and marker to.
3. Then, in the Viewer pane, select the Add point marker icon.
 4. Click on the a location of the model to add the POI marker.
 |
||
|
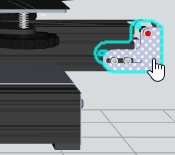
Part marker
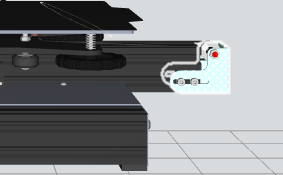 |
Allows a full individual part to be defined as an object of interest.
It may be necessary to define more than just POI markers on a model. In many cases, it might make more sense to use the parts themselves as the marker. Using a part marker may be helpful when a part covers a larger area, such as a hose. The ability to highlight the entire hose can help the person inspecting it understand where the full part is, whereas a POI marker would only point to a portion of the hose.
|
1. On the EDIT tab, open the 3D Editor.
2. Click on the step that you want to add the model and marker to.
3. Then, in the Viewer pane, select the Add point marker icon.
 4. Click on a part on the model to add the part marker.
 5. Once you’ve added the part marker, you can also select the highlight color of the part marker from the step card.

|
Remove Markers
You can remove markers using one of the following methods:
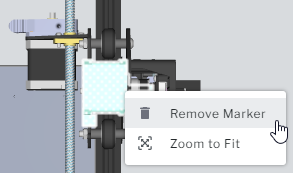
• Right-click on the marker on the model and select Remove Marker.
• Hover over the marker on the step card, click the menu icon ( ), and then select Remove.
), and then select Remove.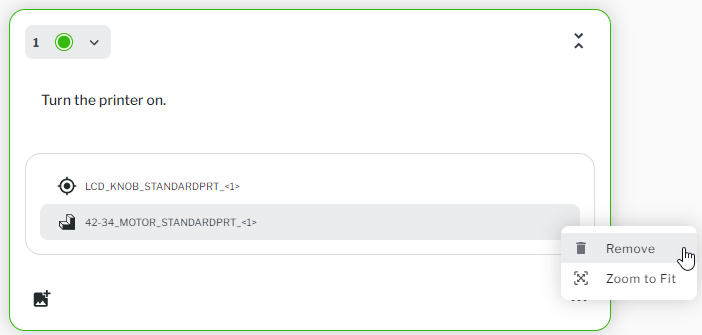
For more information on working with the 3D Editor, see 3D Editor Pane.