Custom Vision
Azure Custom Vision is a cognitive service that lets you apply labels to images, according to their visual characteristics on the basis of a trained image model. For more information, see Azure Custom Vision.
Use the Custom Vision action to classify images as per their visual characteristics.
Prerequisite
Before using the Custom Vision action in your workflow, ensure that you create your project at Custom Vision Portal. Ensure that you have the following values from your project:
◦ Prediction Key
◦ Project ID
◦ Training Key
Complete the following steps to use the Custom Vision action in your workflow:
1. Drag the Custom Vision action under Azure to the canvas, place the pointer on the action, and then click  or double-click the action. The Custom Vision window opens.
2. Edit the Label, if needed. By default, the label name is the same as the action name.
3. In the API Location list, select the location of your cognitive service.
The Custom Vision supports the None connector type only.
4. In the Prediction Key field, enter the Prediction Key of your project.
5. In the Provide Project Details list, select one of the following options, and do the following:
◦ Select Manually and do the following:
a. In the Project ID field, enter the ID of the project that you created.
b. In the Iteration ID field, enter the iteration ID of the project.
◦ Select Fetch Project and do the following:
a. In the Training Key field, enter the training key of the project.
b. In the Project list, select the project.
c. In the Iteration list, select the iteration.
6. In the Provide Image by list, select one of the following options, and do the following:
◦ Select URL and in the Image URL field, specify a publicly accessible image URL.
◦ Select Upload File and in the Image File Path field, map the output of a previous action to provide the path to an image.
The maximum size of the image file is 5 MB.
7. In the Save Result list, select either of the following options:
◦ true—Saves the image to the project.
◦ false—Does not save the image to the project.
8. Click Done.
Output schema
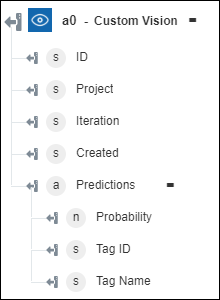
The output schema for the Custom Vision action returns an array with the inputs that you provided and the prediction that the Azure Custom Vision service returned for the image.
