Remote Access and Control
Remote Access and Control is a set of optional features that can be added to Asset Advisor by importing the ThingWorx Asset Remoting Extension (ThingWorx-Asset-Remoting-<version>-extension) into ThingWorx Composer. Remote Access and Control enables you to upload and download files to a remote asset, and access the asset remotely to interact directly with its software system from Asset Advisor. For more information, see Remote Access in the ThingWorx Help Center.
Remote Access and Control requires the use of the ThingWorx Edge MicroServer, the ThingWorx Edge SDK, or the Axeda Compatibility Package. To meet this prerequisite, do one of the following:
• Install ThingWorx Edge MicroServer. For more information, see the ThingWorx WebSocket-based Edge MicroServer (WS EMS) and Lua Script Resource (LSR) Help Center.
• Configure the Axeda Agent for remote access. For more information, see Remote Access for Axeda Agent Assets through ThingWorx in the ThingWorx Axeda Compatibility Package Help Center.
Refer to the support matrices available in each help center for the supported product versions.
Once the extension has been imported, individual assets also must be configured for remote access.
• If the asset is an EMS asset:
◦ The isConnected property of the asset must be True.
◦ An available endpoint must be configured for connection.
◦ The Enable Tunneling checkbox is selected.
◦ At least one configuration exists for tunneling.
◦ The TunnelSubsystem has both a host and a port configured.
For information on configuring EMS assets, see the ThingWorx WebSocket-based Edge MicroServer (WS EMS) and Lua Script Resource (LSR) Help Center.
• If the asset is an Axeda asset, an available endpoint must be configured for connection.
For information on configuring Axeda assets, see Remote Access for Axeda Agent Assets through ThingWorx in the ThingWorx Axeda Compatibility Package Help Center.
Once the ThingWorx Asset Remoting Extension (ThingWorx-Asset-Remoting-<version>-extension) has been imported, the following additional menus display on asset detail pages in Asset Advisor.
Asset Detail — Remote Access
If the asset is configured for remote access, you can connect directly to the asset to execute software patches or change configuration settings – without the need to make a field trip. You can start, stop, and monitor remote access sessions for the asset.
If the extension has been imported, but the asset has not been configured for Remote Access, a message is displayed in the page asking you to notify your system administrator.
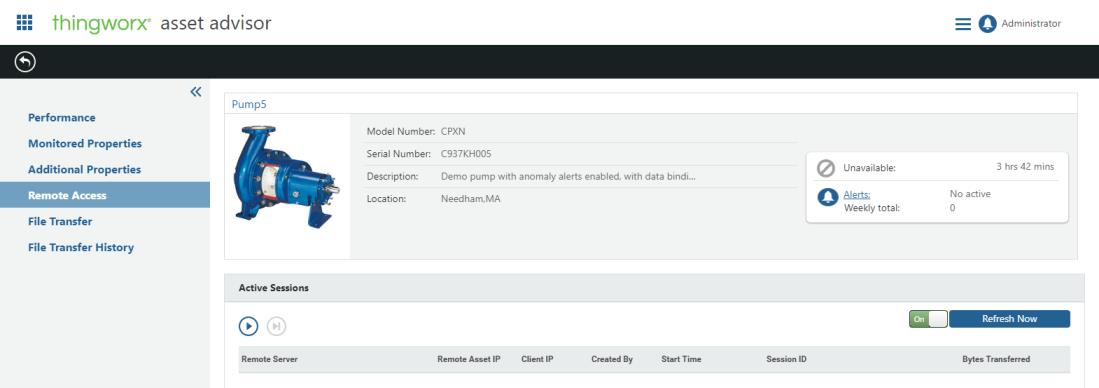
The Active Sessions list displays the following information for each active session:
• Remote Server—The "broker" server that is facilitating the tunnel between the user and the remote device.
• Remote Asset IP—The IP address of the remote asset.
• Client IP—The IP address of the client from which the remote access session is active.
• Created By—The user who started the session.
• Start Time—Time at which the session started.
• Session ID—ID of the session.
• Bytes Transferred—Number of bytes transferred during the session. (This column is hidden by default.)
To start a session:
1. Click  above the Active Sessions list.
above the Active Sessions list.2. In the Start Session window, select the remote endpoint configured for your device, and click Start.
3. The ThingWorx Remote Access Client window opens, displaying the connection information for the session. For example:

If no remote access client is installed on the client machine, a link to download and install the remote access client is provided. |
End an active session in one of the following ways:
• Select the session from the Active Sessions window, and click  .
.
.• Select the end session action from the menu of the ThingWorx Remote Access Client window.
Ending the session closes the tunnel between the client machine and the remote asset.
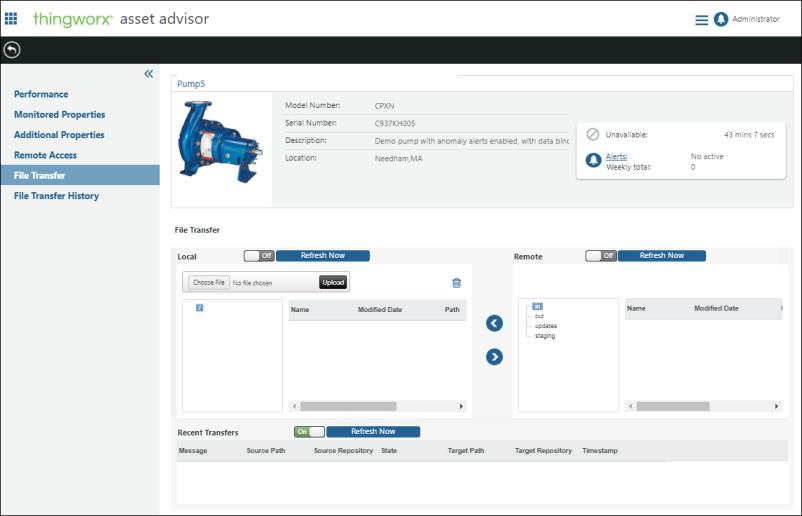
Asset Detail — File Transfer
If the asset is configured for file transfer, you can use the File Transfer page to upload files to, or download files from the asset to upgrade software or perform configuration changes.
If the asset has not been configured for file transfer, a message is displayed in the page asking you to notify your system administrator.
Asset Detail — File Transfer History
If the asset is configured to display file transfer history, information is displayed in the lower half of the asset detail page enabling you to manually browse the file transfer history or to quickly find an entry by entering a date range. You can also find an entry by applying a standard filter from a drop-down menu.
If the asset has not been configured for file transfer history, a message is displayed in the asset detail page asking you to notify your system administrator.
