Defining Prioritization
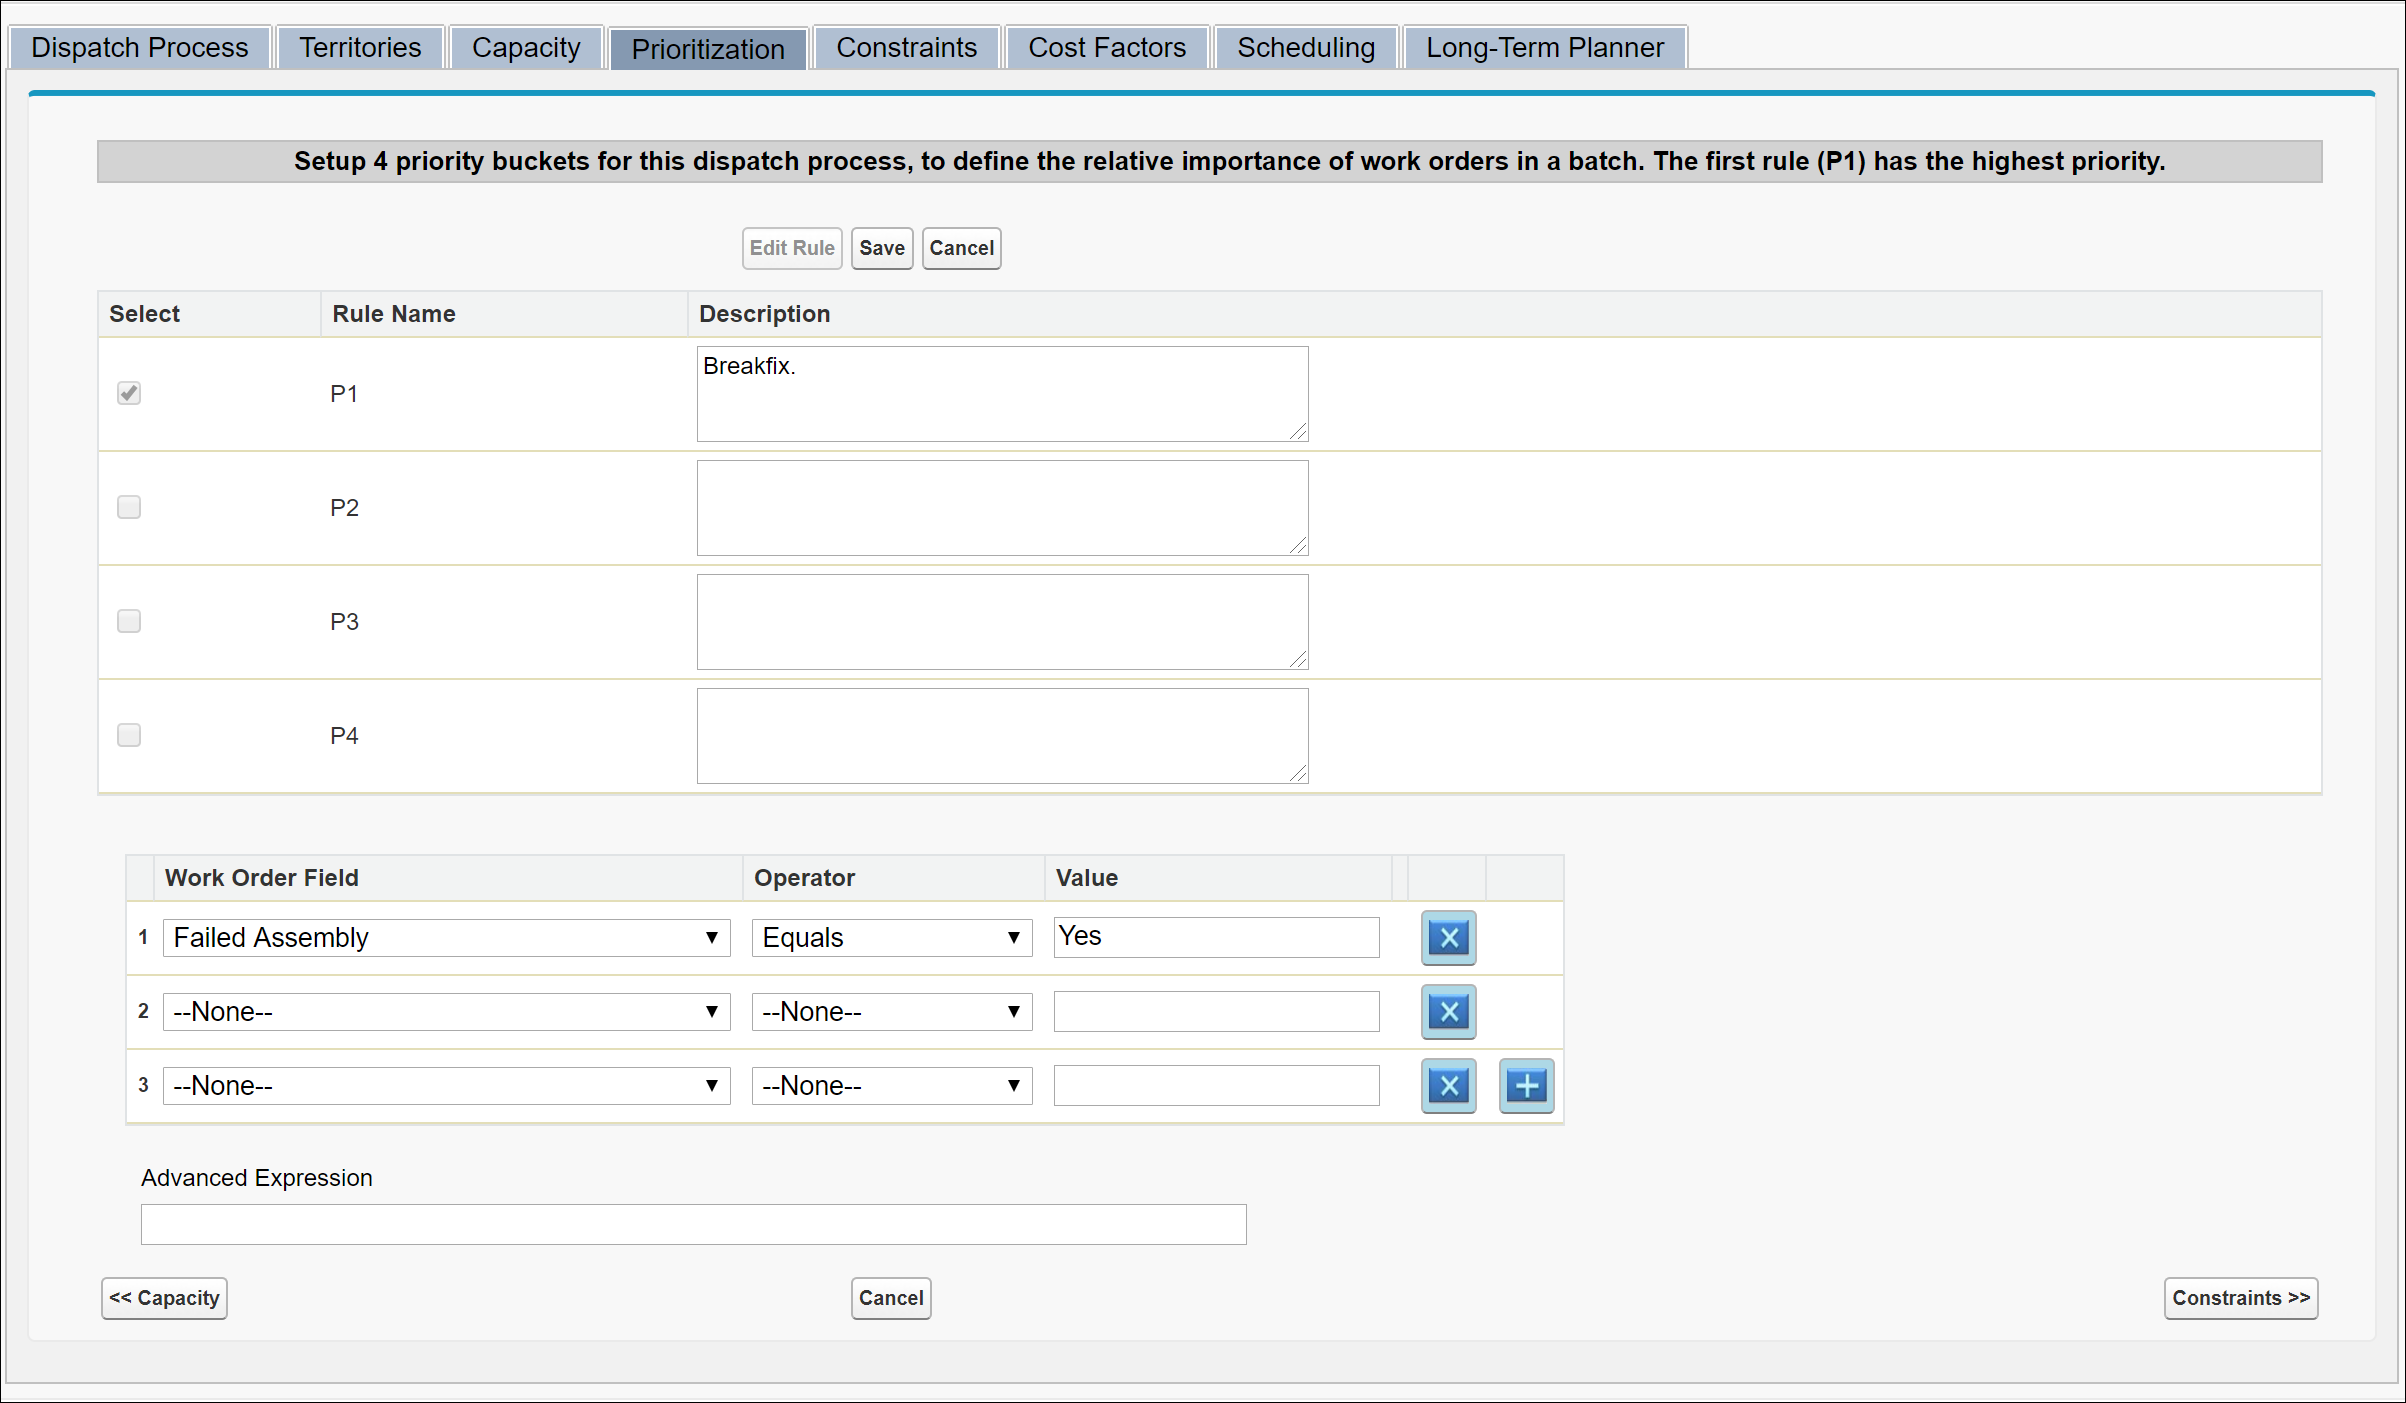
Click the Prioritization tab to view the Prioritization screen as shown in the following screen.

The Prioritization tab is used to define up to four prioritization rules to sort the list of qualified work orders. It is not mandatory to use all four prioritization rules. |
In the Prioritization screen:
• If you are in Edit mode, all existing prioritization rules in this dispatch process are displayed. To edit an existing rule, check the Select check box against the rule and then click Edit.
• Enter the sorting order in ascending order. The prioritization rule with the lowest order value is processed first.
To create a prioritization rule:
1. Enter the Rule Name. Ensure that the rule name is readable and indicates the purpose of the prioritization. For example "Premier Accounts And Down Situations".
2. Enter a detailed description of the rule.
3. Using the combination of the Work Order field name, operator and value, enter the prioritization criteria for each rule. Ensure the criteria are exclusive between each rule. Use the buttons marked with x and + to remove and add conditions respectively. If required, use Advanced Expression to enter conditions such as (1 AND 2) OR 3.
4. Click Save.
• Based on the prioritization rules you have set, the Dispatch Priority field of the work order is updated. If you do not specify any prioritization rule, the default value is populated in this field. This value can be set in the SET003 Default Dispatch Priority (Module: OptiMax, Submodule: Dispatch Calculations) configuration setting. The value range is 1-10. • The priority values for P1, P2, P3, and P4 prioritization rules are set in the configuration settings SET033, SET034, SET035, and SET036 (Module: OptiMax, Submodule: Dispatch Calculations) respectively. The default values are 5, 4, 3, and 2. The value range is 1-10. |