Creating New Checklists
Tap Default title for Checklist process in Actions menu to navigate to Checklists screen. The following screenshot illustrates the checklists screen which lists all the checklists available for that particular record along with their status.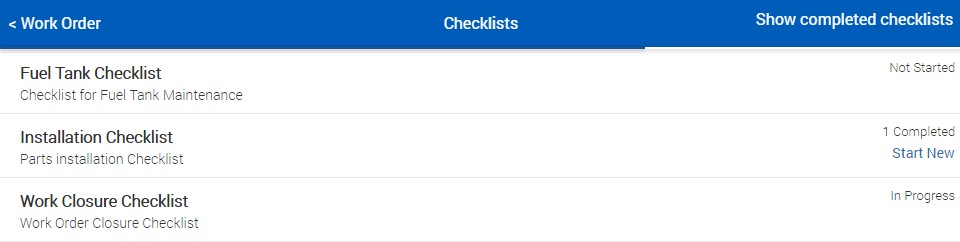
Follow the steps below steps to create a New checklist from your Field Service App.
1. Tap the checklist which has the status as Not Started to navigate to the checklist form-fill screen. Not Started indicates that this checklist has never been filled for the record and you can start filling it. The checklist sections are displayed as section navigators on the left side of the screen with the questions of each section on the right as displayed in the following screen shot:

2. Tap Next at the bottom of the screen to navigate to the next section. Tapping Next automatically saves the checklist locally . The number of question answered across the total number of questions for that section is displayed in the right top corner of the screen.
3. An alert message Saved Successfully is displayed on the top. If you wish to change your answers in different sections you can navigate using the section navigators for respective sections on the left side of the screen.