Enabling IB Timeline for Community User
A Community user can view the IB timeline on the object record page only if the IB Timeline component is added in the Community Builder.
|
|
• The community user must have access to the Covered Product, Product, Warranty, Service Request, Work Order, and Installed Product objects to access the OOTB IB Timeline component.
• The community user must also set the sharing setting as Public Read/Write.
|
To enable the IB Timeline component for the Community user:
1. Open the object record.
2. Open the Community Builder.
3. Drag and drop the IB Timeline component in the Community Builder.
4. Click the Timeline Component. The Timeline configuration screen is displayed on the right.
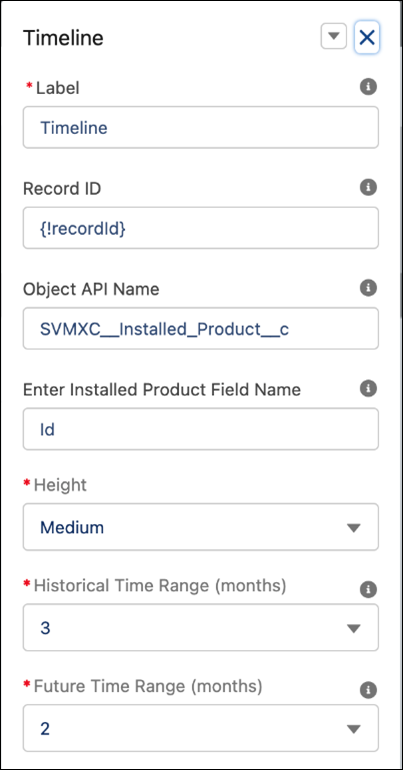
5. In the Timeline Configuration screen, enter the attributes as described in the table:
|
Field
|
Description
|
||
|---|---|---|---|
|
Fields marked with * are mandatory.
|
|||
|
Label*
|
Name of the timeline component to be displayed. The default value is Timeline.
|
||
|
Record ID
|
{!recordId}
|
||
|
Object API Name
|
Add API name of the object where the IB Timeline is viewed.
For example SVMXC__Installed_Product__c
|
||
|
Enter Installed Product Field Name
|
Enter the field name of the installed product field for which the timeline is viewed. For example, enter SVMXC__Top_Level__c when viewing the timeline for Top-Level Serial/Lot Number on the Work Order object.
For example Id
|
||
|
Height
|
Medium
|
||
|
Historical Time Range (months)
|
3
|
||
|
Future Time Range (months)
|
2
|
||
6. Click Save to save the configuration.