Creating Warranty on Installed Product Manually
To create a warranty manually:
1. Locate the Installed Product by searching in the sidebar or from a list view in Installed Products tab and click the Installed Product ID to which you want to add warranties.
2. Click New Product Warranty from the Product Warranty related list section of the Installed Product screen. The list of warranty terms applicable to the product and all other warranty terms is displayed in two separate lists. A sample warranty terms screen is shown in the following screenshot.
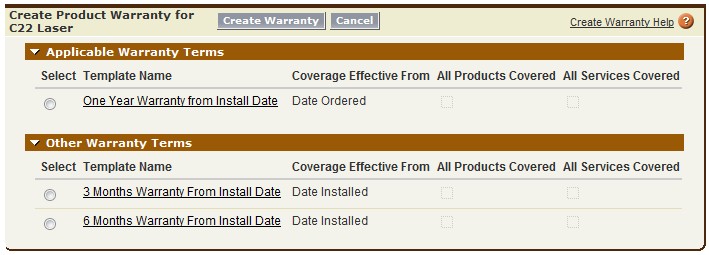
3. Select the appropriate warranty terms from the list. ServiceMax does not validate if the template covers the current Installed Product. You can select to use any available warranty terms to apply to an Installed Product. Manual creation of warranty also overrides the Inherit Parent Warranty setting of the product.
4. Click Create Warranty. Product warranty will be created based on the terms. The newly created product warranty record is displayed.
There is no limit to the number of warranty records an Installed Product can have. Repeat the above steps as many times as required.
|
|
When creating warranty manually or automatically, the mapping of fields between Warranty Terms and Product Warranty is configurable by your ServiceMax admin. This also includes your organization’s custom fields..
|