Creating/Editing a Custom Work Order Proforma Invoice Process
To create a custom service contract Proforma invoice process:
1. Click the New button in the Custom Work Order Proforma Invoice Processes screen, or select a process and click the Edit button to edit an existing process. See figure below:

2. In the General Info Tab:
a. Enter the Process Name.
b. Enter the Process ID.
c. Enter the Description.
d. Check the Active checkbox to make the process active.
|
|
If you do not check the Active checkbox, the process will not be activated. Therefore, when the end-user clicks the Generate Invoice button in the SFW, an error message displays indicating that the Proforma Invoice Process is inactive.
|
3. If necessary, use the expression builder to indicate how Work Orders qualify for the process. See figure above. Select one of the following options:
a. Select existing criteria from the picklist.
b. If applicable, click the View/Edit link to view or edit the existing criteria. Make any necessary changes.
c. If applicable, click the Create New link to create new criteria for the process.
4. Click the Invoice Rules tab.
5. In the Work Order Consolidation Rules area (see figure below):
a. Determine what the consolidation is based on (for example, Work Order, Account).
b. Determine what to use for the primary grouping of proforma invoice.
c. Determine what to use for the secondary grouping of proforma invoice.

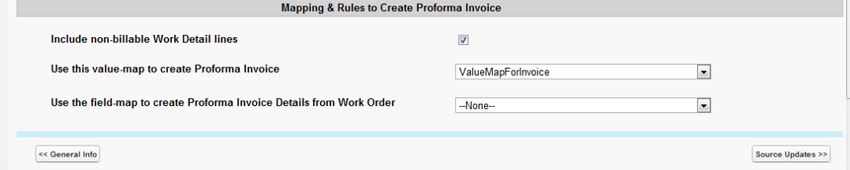
6. In the Mapping & Rules to Create Proforma Invoice area (see figure below):
a. Check the Include non-billable Work Detail lines checkbox.
b. Select a value map from the Use this value-map to create Proforma Invoice picklist.
c. Select a field map from the Use the field-map to create Proforma Invoice Details from Work Order picklist.
7. Click the Source Updates tab (see figure below).
8. In the Automatic field updates to Work Order when proforma invoice is created area:
a. Select the field name in the Field Name picklist.
b. Select an operator from the Operator picklist.
c. Select a value in the Value text box.
d. Click the +/- buttons to add or delete rows.

9. Click the Schedule & Notification tab (see figure below).
10. In the Select the times and days to run this process area:
a. Select the time in the Run At (GMT) picklist.
b. Select the day in the On These Days picklist.
c. In the Available panel, select an available day, and using the appropriate arrow, move the day to the Select panel. (Use the arrows to move the days from left and right between the Available and Chosen panels.
d. Use the +/- buttons to add or delete
11. In the Specify recipients of notification and alerts area:
a. Enter the email address for receiving success notifications.
b. Enter the email address for receiving error notifications.
c. If applicable, check the Enable Logging checkbox.
