Managing Service Teams
From the console, you can create, edit, or delete Service Teams.
Creating a Service Team
To create a new team:
1. Click New Service Team. The Add/Edit Team page is displayed.
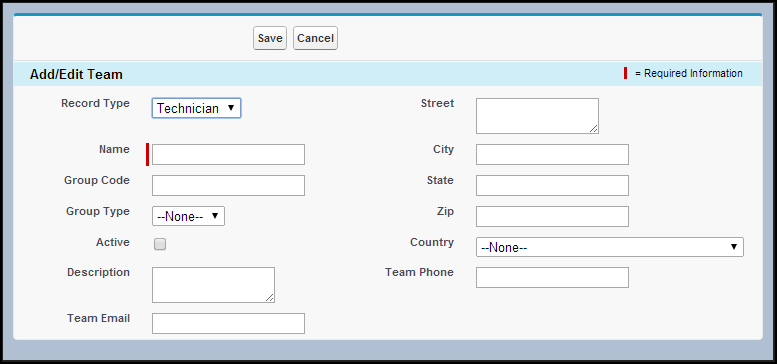
2. If you want to define a group of technicians, select Technician in the Record Type picklist. To define a group of equipment, select Equipment in the Record Type picklist.
3. Enter a unique name for the Service Team. For example, "NA East Laptop Field Service."
4. Enter any internal Group Code your organization might use to refer to the team.
5. Select the Group Type (None, Internal, Partner, or Both).
6. Check the Active checkbox if this group is active and available for Work Order assignments.
7. Enter a detailed description about the team.
8. Enter a Team Email, if configured.
9. Enter valid address information in the appropriate fields.
10. Enter the team telephone number.
11. Click Save.
|
|
If you enter an invalid address, an error message is displayed. An address is considered invalid if there are any spelling mistakes or if it contains PO Box or Suite numbers. Since this functionality uses the Google Maps engine, the ability to validate an address depends upon the level of coverage for countries provided by Google.
|
Editing a Service Team
To edit an existing service team information:
1. Click the radio button adjacent to the service team and then click Edit.
2. Make the necessary changes, and then click Save.
Deleting a Service Team
To delete an existing Service Team:
1. Select the Service Team and then click Delete.
A confirmation pop-up is displayed.
2. Click OK. The service team and the associated technicians, expertise, product, and cost records are permanently deleted.