Configuring Columns in the PSC Results Table
In the Manage PSC Results wizard, you can select the PSC Item fields to display in the Result Lines table as per your requirements.
To select PSC Item fields to display in the Result Lines table:
1. Click the Gear icon in the Manage Result Lines screen.
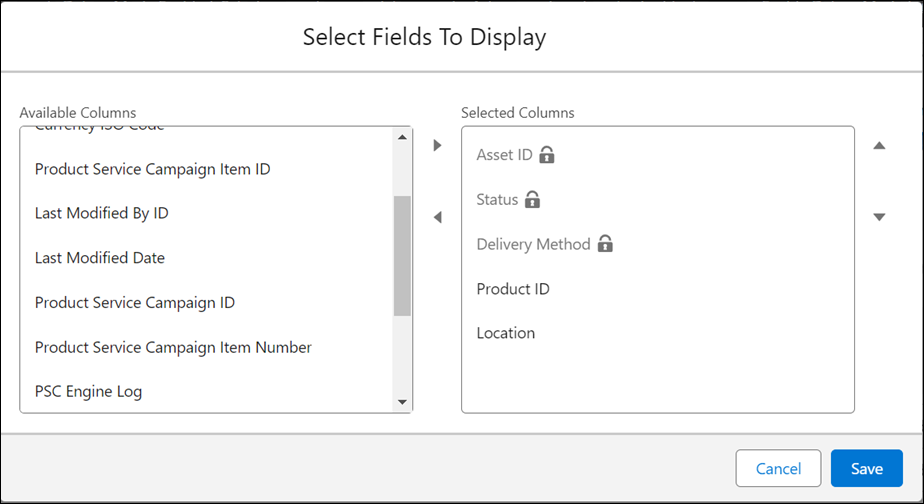
The Select Fields to Display window is displayed.
2. Select the PSCI fields in the Available Columns section and move them to the Selected Columns section.
|
|
• The following PSCI fields are selected by default: Asset ID, Status, Delivery Method, Product ID, and Location. You cannot remove Asset ID, Status, Delivery Method from the display. These fields are locked for display.
• You can select up to eight fields for display in total, including the default fields.
• You can arrange the columns as per your requirements when you select the fields for display. The Asset Name is always the first column, and the Status and Delivery Method are always the last columns. The additional fields you select for display appear in the order you add the fields in the Selected Columns section. For example, Product ID and Location will display as second and third columns as per the selection in the screenshot.
• The selected columns for display persist even when you log out or close the browser, and log in again.
|
3. Click Save to save the fields for display.
You are navigated to the Manage Result Lines screen upon clicking Save. The table is updated with the fields you have selected for display.