Modifying Callout Style Attributes
Name
Each style must have a unique name. The name of the standard style Normal cannot be overwritten.
Text Options
You can use these options to change various attributes for the text entry.
Attributes
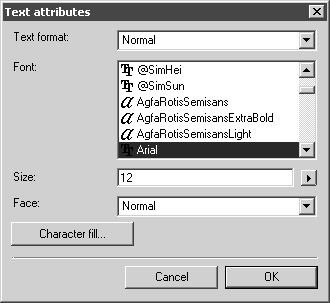
If you select Attributes, the following dialog box appears:
All the available text formats are shown in the pop-up menu under Text format. Using the options available here, which will be familiar to you from text elements, you can select the Font, enter the Font size and set the Face. This overwrites the preferences of the selected text format.
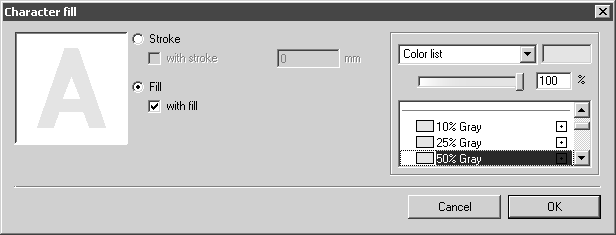
Clicking on Character fill opens another dialog box.
In this dialog box you can change the graphic attributes for the callout text entries. As with normal text, you can fill the black-filled characters with color by selecting
Fill. If you want to highlight the outline of the characters, you can set the thickness of the outline and its color by selecting
Stroke. You can find a detailed description of character fill in
Character Fill.
Selecting Cancel returns you to the dialog box for the text attributes without performing any changes. Clicking OK adopts the settings.
Scheme
Under Scheme you can select the type of part number. If you set No scheme, only the non-varying entries under Prefix and Postfix appear in the text entry for the callout. If Numerical is set, the callouts are numbered from 1 upwards. If Alpha, upper case and Alpha, lower case are set, letters are given for the part numbers instead of numbers.
Update
Under Update you can define whether the callouts are to be updated or not following the deletion or addition of new callouts. If update is set, all changes to a style are applied to all callouts formatted using this style. If none is set, only the newly generated callouts are created with the changed settings.
Position
Under Position you have two possible settings. If you set centered, the text entry is centered relative to the end of the leader line. With aligned, the text entry is at a fixed distance (next to, under or above) the leader line.
Distance
The distance can only be adjusted when aligned is selected under Position. When adjusting the distance, you are specifying the distance between the leader line and the outer edge of the nearest text entry. This setting only works when no frame is selected under the Shape options option. When text entries have a frame, the leader line runs to the edge of the frame.
Prefix, Postfix
With Prefix and Postfix, you can also place a non-varying entry in front of or behind the ongoing numbering scheme for the callouts. You can use numbers, letters or other characters for this. For instance, you can use this method to add an assembly name to the callout numbers used for drawings or, using the prefixed word Viewport, to assign a designation to various viewports with a callout in the drawing.
Line Options for Callout Leader Line
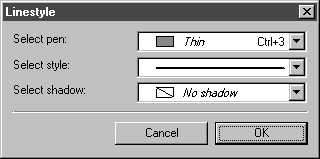
The settings under Line options relate to the leader line of the callout element. When you click this button, the following dialog box appears:
Here you can select the pen, style and halo for the leader line.
Shape Options for Callout Frame
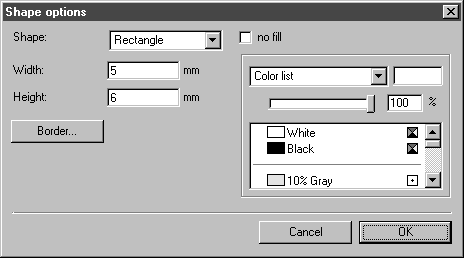
The attributes for the frame element around the text entry are defined under Shape options. When you select Shape options, the following dialog box appears:
You can define the shape of the frame under Shape options. You can select between a range of different geometrical shapes. If you set none, all other settings cease to apply.
When you have set a frame shape, fields appear which match the size of the frame. Enter the desired value.
| Ensure that the frame size is not smaller than the extent of the text entries. |
If the box next to
no fill is not checked, then the frame element can be filled. You have the option of selecting one of the defined colors from the list or mixing your own CMYK or RGB color. Using the color list and setting a CMYK or RGB color are described in
Show Fill Window.
The settings under Border define the border of the frame around the text element. When you select Border, the following dialog box appears:
Here you can select the pen, style and halo for the border. If you select no pen, the border of the frame is invisible.
Use these Callouts as Hotspots
When this box is selected, hotspots are created for the callouts with this style. The entry for the numbering scheme is automatically created as the object name. For example, a 3 is generated for the name of a callout with the consecutive number 3.
When the numbering of the callouts is updated, the names of the hotspots are also adapted.
Creating a New Style
Clicking on the New button creates a new callout style. This style will initially have the attributes of the last style displayed. Assign the text format a unique name. If a style with that name already exists, the following warning window appears:
Confirm with OK and change the name. You can now change the settings of the new style as required and confirm these with OK when you have finished.
If you have clicked New by mistake or want to abort the creation process, you can delete the styles as described below.
You can also create a new style by selecting the New callout style from the Callouts window submenu.
Deleting a Style
You can delete the style currently displayed by clicking the Delete button.
| The standard style Normal cannot be deleted. |
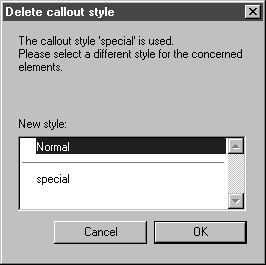
The callout style is deleted immediately provided it is not being used for callouts. Otherwise, a substitute style must first be defined for assigning to the affected callout elements:
The new style must be assigned directly in order to avoid conflicts. This assignment cannot be undone. Consequently, the program will ask you for final confirmation if you click OK:
Click No if you do not want to make the changes. Click Yes to assign the new style with immediate effect. Although you can still cancel the Edit callout style dialog box afterwards, the assignments will be retained.
| Attributes that have been changed subsequently in element info with the deleted callout style are retained. For example, if you have subsequently assigned another prefix to a callout, the substitute style will not affect this change. |