Hyperlink
This allows you to define what will happen if the user clicks on this object. In most cases, you will jump (link) to a specific target.
There are many targets that you can address from a graphical object. Choose a target from the Hyperlink drop-down list. These are described in detail below.
No Link
This setting results in no link being assigned to the object. Any link which has already been entered will be deleted.
Viewport
You can assign a view to the object (see
Show Attribute Window). In this case, the view in question will be called up as soon as the user clicks the active hotspot.
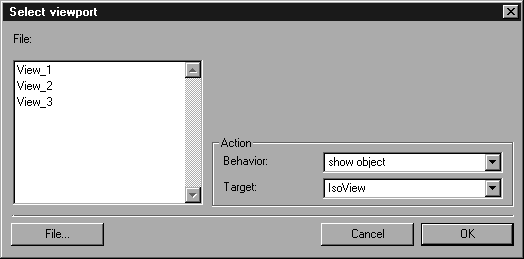
Do this by selecting the Viewport command from the pop-up menu. The following dialog box appears:
The File list box displays all the viewports which have been created for the current file. Select one of these viewports and click OK. This links the viewport to the object.
You can also select a viewport which is not located in the current file. Do this by clicking the File button. The dialog box from the > > command appears. Select the required file and confirm by clicking OK.
The path for this file is now shown in the dialog box. The list shows all viewports created for this file. Click one of the viewports to link it with the object.
You can now use the settings in the
Action area to specify what exactly is to happen if the object jumps to this viewport. These settings relate to subsequent usage in interactive environments. They are described in further detail in
Actions for Viewports and Objects.
Clicking Cancel terminates selection of the viewport without performing any changes. Clicking OK confirms your selection. The selected viewport will be displayed in the object info.
Object
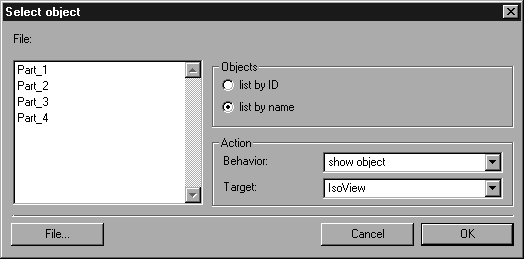
You can jump from one object to another. Clicking the current object will move you to the target object. Do this by selecting the Object command from the pop-up menu. The following dialog box appears:
The name and path of the current file are displayed in this dialog. The list shows all objects created in this file. You can select whether the objects are to be listed according to ID or name. Select one of these objects and click OK. You have now selected this object as a target for the current object.
You can also select an object which is not located in the current file. Do this by clicking File. The dialog box that you will already know from the Open file command appears. Select the required file and confirm by clicking OK.
The path for this file is now shown in the dialog box. The list shows all objects created for this file. Click on one of the objects in order to link it to the current object.
You can now use the settings in the Action area to specify what exactly is to happen if the object jumps to this viewport. These settings relate to subsequent usage in interactive environments. They are described in further detail below in the next section.
Clicking Cancel terminates selection of the object without performing any changes. Clicking OK confirms your selection. The selected object will be displayed in the object info.