How to Create a New Hatching
When creating your own hatching, on no account should you use the file DefaultHatchings.idr in the installation folder, which contains the standard hatchings. If this file is changed, you could experience problems when launching the program.
A hatching is specified within an area measuring 50 mm x 50 mm.
All the elements of the hatching and the rectangle must be grouped together.
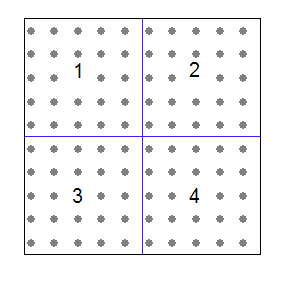
When applying a hatching, the hatching area (50 mm x 50 mm) that has been created is repeatedly copied into a large fill area. For example, in a square fill area measuring 100 mm x 100 mm, the hatching area (1) will be inserted four times. Twice side by side (1 and 2) and twice underneath (3 and 4).
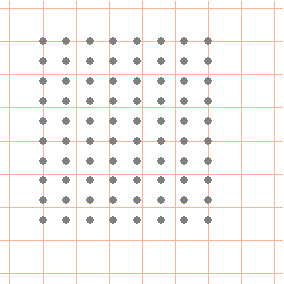
Therefore, when creating a hatching, you must ensure that the individual hatching areas will fit together appropriately (see the example hatching here).
1. Open the file hatching_example.idr from the Arbortext-IsoDraw-install-path\Tutorial\Tutorial IsoDraw folder.
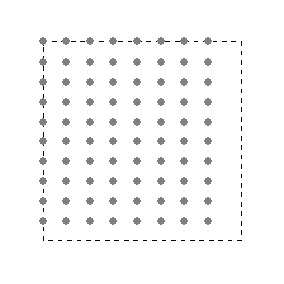
You will see the completed example hatching.
If you prefer, you can follow the steps required to complete the hatching in a new file. The workflow is described below.
2. Select the > menu. Save the file as example.idr in the installed Arbortext IsoDraw program folder Arbortext-IsoDraw-install-path\Program\Patterns.
| A new hatching file can only be loaded by the program if it is placed in this folder or in the folder of the same name found in the Windows user application data folder at User Profiles\username\Application Data\PTC\IsoDraw\Patterns. |
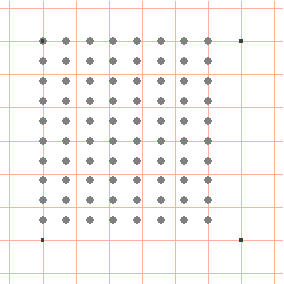
3. Click on the Grid button in the Attributes window and select the Plane view grid.
4. Use the Rectangle tool to draw a square measuring 50 mm x 50 mm.
5. Select the No pen option for the selected square.
6. A new pen and new style need to be set for the example hatching.
Select New style from the pop-up menu of the style window.
7. Enter hatch next to Name in the dialog box.
8. Specify the settings for the style and click OK to confirm.
| Take the settings for the hatch style from the example file hatching_example.idr. |
9. Select the New pen command from the pop-up menu of the pen window.
10. Enter hatch next to Name in the dialog box.
11. Specify the settings for the pen and click OK to confirm.
| Take the settings for the hatch pen from the example file hatching_example.idr. |
12. Instead of creating the new style and pen, you can also copy the hatch pen from the example file hatching_example.idr into your file example.idr using the Drag and Drop function.
13. Select the hatch pen.
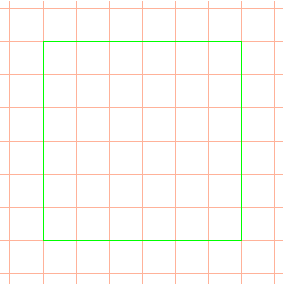
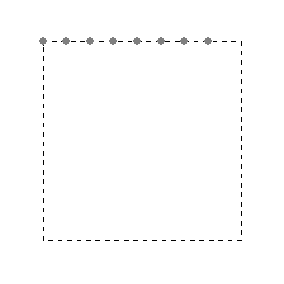
14. Starting from the left, use the Line tool to draw a line at the height of the upper rectangle line. The line must be 45 mm in length. If preview mode ( > menu) is active, you will notice that the line begins and ends with a point.
| If you look at the hatch style settings you will notice that the points are set at a distance of 5 mm apart. As hatch areas are repeatedly inserted one next to the other and one above the other to complete the entire fill area (as described at the start of this section), the distance between the last point of the first area and the first point of the adjoining area must be 5 mm. That is why the line must be 45 mm and not 50 mm in length. |
15. Use the
Move dialog box (see
Drawing a Cylinder) to move a copy of the line 5 mm down.
Repeat the move eight times using the Repeat move command.
| The same applies to the number of lines as for their length. There must be a distance of 5 mm between the last line of the first area and the first line of the area below. |
16. Select all the elements and the > menu.
This completes the hatching.
18. Select the > menu.
19. End the session and restart the program.
20. The new hatching is loaded as the program restarts.
21. Select the > menu.
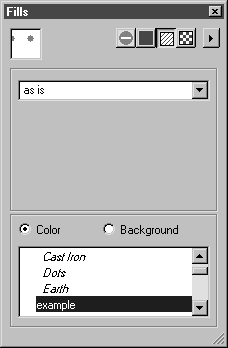
22. Click on the Hatching button.
The name of the hatching you created (example) now appears in the list of hatchings.
23. If you now draw a rectangle or a closed Bézier path and select the example hatching for the areas, the result should look similar to the figure to the right.