Create a Library File
The first points you should consider are which views and perspective orientations you require for the library part you are using. Do not create more versions than are necessary. You can add extra library parts to a library file at any time.
Various perspective orientations from one perspective should be grouped together in one file.
Different views, for example, from above (top) or below (bottom), should be put in separate files, with each filename appropriately appended (e.g. with T or B) to indicate the respective view. This makes it easier to select the correct file from the library window.
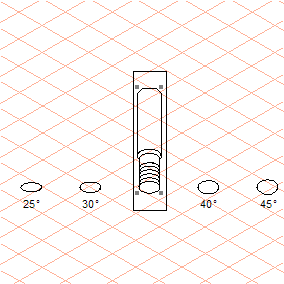
1. Open the file bolt_start.idr from the Arbortext-IsoDraw-install-path\Tutorial\Tutorial IsoDraw folder.
You will see the isometric representation of the library part in the center. To the right and left of it are ellipses with various ellipse values. Now draw the library part outside the isometric perspective taking each starting ellipse as your basis.
2. We have prepared a tool to help.
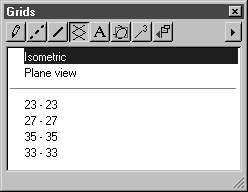
Select the Grids window from the attributes window.
You will notice other grids underneath the standard grids. Each of these four grids is set up for an ellipse value. Grid 23-23 is designed for an ellipse value of 25°. In the same way, 27-27 is designed for 30°, 35-35 for 40°, and 37-37 for 45°.
| Using a grid that matches the perspective orientation offers two advantages. First, it is easier to draw when using the appropriate grid and, secondly, perspective foreshortening is taken into account. You can learn how to create a new grid in the Attributes section of the Arbortext IsoDraw User's Reference. |
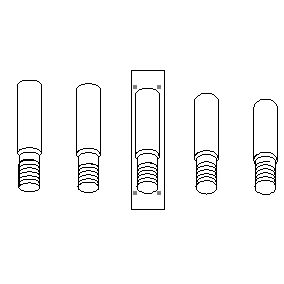
3. Now use the tools and functions you are familiar with to draw the library part in the other orientations.
| Once you have drawn the library part in an orientation, you must group all the elements of the part together. If the elements are not grouped, Arbortext IsoDraw will not recognize the part as a library part. Use the Group menu command to group elements. |
If you do not wish to complete the drawing at this stage, go to the Arbortext-IsoDraw-install-path\Tutorial\Tutorial IsoDraw folder and open the file bolt_example_B.idr, which contains the completed drawings.
4. Once the library file has been completed, save the file in the Arbortext IsoDraw program folder Arbortext-IsoDraw-install-path\Program\Library Window\Bolts.
| You have the option of saving library files in Arbortext IsoDraw format or in CGM format. You must restart Arbortext IsoDraw before you can use newly saved library files. When the program is restarted, all the available library files are loaded. |
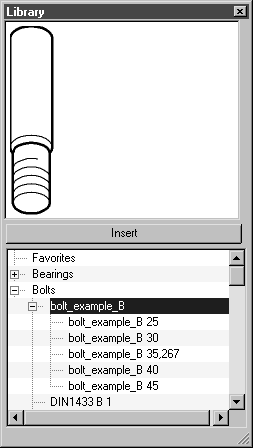
The library parts in the new file appear in the library window as illustrated below.
You will see that the relevant ellipse value and the letter B for bottom have been added to the name of each bolt automatically.
You can now insert the part with the appropriate orientation or, as in
Using the Library exercise, use an ellipse and insert
bolt_example_B.