Creating a Reason Code
To add a reason code to a reason tree, complete the following steps:
1. On the Reason Trees details page, in the Reason Codes tab:
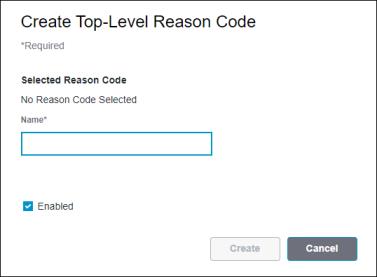
◦ Click Create to open the Create Top-Level Reason Code window. This form adds a top-level reason code to the list of reason codes.
◦ Select a reason code from the list and click Create to open the Create Child Reason Code window. This form adds a child reason code to the parent that is displayed in the Selected Reason Code field. Use CTRL + click to clear a row selection.

2. Specify a name for the reason code. The name must be unique within the reason tree. For reason code name uniqueness, capitalization is not considered. For example, ABC, Abc, and abc are all considered to be the same name. Required.
The same reason code name can be present in multiple reason trees. When a reason code name is used in more than one reason tree, any capitalization differences are ignored. The name always appears as it was entered for the first time. For example, a reason code named Abc is created on Reason Tree 1. When a reason code with the same name is created on Reason Tree 2, it will appear as Abc, even if it is entered as ABC. |
3. The reason code is set to enabled by default. To disable the reason code upon creation, clear the checkbox.
4. Click Create to create the reason code.
You can click Cancel to cancel the creation of this reason code.
The new reason code displays in the Reason Codes tab of the reason tree details page.
You can provide translations for the names and descriptions of any reason codes that you have created. For more information, see Providing Translations for Customer-Created Reason Code Names
and Descriptions. |