Selecting a Demand Window
To view and manage data on the Demand BOM, Demand, and Demand Allocation tabs on a material details page, you must first select a demand window. Once selected, the demand window information displays on the tab, including the name and dates for the demand window, the site to which the demand window belongs, and whether the demand for the demand window is set on materials or on work centers.

After you have selected a demand window, that selection is retained as you move between the three tabs. Changing the selected demand window on one tab changes the selected demand window for all three tabs.
Selecting a Demand Window
To select a demand window, complete the following steps:
1. On the Demand BOM, Demand, or Demand Allocation tab, click Select.
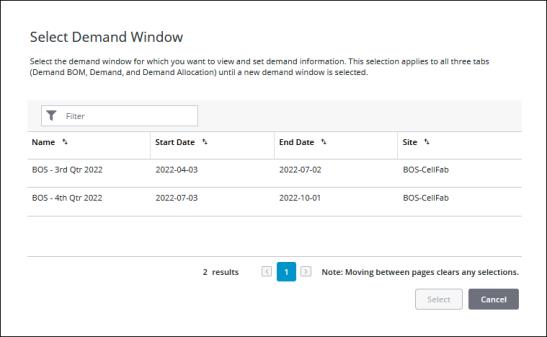
The Select Demand Window window opens, displaying all demand windows for the sites to which the material belongs.

You can narrow down the list of demand windows by entering text in the Filter field. This filters the list on the Name and Site columns. The demand windows list can be sorted on any column. The total number of demand windows is displayed at the bottom of the table. To move between results on different pages, click  or
or  , or click a page number to go to that page.
 or
or  , or click a page number to go to that page.
2. Select a demand window by clicking a row in the table.
3. Click Select. You are returned to the tab from which you had launched the Select Demand Window window.
You can click Cancel to cancel the selection.