Customizing change note indexes
|
Time Estimates for Completion
|
||
|---|---|---|
|
You can customize the change note index so that it doesn't track the version of the model.
|
Description:
|
5 minutes
|
|
Lab exercise:
|
15 minutes
|
|
Description
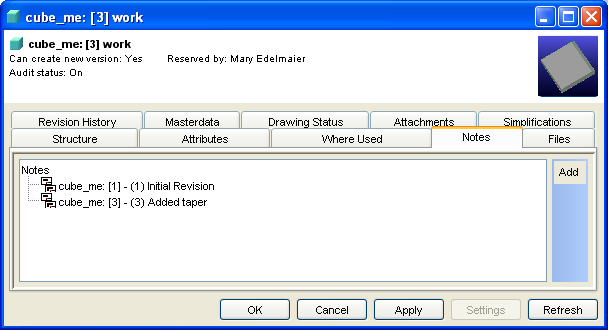
Normally, a change note's Change Index reflects the revision of the model (based on the Major Rev and Minor Rev attribute values). If you don't create a change note on a revision, and then display the model's DB Properties, the list appears to be missing an entry. In the following example, no change note was created at revision 2.
You can modify the change note index so that it automatically increments from the last used value, rather than reflecting the revision of the model. This lab uses letters for the indexes (A, B, ...).
Lab
In this lab you will add a new Java class to define the initial change note index and successive values, and you will update your acme.xml to register the new business object.
This lab assumes that you have completed the Business logic extension lab.
The major steps for customizing change notes are:
Create the new TestCustomChangeNote class
1. In NetBeans, add a class named TestCustomChangeNote to com.acme.datamgmt.biz.
2. Extend com.osm.dm.biz.DMChangeNote3D to replace the standard change note index with the customized change note index. (Click here for a file you can copy and paste into NetBeans.)
package com.acme.datamgmt.biz;
import java.util.Collection;
import java.util.List;
import com.osm.*;
import com.osm.action.*;
import com.osm.actionmenu.*;
import com.osm.biz.*;
import com.osm.datamgmt.biz.ChangeNote;
import com.osm.datamgmt.biz.VersionableDoc;
import com.osm.dm.biz.*;
import com.osm.dt.biz.*;
import com.osm.exception.*;
import junit.framework.*;
public class TestCustomChangeNote extends DMChangeNote3D {
public TestCustomChangeNote(WMSession theSession, int theHandle)
throws WMException {
super ("Acme Action");
}
@Override
protected String getChangeIndexValue(WMElement element)
throws WMException {
return getCustomChangeIndex((VersionableDoc) element);
}
private String getCustomChangeIndex(VersionableDoc owner)
throws WMException {
String customChangeIndex = "A";
ChangeNote chNote = null;
if (owner != null) {
Collection list = owner.getChangeNotes();
if (!list.isEmpty()) {
chNote = (ChangeNote) list.toArray()[list.size() - 1];
}
if (chNote != null) {
customChangeIndex = incrementCharacter(chNote.getChangeIndex(), chNote.getChangeIndex().length() - 1);
originalChangeIndex = chNote.getChangeIndex();
} else {
originalChangeIndex = customChangeIndex;
}
}
return customChangeIndex;
}
private String incrementCharacter(String s, int index) {
if ((s.charAt(index) == 'Z') || (s.charAt(index) == 'z')) {
s = changeZToA(s, index);
if (index == 0) {
s = addLeadingA(s);
} else {
s = incrementCharacter(s, index - 1);
}
} else {
char[] c = s.toCharArray();
c[index]++;
s = String.valueOf(c, 0, c.length);
}
return s;
}
private String changeZToA(String s, int index) {
char[] c = s.toCharArray();
c[index] = 'A';
return String.valueOf(c, 0, c.length);
}
private String addLeadingA(String s) {
return "A" + s; //frozen
}
}
3. Save your TestCustomChangeNote class file.
Edit the XML file to use the new business logic
Add this extension to the BASE_CHANGENOTE_3D class in the XML file.
1. In NetBeans, open your acme.xml file.
2. Copy the BASE_CHANGENOTE_3D class from wmconf.xml to acme.xml (you may need to add the <ClassDefs> tags).
3. Change the <BusinessObjectClass> from com.osm.dm.biz.DMChangeNote3D to com.acme.datamgmt.biz.TestCustomChangeNote.
4. Save the changes to your acme.xml file.
Test the code
You can run the code from NetBeans, without having to install it.
1. In NetBeans, display the dev.properties file and set run.mode to OSDM.
2. Execute the Build Main Project script.
3. Execute the Run Main Project script.
4. Create a model in Creo Elements/Direct Modeling.
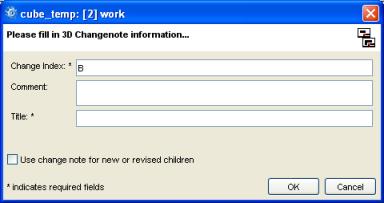
5. Save your model (right-click > ). In the Save dialog, add a change note.

6. Modify your model, then save it to Creo Elements/Direct Model Manager without adding a change note.
7. Modify your model again, then save it to Creo Elements/Direct Model Manager and add a change note.
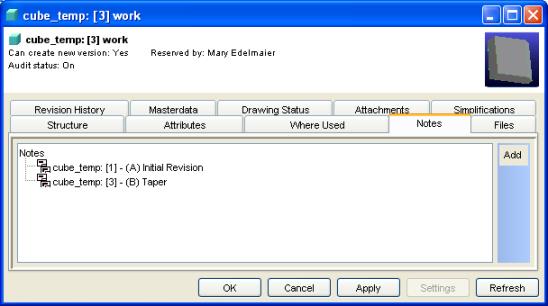
8. In Creo Elements/Direct Model Manager, open DB Properties on your model, and click the Notes tab. You can see that there are change notes on Revision 1 and Revision 3, but the change notes are numbered A and B.