Setup Flows
This section explains the setup flows for Publisher and Viewer setup.
Publisher Setup
Install the Publisher by following the steps as specified in Monolithic.
You can add a new vendor source using the Configurator. For more information, see Configuring Identity Management (IMAN).
Viewer Setup
Perform the following steps for the viewer setup:
1. Run the PTC Arbortext Content Delivery setup to Install the Viewer and select the Viewer option.

2. Select the environment mode and browse the location of the configurator xml.
The configurator xml is generated on the publisher machine at location INSTALL_DIRECTORY/InS_Data/Data/System/Config/ |

3. Enter the company name and domain.

4. Select database type and configuration.

5. Enter database user details same as specified on the Configurator.

6. Enter the MongoDB details if you want to have separate database for Viewer. Skip the MongoDB configuration if you want to use the Publisher MongoDB.

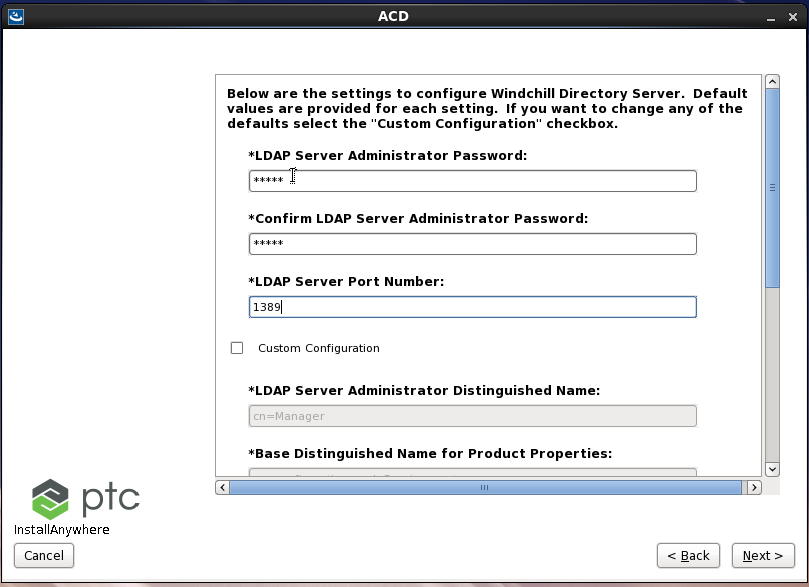
7. Enter the Windchill DS configuration details.

8. Enter the WindchillDS configuration details.
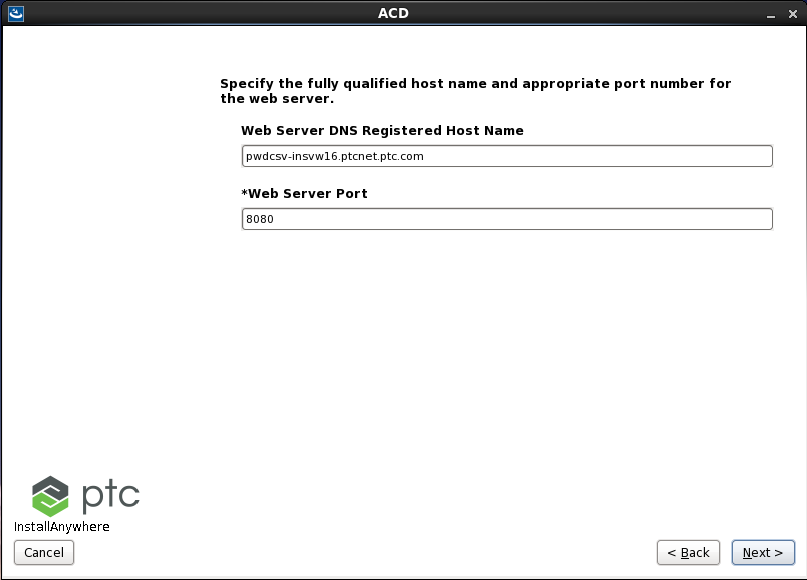
9. Enter the web server hostname and port number details.
10. Enter the SW, Data and JAVA directory details.

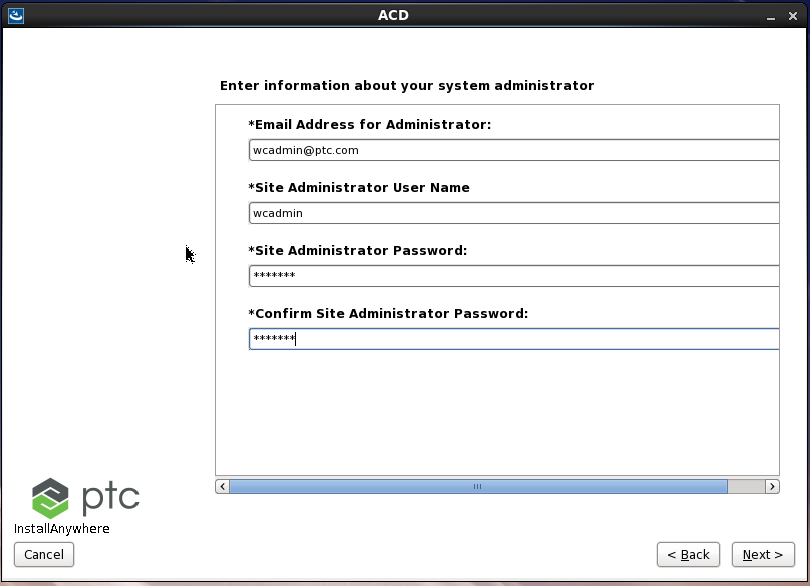
11. Enter the administrator user details.
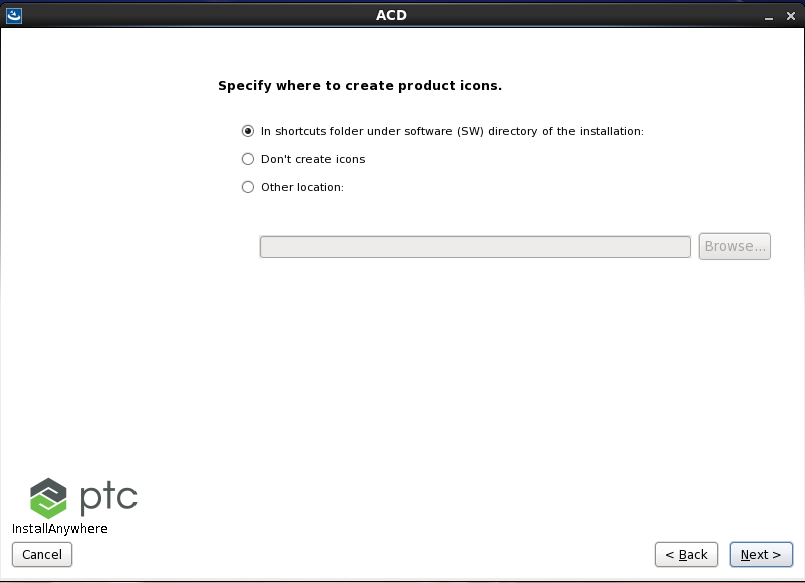
12. Enter the shortcut details.
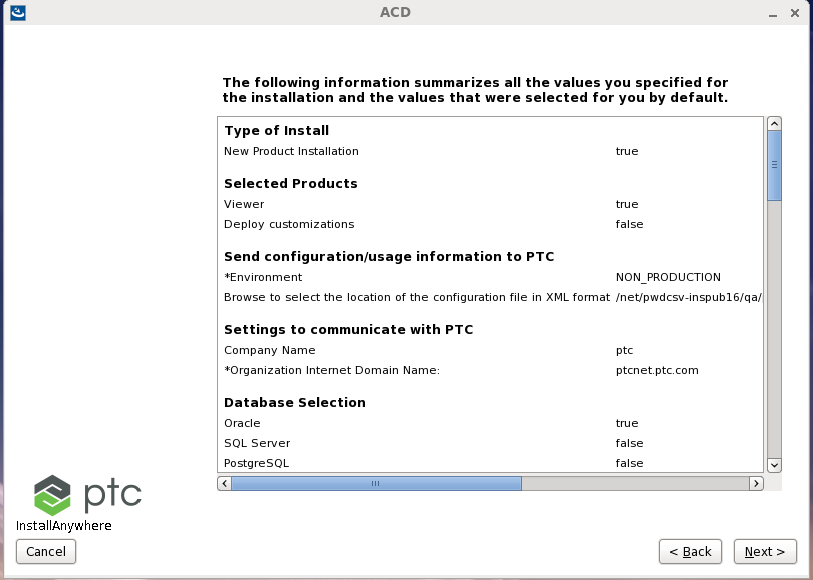
13. Review the summary details and click Next.
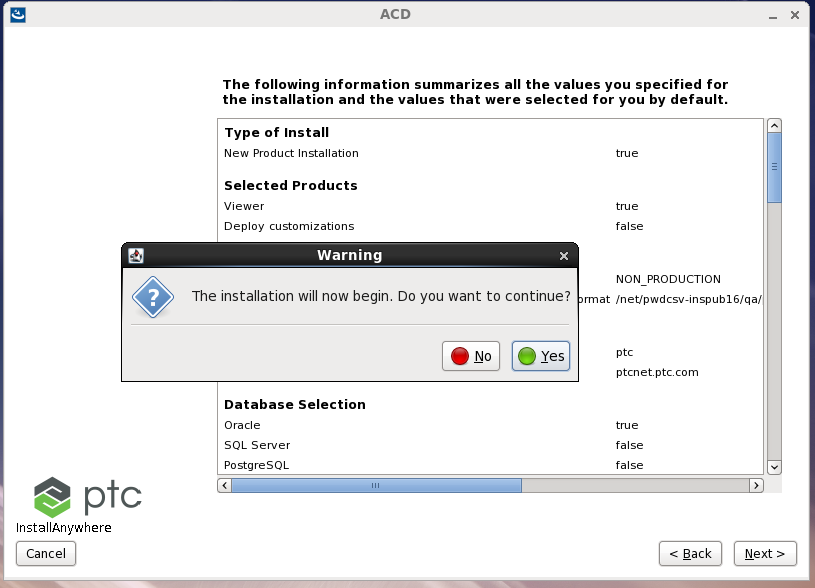
14. On the installation warning message box, click the Yes begin the installation.
15. Once the installation is complete, start the following servers.
◦ Windchill DS server
◦ CoreCMI Server
◦ Core Server
◦ Jboss Server
• You can use the same setup options for configuring as many Core servers as required (using the configurator). • If you want to use Publisher LDAP for Viewer, then in the Configurator UI, add the Publisher LDAP details for the Viewer’s LDAP entity. |
Follow these steps for configuring on the Viewer (after the first time Viewer installation):
1. for LDAP, select the Skip WindchillDS And Ldap Configuration option.

2. If you want to use the existing database details, then from the Configurator UI, modify the database details of the Viewer. Or you can select the Skip database configuration option.

3. Provide the location of the shared Data directory that you specified during primary Viewer installation.
