Previous Page 69 of 89 Next
Information

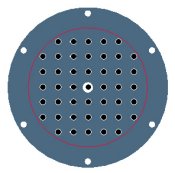
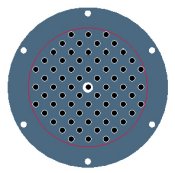
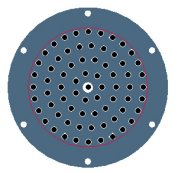
Creating Fill Patterns

A Fill Pattern allows you to pattern a feature by 'filling' the area within a selected Sketch with multiple pattern members.  There are several options for the fill pattern type, and various spacing options.  The sketch selected for the Fill pattern can be any shape, and if redefined the pattern will update accordingly - members will be added/removed as necessary.

Task 2-40. Create a fill pattern on the FLANGE_2.PRT.

  1. Click Open from the main toolbar, select FLANGE_2.PRT, and click Open.
  2. Click Datum Axes to disable their display.
  3. Click Saved View List from the main toolbar and select FRONT.
  4. Select the CTR_HOLE feature from the model tree, and click Edit > Pattern.
    1. Notice the pattern type is set to Fill
    2. Select the circular sketch feature from the model.
    3. Edit the pattern spacing to 6 in the dashboard. (Do not complete the pattern yet).


Creating a Fill Pattern

  1. Edit the pattern as shown in the following figure:
    1. Select Triangle as the pattern spacing type in the dashboard.
    2. Select Circle as the pattern spacing type and edit the radial spacing to 7.


Editing a Fill Pattern

Previous Home Next