Task 5. Create a New Assembly Drawing
|
|
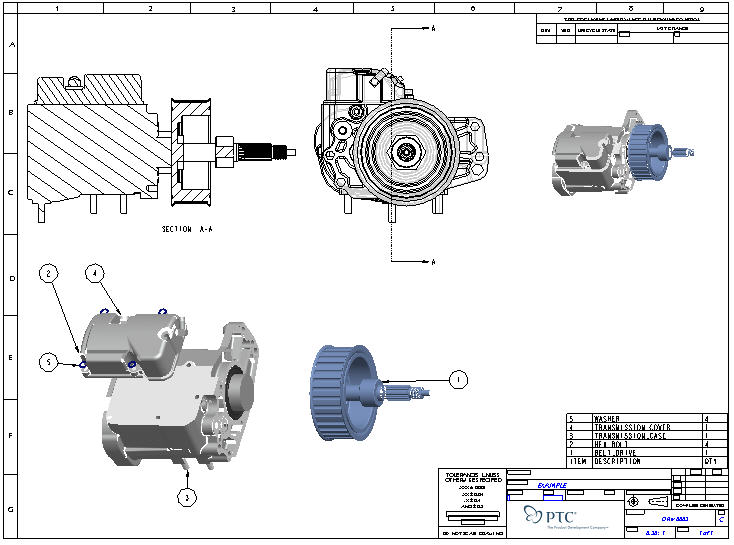
Let's create a new drawing for the example assembly we created in our "Assembly" tutorial. |
-
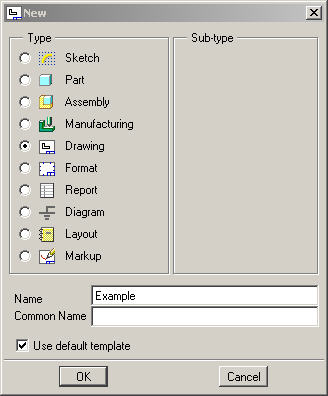
Click the New
 icon on the main toolbar.
 -
Select Drawing as the Type.
-
Type EXAMPLE for the Name.
-
Make sure Use default template is checked.
-
Click OK from the New dialog box.
-
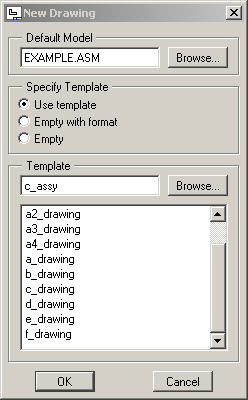
Select Browse... for the Default Model and select EXAMPLE.ASM
-
Click Open.
-
Select Browse... for the Template and select C_ASSY.DRW
-
Click Open.
-
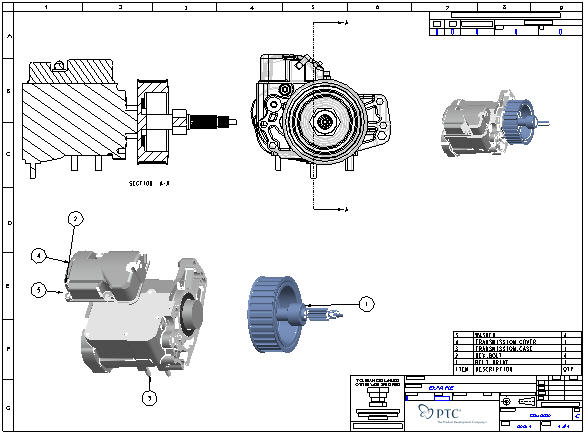
Click OK from the New Drawing dialog box. The template drawing will automatically layout the drawing.
-
If necessary, turn off the display of Datum Planes
 , Datum Points
  , and Coordinate Systems
  and Repaint

Use Redraw
from the main toolbar anytime to repaint the screen. -
Zoom in
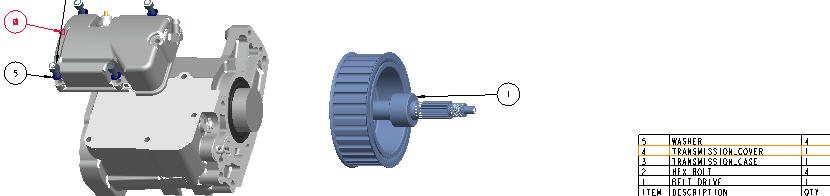
 on the lower right corner to observe the title block and the Bill of Material table.
 -
Refit
 to see the whole page
 -
Select a call-out balloon (as shown below). Notice that the component highlights in the table.
-
Select a different item in the table. Notice it will highlight the corresponding call-out.

You can clean up the call-outs/BOM balloons both manually and automatically.
-
Select the Hex Bolt call-out (#2)
-
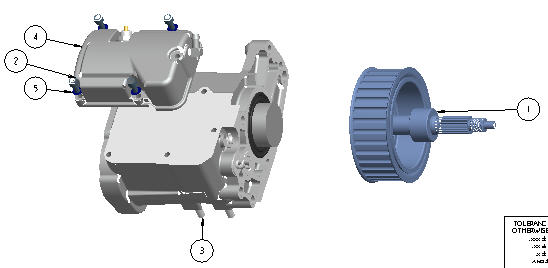
Press and hold the Left Mouse Button over the selected call-out and drag it so that its leader line does not cross any other.
-
Select the exploded view.
-
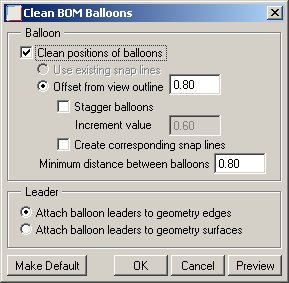
Press and hold the Right Mouse Button and select Cleanup BOM Balloons.
-
Accept the defaults and select OK to finish.
-
Click Save
 and click OK.
Congratulations! You have successfully created your first assembly drawing.