Getting an Azure IoT Hub Connector Up and Running
This topic provides a short list of expected installations before you begin. It provides an overview of the installation steps and provides a checklist that you may want to refer to as you go through the steps to get a new Azure IoT Hub Connector up and running. To upgrade an existing v.2.0.x Connector to version 3.0.0, refer to
Upgrading the Azure IoT Hub Connector from v.2.0.x to 3.0.0.
Installation overview and checklist
The following diagram presents an overview of the main steps of the installation, configuration, and testing procedures:
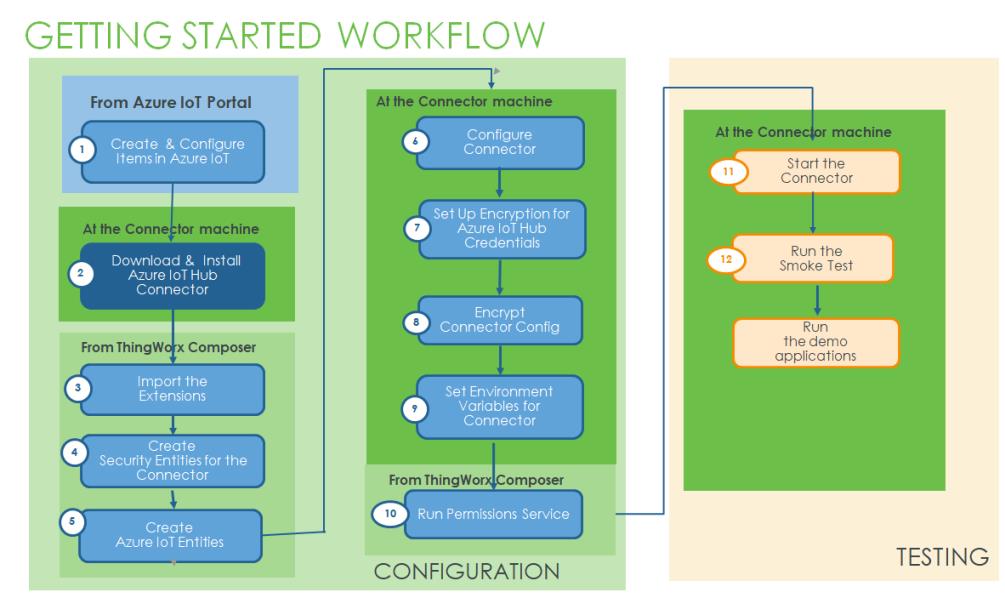
Here is a checklist that links you to the procedures to follow:
If you have used v.2.0 or earlier of the ThingWorx Azure IoT Hub Connector, keep in mind that with v.3.0 and later, you must model the Azure IoT resources in the ThingWorx Platform before starting the Connector. On startup, the Connector connects to the platform and uses the configuration of the Azure IoT Things to connect to Azure resources. |