Example: Moving 2D Geometry Relative to an Entity
You can move 2D geometry relative to other entities in the graphics window.
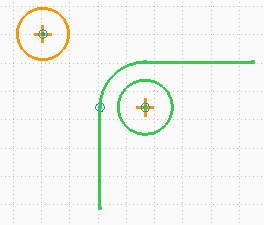
The following example shows how to move selected geometry using on-the-fly dimensions. The following figure shows the selected entities in green and other entities in orange.
|
|
 Drag a box around the entities to select the entities. |
To move the selected geometry relative to the reference circle,
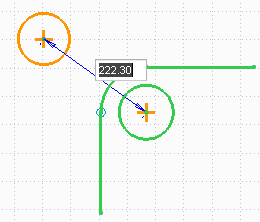
1. Move the pointer (hover) over the center of the selected circle (in green) and press R.
2. Move the pointer (hover) over the center of the reference circle (in orange) and press R. A dimension shows the distance between the two circles as shown in the image below.
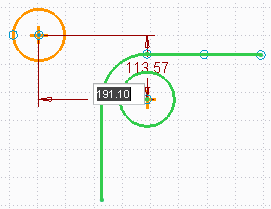
| Press SPACEBAR to show orthogonal dimensions (X and Y distances) between the two circles as shown in the following image. Press SPACEBAR again to show the distance between the two circles. |
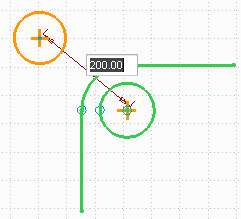
3. Drag the selected entities to move them relative to the reference circle. The dimension shows the distance as you move the pointer.
| The orthogonal dimensions show X and Y distances as you move the pointer. |
4. Place the selected entities at a desired distance from the reference circle and click anywhere in the graphics window to complete the operation.
| Type a distance value and press ENTER to fix the relative distance between the two points. You can then move the selected entities but the distance is restricted to the typed value. |