Creo Elements/Direct Modeling allows you to move a face using a linear or an angular dimension. The following procedure shows how you can move a face of a cube using a linear dimension on the cube.
To move a face using a linear dimension,
1. Click Modeling and then, in the Modify 3D group, click the arrow next to Modify.
2. Click Move. The Move dialog box opens.
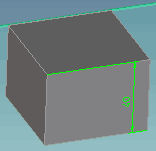
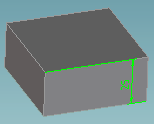
3. Click Faces and select the top face of the cube in the viewport.
4. In the Methods section, click Dimension.
5. In the Transform by Dimension section, click Dimension and select the linear dimension of the cube in the viewport.
6. Move the cursor to move the face of the cube in the viewport. The visual feedback in the viewport shows the position of the face as you move the cursor. You can also type a value to move the face in the viewport.
You can toggle between either Quick or Realistic in the Feedback section of the Move dialog box to view either quick or realistic feedback in the viewport.
• You can also select the linear dimension in the viewport (preselection mode) and drag the 3D CoPilot or type a value to move the face of the cube.
• You can click Preview to preview the model in the viewport. The final model is shown below.
7. Click to complete the operation.
The following procedure shows how you can move a face of a cube using an angular dimension on the cube.
To move a face using an angular dimension,
1. Click Modeling and then, in the Modify 3D group, click the arrow next to Modify.
2. Click Move. The Move dialog box opens.
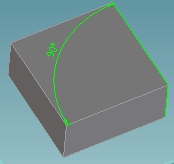
3. Click Faces and select the lateral face of the cube in the viewport.
4. In the Methods section, click Dimension.
5. In the Transform by Dimension section, click Dimension and select the angular dimension of the cube in the viewport.
6. Move the cursor to move the face of the cube in the viewport. The visual feedback in the viewport shows the angle as you move the cursor. You can also type the angle to move the face in the viewport.
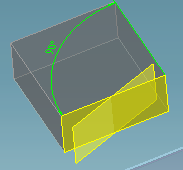
7. Alternatively, to move the face using Rotate Point:
a. In the Transform by Dimension section, click By Rot. Point.
b. Type a value for the angle of rotation. The angle is measured between the two faces that are referenced by the angular dimension.
c. Click Rotate Point and select a rotate point in the viewport. The rotate point allows you to move the rotation axis to the new rotate point. The visual feedback in the viewport shows the face at the specified angle relative to the fixed face without the 3D CoPilot dragger as shown below.
You can toggle between either Quick or Realistic in the Feedback section of the Move dialog box to view either quick or realistic feedback in the viewport.
• You can also select the angular dimension in the viewport (preselection mode) and drag the angular 3D CoPilot or type a value to move the face of the cube.
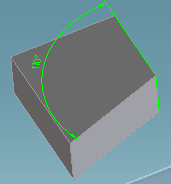
• You can click Preview to preview the model in the viewport. The final model is shown below.
 Modify.
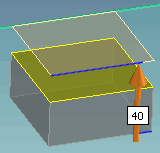
 to complete the operation.