Feature Recognition
|

|
New Feature Recognition Toolkit (FRT) enables the selective conversion of imported model geometries to certain classes of native Pro/ENGINEER features such as holes, rounds, chamfers, and extrudes. This greatly extends the value of imported data by enabling easy modification using familiar parametric techniques.
This is available free for customers active on maintenance from the Free Downloads Resource Page. |
- Set Working Directory to FRT
- Open
 , set Type to All Files (*) and select frt_tutorial.stp.
- Select OK and select Close from the Information Window.
|

|
At this point the model is just a 'dumb' solid and cannot be parametrically modified. |
- Start the Feature Recognition Toolkit Application:
- Tools > Auxiliary Applications from the main menubar
- Select "Feature Recognition..."
- Click Start button
- Confirm successful start in the Message Area
- Click Close button
|
|
Notice the new toolbar with the tools we will use to recognize features. These commands are also accessible from the Edit menu.

|
Proceed to the exercises:
Extrudes using the Intelligent Extrude Search
- Extrude As Solid
- Extrude As Blind Cut
- Extrude As Thru Cut
Intelligent Extrude Search Tool: Extrude As Solid
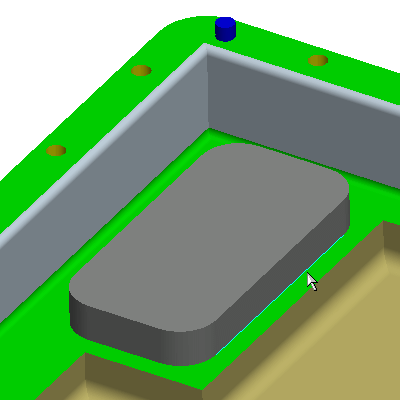
1. Select the Intelligent Extrude Search  and select the bottom edge of the grey Extrude as shown.
|
|
Notice that it was replaced with a 'default color' extrusion of the same dimensions. |
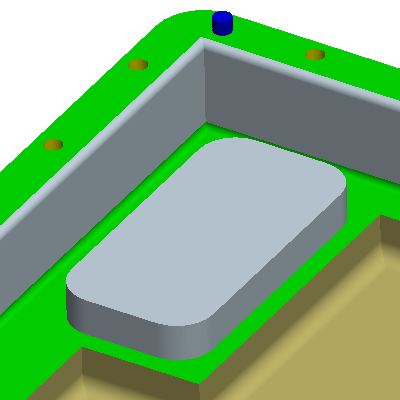
Also notice the Model Tree as added a Remove Feature and an Extrude Feature. The Remove feature is new in this release, and can remove geometry. The feature then recreates the extrude using standard extrude feature.
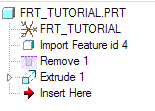
2. Select the Extrude 1 feature and Right-Click to select Edit.
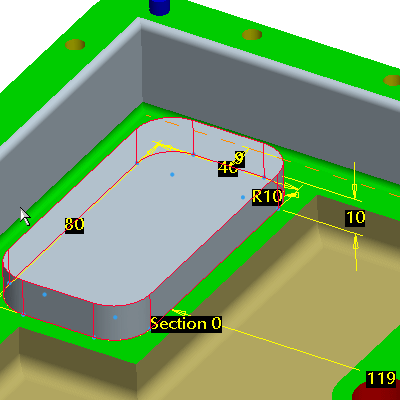
3. Flex the design by editing any dimension values.
|

|
This native feature has a fully parameterized internal sketch, and you can use Edit Definition to fully control the dimensioning references, scheme, and constraints. |
You have completed this Exercise, continue to Next Page.
Intelligent Extrude Search Tool: Extrude As a Blind Cut
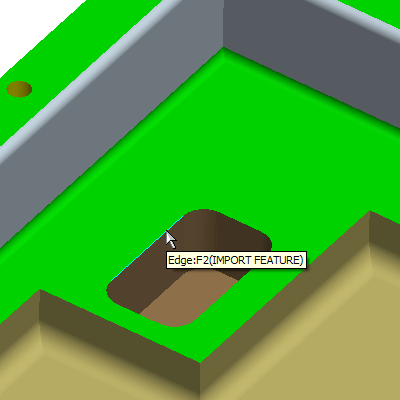
1. Select the Intelligent Extrude Search and select and edge of the pocket as shown.
|
|
This will create a Blind Extruded Cut. |
Intelligent Extrude Search Tool: Extrude As a Thru Cut
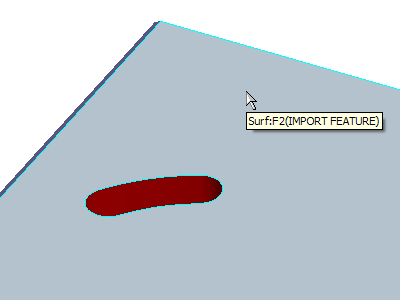
2. Select the Intelligent Extrude Search and select the bottom surface as shown.
|
|
This Intelligent Search Tool is smart enough to find all enclosed loops and recognizing them as extrudes. |
You have completed this Exercise, continue to Next Page.
Fillets using the Intelligent Fillet Search
- Simple Convex Fillets
- Simple Concave Fillets
- Multiple Fillets at Once
Intelligent Fillet Search: Simple Convex Fillets
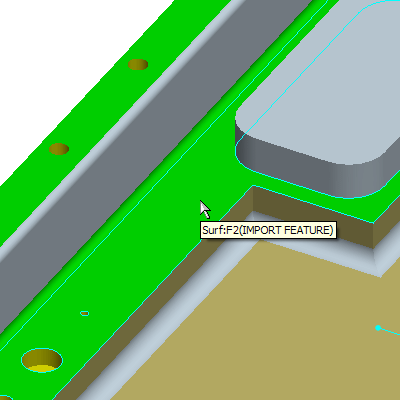
1. Select the Intelligent Fillet Search Tool  and select the top 'green' surface.
Intelligent Fillet Search: Simple Concave Fillets
2. Select the Intelligent Fillet Search Tool and select the bottom 'brown' surface of the pocket as shown.
Intelligent Fillet Search: Multiple Fillets at Once
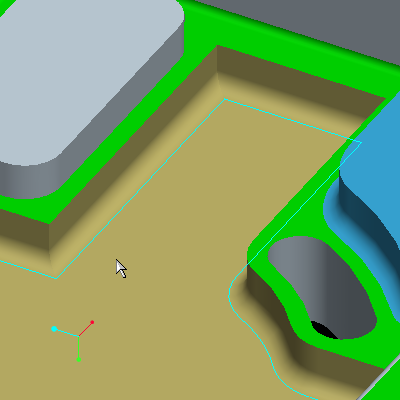
3. Select the Intelligent Fillet Search Tool and select the bottom green surface of the large pocket as shown.
|
|
Note that (2) round sets were created. The tool is smart enough to find all associated rounds to the plane selected, regardless of whether concave or convex rounds existed. |
You have completed this Exercise, continue to Next Page.
Holes using the Intelligent Hole Search
- Intelligent Hole Search - multiple sized holes on a plane
- Intelligent Pattern Search
Intelligent Hole Search: Multiple sized holes on a plane
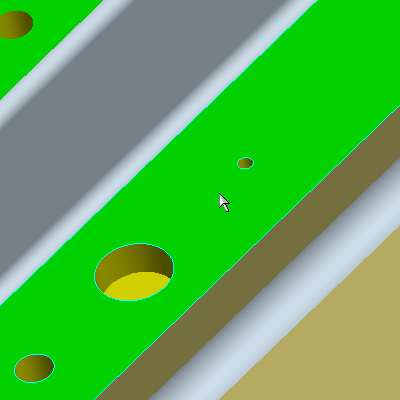
1. Select the Intelligent Hole Search Tool  and select the top 'green' surface as shown.
|
|
Notice it found all holes regardless of Diameter and Depth and created 3 separate Hole Features. |
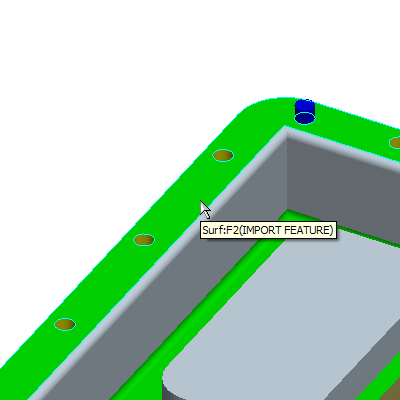
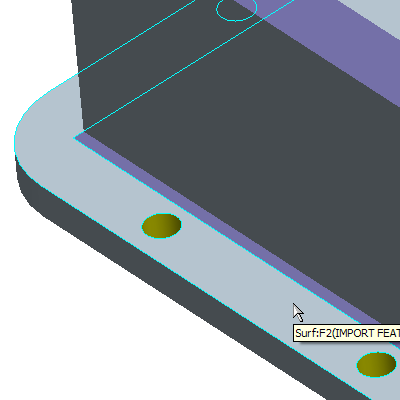
2. Select the Intelligent Pattern Search Tool  and select the surface of the Lip as shown. Close the info window that appears.
|
|
In this case the tool will find all the holes on this surface and remove and replace them with a hole pattern. |
You have completed this Exercise, continue to the Next Page.
Chamfers using the Intelligent Chamfer Search
- Concave Chamfers
- Convex Chamfers
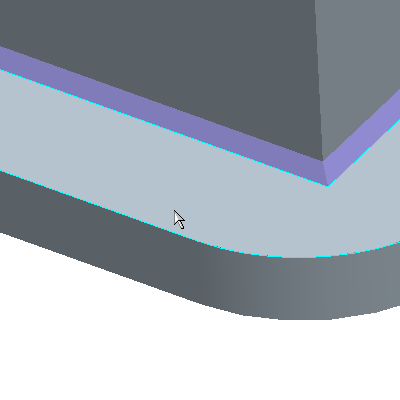
Intelligent Chamfer Search: Concave Chamfers
1. Select the Intelligent Chamfer Search Tool  and select the bottom Surface as shown below.
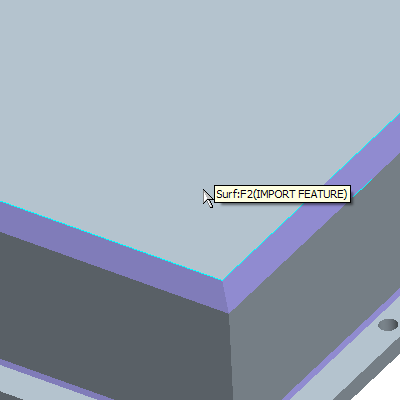
2. Select the Intelligent Chamfer Search Tool and select the surface of the Lip as shown.
You have completed this Exercise, continue to Next Page.
At this point, inspect the Model Tree:
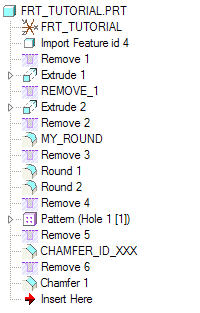
You can see the features that were created. Feel free to edit any feature.
Please stop the FRT plug-in before continuing.
- Tools > Auxiliary Applications
- Select Feature Recognition...
- Click Stop, then Close
You have completed the Feature Recognition Tutorial.