Task 4. Assemble the transmission cover
-
Click Datum Planes
 in the main toolbar to display the datums for assembly.
 -
Select Component Assemble
 icon in the right side toolbar.
 -
From the Open dialog box, select TRANSMISSION_COVER.PRT as the part to assemble and select Open. The transmission cover model will appear in the graphics window in yellow to represent the part being assembled.
-
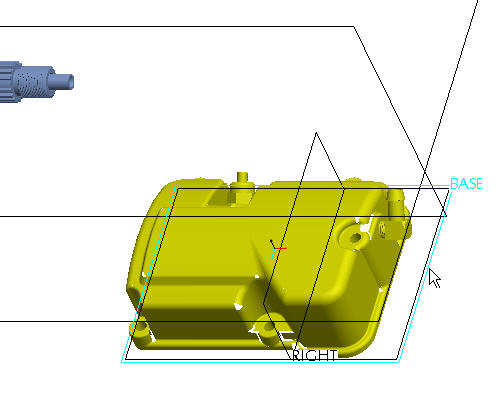
Select the BASE datum plane for a reference on the cover as shown in the figure below.
-
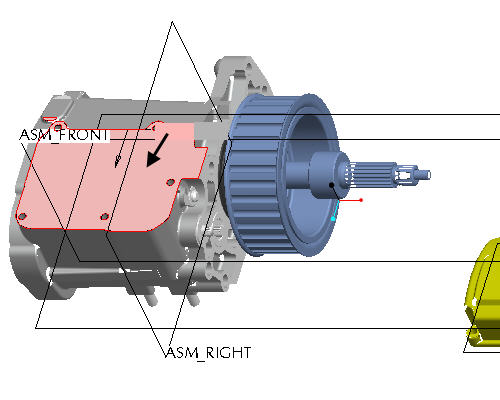
Select the top of the transmission case to align to as shown in the figure below. Notice how the part has now moved to align the selected surfaces as the first constraint.
-
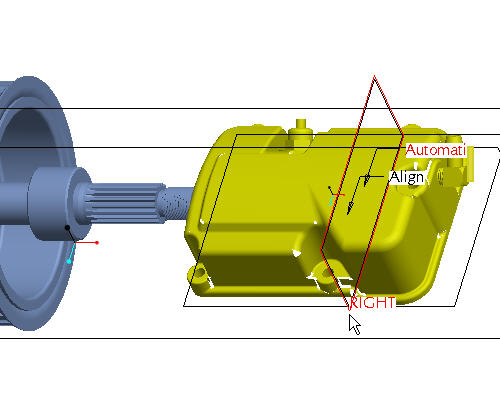
Select the RIGHT datum plane on the cover as shown in the figure below.
-
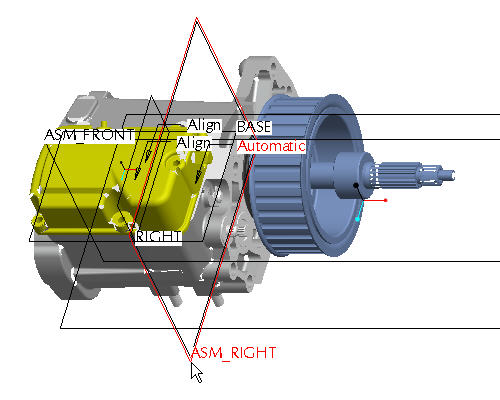
Select the ASM_RIGHT datum plane to as shown in the figure below. Notice how the cover now snaps over into alignment as the second constraint.
-
Click Datum Planes
in the main toolbar to display the datums for assembly.
|
|
The transmission cover will use three placement constraints to FULLY CONSTRAINED the component in all three degrees of freedom. |
|
|
The |
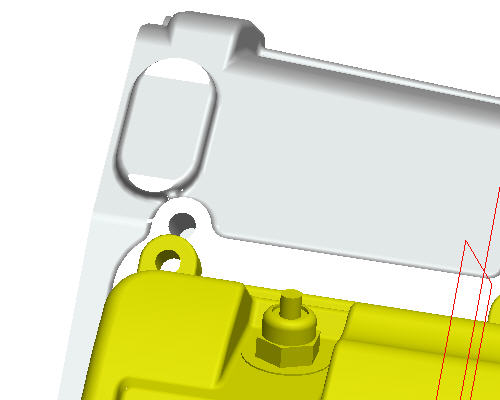
- Orient the model to better select the upper left holes on the transmission_case and the transmission cover. Roll the scroll button toward you to zoom in. Use SHIFT + MIDDLE-DRAG to pan the model to the center of the screen. Use MIDDLE-DRAG to rotate the model.
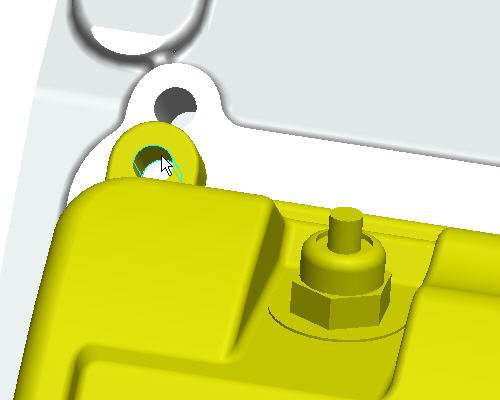
- Select the hole on the transmission cover as shown. The surface should turn red after selection.
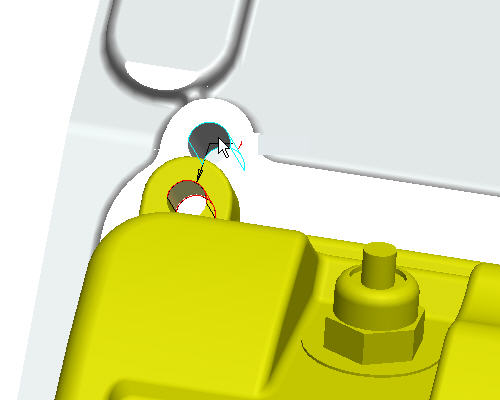
- Select the corresponding hole in the transmission case as shown in the figure below. Notice how the cover now snaps into place as the final constraint.
- Select Complete Component
 to finish the placement of the cover.
- Select Repaint
 icon on the main toolbar.
- Select CTRL+D to reorient the model into the default orientation.