Inserting and Modifying Attachments
When an Attachments field is shown in a table or form, you can insert external files as attachments. All files inserted as attachments are copied into a folder so that you can open them from Windchill Risk and Reliability. The following figure shows Attachments, Incidents. In this example, the field has no attachments. The text for it is red only because the active record in the table is for an open incident. In the Options window, > specifies the color in which to display all open incidents. The default is red. For more information, see FRACAS User Options.

1. Click the Attachments field. If the data in this field can be modified, an attachment button becomes available.

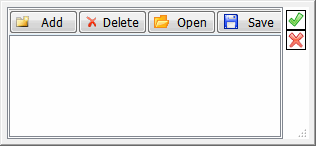
2. Click the attachment button. A window opens for inserting, deleting, opening, and saving attachments. For descriptions of tool buttons in this window, see Tool Buttons for Attachments.

3. For each attachment to insert, do the following:
a. Click Add. The Open window opens. The default for Files of type is All Files (*.*).
b. Use the options in this window to navigate to and select the file.
c. Click Open. The name of the selected file is added to the window.
4. To delete, open, or save an attachment, use the other buttons in the window.
5. When finished, click the green checkmark to save your changes and close the window.
If your administrator has blocked the file type of the attachment you are trying to insert or open, a window opens, displaying an error message that explain why you cannot add or open the selected file. |
Files are copied into the standard Attachments folder unless you have specified a custom folder for > in the Options window. For more information, see Directories User Options.
• For the Enterprise Edition, the standard Attachments folder is created in the installation directory on the application server. The directory path for this folder is C:/Program Files/PTC/Windchill Risk and Reliability Version/Windchill Risk and Reliability/Attachments.
• For the Team Edition, a standard Attachments folder is created within each Project folder. By default, Projects are created in the My Windchill Risk and Reliability Files folder in your local documents area. The directory path for a Project’s Attachments folder is My Windchill Risk and Reliability Files/VERSION/PROJECT_NAME/Attachments.
If these files are large, a window opens, indicating progress as they are copied. Clicking Stop in this window cancels the copy procedure.
As files are copied into the folder, they are assigned random names. For example, a file named image1.jpg might be assigned a name of 5FD069ECEFF8407DA5F913CC23B47443.
Once all files are copied to the folder, Attachments displays the total number of attachments that have been uploaded and linked to this field. To make modifications, you click the field’s attachment button to open the window in which you insert, delete, open, and save attachments.

If > is selected in the Project properties for an Enterprise Project, modifications that you make to Attachments fields are tracked in Audit Trail files. For more information, see Audit Trails (Enterprise Edition Only). When you add, delete, open, or save an attachment, the Audit Header record logs the IP address of your machine. Additionally, the Audit Detail record logs the name of the attachment file, the display text of the record on which you performed the action, and the name of the table in which the record is stored. For more information, see Audit Trail Header and Detail Records.