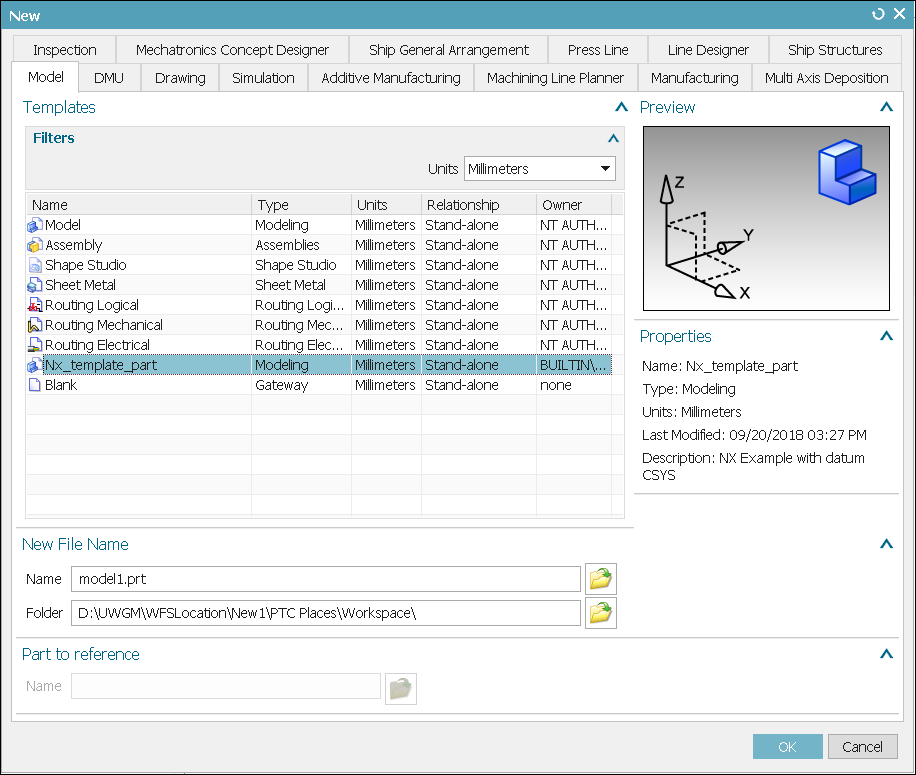
Creating a Default NX Template using Windchill File System
Windchill File System (WFS) allows you to create a new default NX template that is saved in Windchill. The steps to create a default NX template are as follows:
1. In
Windchill, from the Library option, click

to create a new library.
2. Navigate to Preference Management utility and configure the WFS Template Folder preference to specify the path of the newly created library.
3. Create a part with some template geometry.
4. Save and check in the part to the library location specified in the WFS Template Folder preference.
5. Remove the created part from workspace.
6. Open the .pax file in the templates directory located at %UGII_BASE_DIR%\ugii.
7. Copy the PaletteEntry section and insert it where you require it to appear in the template list in the .pax file (ugs_model_templates.pax). A sample of the PaletteEntry section is given below.
8. Enter the file path of the WFS Template Folder for the created part in the <Filename> attribute.
9. Edit other attributes as per your business requirement. For example, Presentation and Objectdata.
10. Save the .pax file.
11. Restart NX.
The new template is displayed in the New dialogue box.
| You can create new parts using the default templates. |