Import to Workspace
The Import to Workspace command allows you to import multiple CAD documents and their references from the file system to the active Workspace. The Import to Workspace command uses the Autodesk Inventor application in non-graphical mode to import CAD documents. Before starting the import action, the Windchill Workgroup Manager client closes all the CAD documents in the Autodesk Inventor session. If Autodesk Inventor is not running, it will be started by the Windchill Workgroup Manager client.
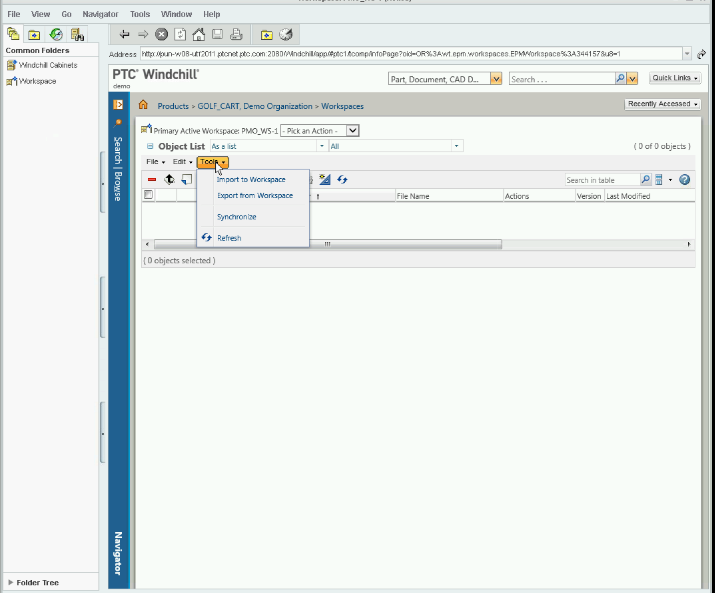
To import to the Workspace:
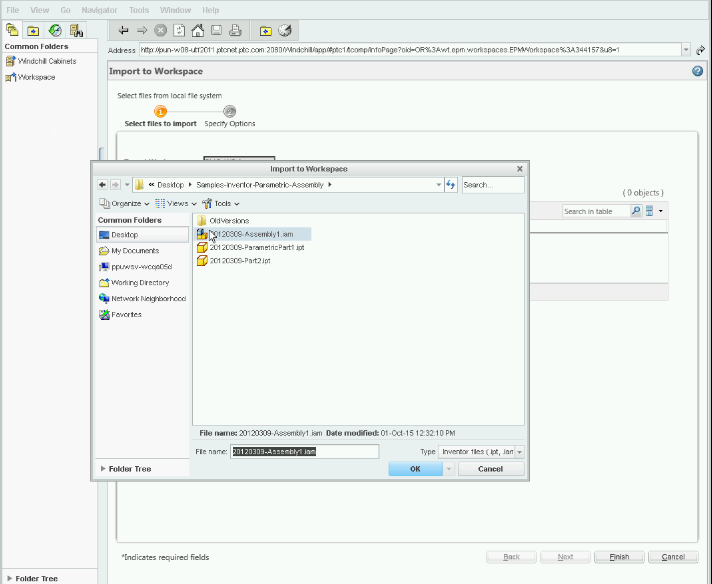
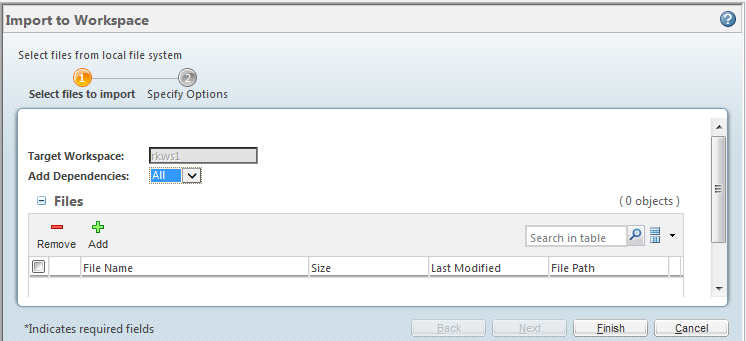
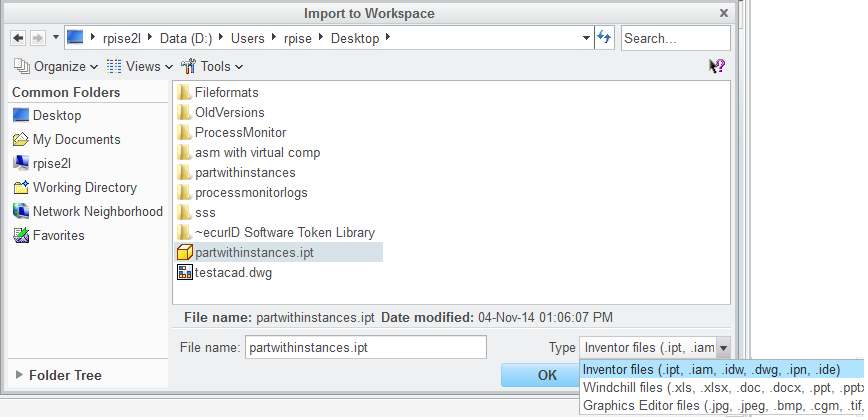
1. In the Windchill Workgroup Manager client, select > . The Import to Workspace window opens. The Target Workspace box shows the active Workspace.
2. Click

to select files from your local file system. The selected files are added to the
Files table in the
Select files to import page.
| Ensure that the value in the Type field is Inventor files. This allows you to import all supported Autodesk Inventor file types to be imported. |
3. Optionally, select a file and click

to remove that file from the
Files table if you do not want to import the specified file.
4. In the Add Dependencies box, either select All (default), or None to set a rule for the dependent objects to be collected.
5. Optionally, click Next. The Specify Options page opens. This page confirms the list of objects and allows you to specify additional options (for example, Location).
6. Click Finish to complete the operation.
| Import of an Autodesk Inventor iPart may fail if the Space character “ “ is present at the end of the file name. |
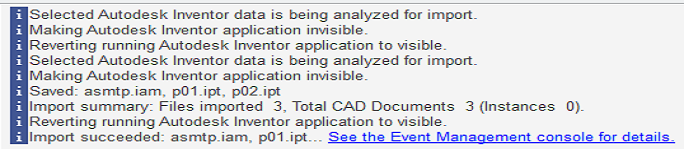
The Windchill Workgroup Manager client message area displays the import status. On a successful completion, the import summary displays the following items:
• Total files imported
• Total CAD documents
• Instances imported
If the CAD documents being imported have references which cannot be found by
Autodesk Inventor (which may happen if files are missing or only the seed object, for example an assembly, is selected for import with
Add Dependencies set to None), these objects are called Incomplete CAD Documents and are represented by the

icon. To resolve these incomplete CAD documents, you must either import the missing files from the file system, or if the files already exist in
Windchill, you must follow the steps listed in
Resolving Incomplete Dependents.
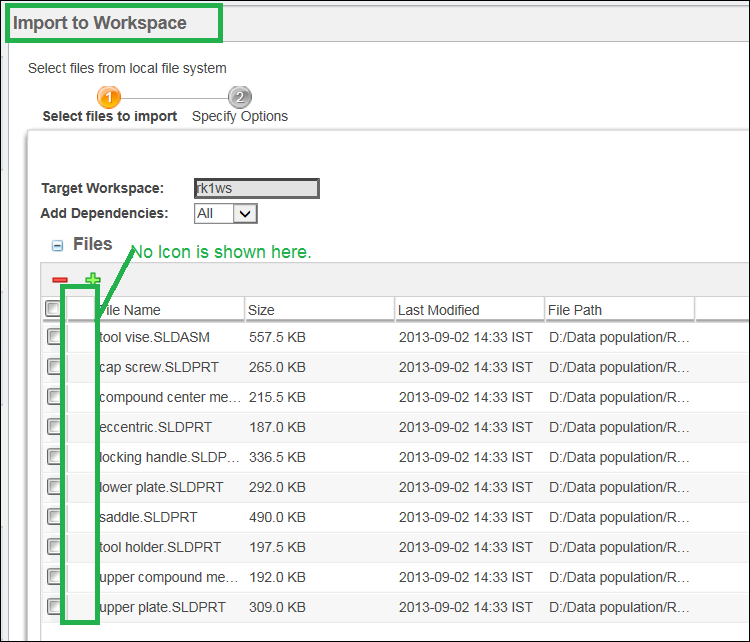
| The CAD icons do not appear in the Select files to import step in the Import to Workspace operation as shown in the following image |
Best Practices
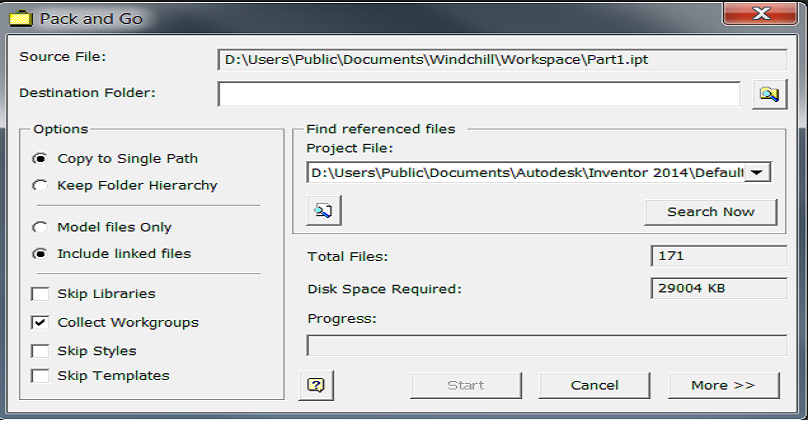
• It is recommended that all files (the seed and its dependents) be available in a single directory. This helps to avoid duplicate files under different folders and missing file references. To copy files from multiple directories to a single directory, you must use the Pack and Go command in Autodesk Inventor. Do not use the Windows Explorer Copy or Cut and Paste commands.
• It is recommended that you add the directory paths under Workgroup Search Paths ( > > ) to point to the directories from which the files are to be imported. You can add multiple directory paths.
• Issues during rebuild must be fixed before import.
• Preferably select only seed objects and import with the Dependents=All options. Select Finish if you do not intend to modify the dependencies during import.
• If you select seed along with its dependents to import, you may use the Dependents=None option.
• Ensure that the objects are updated to the current Autodesk Inventor version before import.
| It may be possible that the large assemblies are too large to be opened with their dependant. In such cases, use Dependents=None and import the objects in small batches. |
For more information, see
Importing to the Workspace.
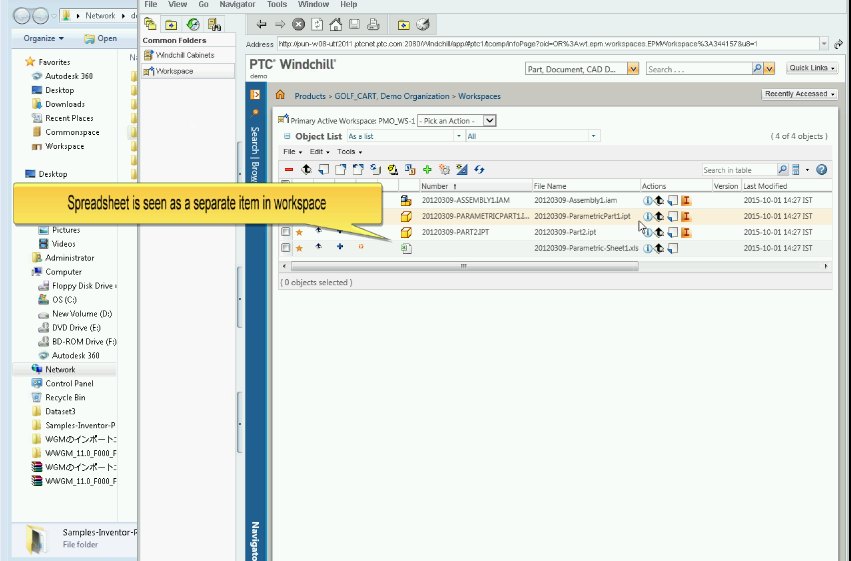
Managing Spreadsheets Related to Autodesk Inventor Models as CAD Documents
Beginning at 11.0 F000, you can manage Microsoft Excel Spreadsheets that are referenced by Inventor Models as separate documents rather than as secondary content. Using Import to Workspace, you can save Excel spreadsheets and display them as References in Windchill.
1. From the Windchill workspace, access > .
2. From the
Files table, click
. Navigate to the location of the assembly, select the assembly, and click
OK.
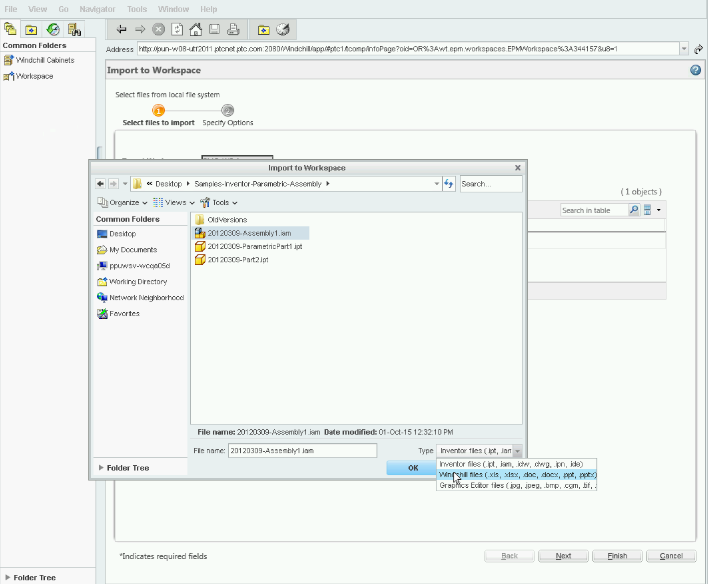
3. Click
. Set the
Type field to
Windchill files. Click
OK.
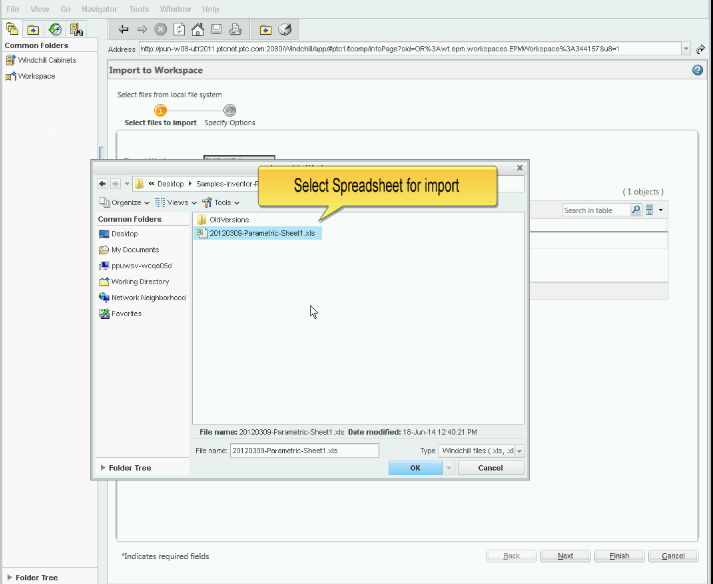
4. Select the spreadsheet to be imported and click OK. Click Finish.
5. Windchill imports the spreadsheet, and it appears as a separate line item in the workspace.
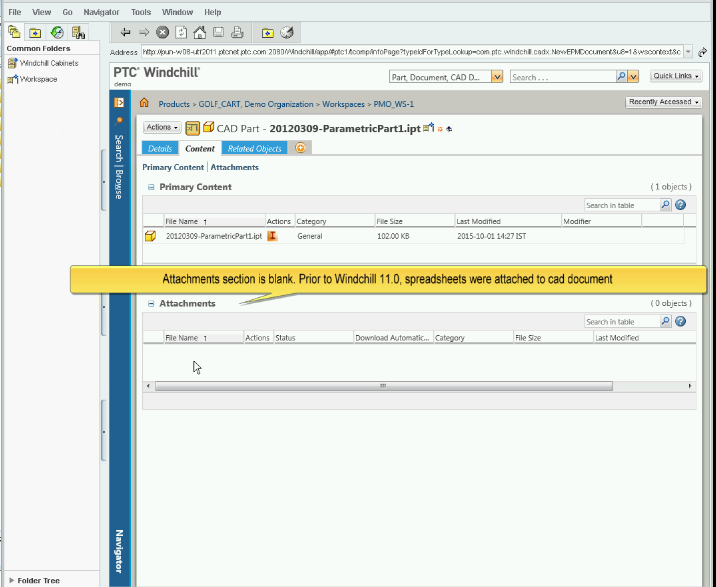
6. Open an Autodesk Inventor part to display the Attachments table. Prior to Windchill 11.0 F000, spreadsheets were attached to the CAD Document.
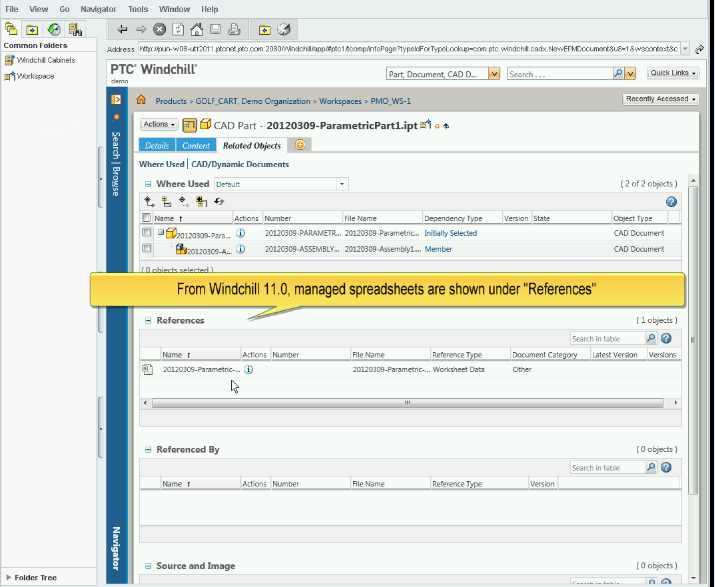
7. Click the Related Objects tab of the Autodesk Inventor part. At Windchill 11.0 F000, managed spreadsheets are displayed as References.
| When performing a Save to Workspace of an Autodesk Inventor file with a linked Excel spreadsheet, the message “Close active document and open the saved files from active workspace” appears in the client area. You must close and reopen the file from the Workspace before performing any changes to the spreadsheet; otherwise, changes will not propagate to the Autodesk Inventor document open in session. |
| When importing family table datasets and modifying the generic with new instances, ensure that you save the generic before you execute the Generate Files command to save new instances. |
| If a part and its linked Excel spreadsheet are in the workspace, and the Excel spreadsheet is modified and saved, it will not be checked out on the fly, but instead is checked out privately. You must explicitly check out the spreadsheet using > . It is also suggested to check out the spreadsheet before modifying any of its parameters. |

 > > ) to point to the directories from which the files are to be imported. You can add multiple directory paths.