Working With Autodesk Inventor Cable and Harness Module In Windchill
Windchill 11.0 M020 onward, the Cable and Harness module of Autodesk Inventor is supported in Windchill Workgroup Manager.
With support for Cable and Harness module of Autodesk Inventor, you can create Cable and Harness components in Autodesk Inventor and then manage the components in Windchill Workgroup Manager. For information about creating components such as cables, wires, splices, ribbon cables, see Autodesk Inventor help.
To create a cable and harness assembly,
1. In an Autodesk Inventor assembly, click > > .
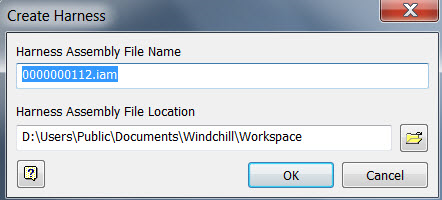
The Create Harness window appears with Harness Assembly File Name and Harness Assembly File Location fields populated. The file location is set to default Windchill workspace. The Harness part and assembly number is auto-generated by default. The Harness part gets an incremental number as shown in the following images.
|
|
The Harness part number in Autodesk Inventor structure is not updated in the user interface.
|
If the Windchill Workgroup Manager is connected to Autodesk Inventor, the Harness Assembly File Name will be named as per the following rules:
◦ If Windchill CAD Document Auto-numbering is ‘ON’, their names follow the auto-numbering scheme (auto-generated number).
◦ If the Windchill CAD Document Auto-numbering is ‘OFF’ or if the preference Synchronize Number and File Name is ‘No’, their names follow the Autodesk Inventor naming convention:
▪ Harness part file name will be Cable and Harness.Harness1.ipt.
▪ Harness assembly name will be Cable and Harness.Harness1.iam.
◦ If you click the Cancel button and then relaunch the Cable and Harness window, new names are generated and auto-number gets incremented.
◦ If you click

on the
Cable and Harness window, the Inventor ‘Save As’ window appears and auto-number gets incremented.
| Do not change the save location for the Harness Assembly File Location. |
| Standalone Autodesk Inventor creates a particular folder structure runtime while creating Cable and Harness data. When Windchill Workgroup Manager is connected to Autodesk Inventor, all the components are created in Windchill workspace. |
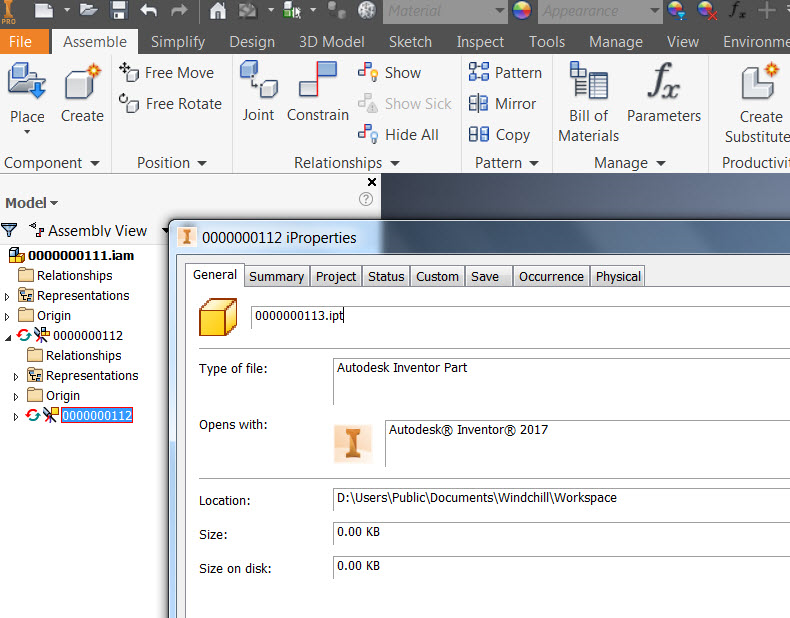
2. Click OK on Create Harness window to close it. The assembly and part names are as per the auto-generated number as shown below:
3. Under Cable and Harness, you can create Cables, Wires, Segments, Splices, Ribbon Cables, and Folds (on Ribbon Cables). For information about creating Cable and Harness components, see Autodesk Inventor help.
4. After creating the required Cable and Harness components, click Finish Harness and Assembly and save the assembly. All the Cable and Harness components such as Cables, Wires, Segments, Splices, Ribbon Cables, and Folds (created inside Ribbon Cables) are created under the Cable and Harness Assembly and part.
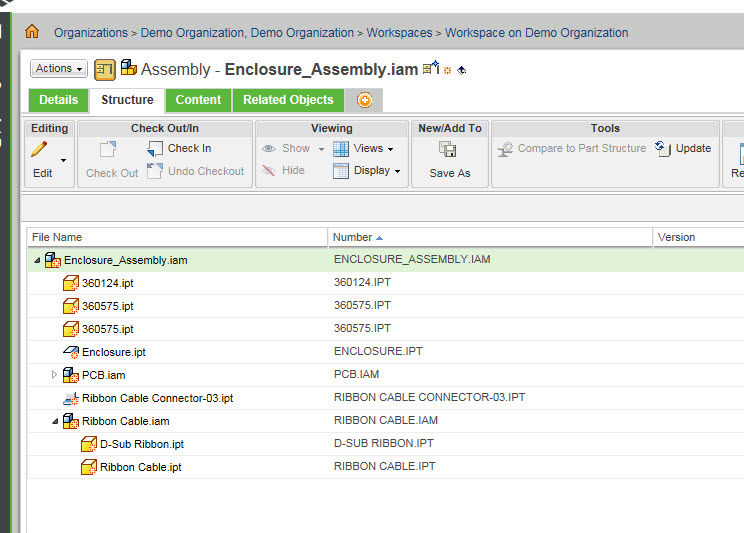
The following image shows the structure in Windchill Workgroup Manager.
| BOM support of Cable and Harness data set is currently not a part of Windchill Workgroup Manager functionality. |
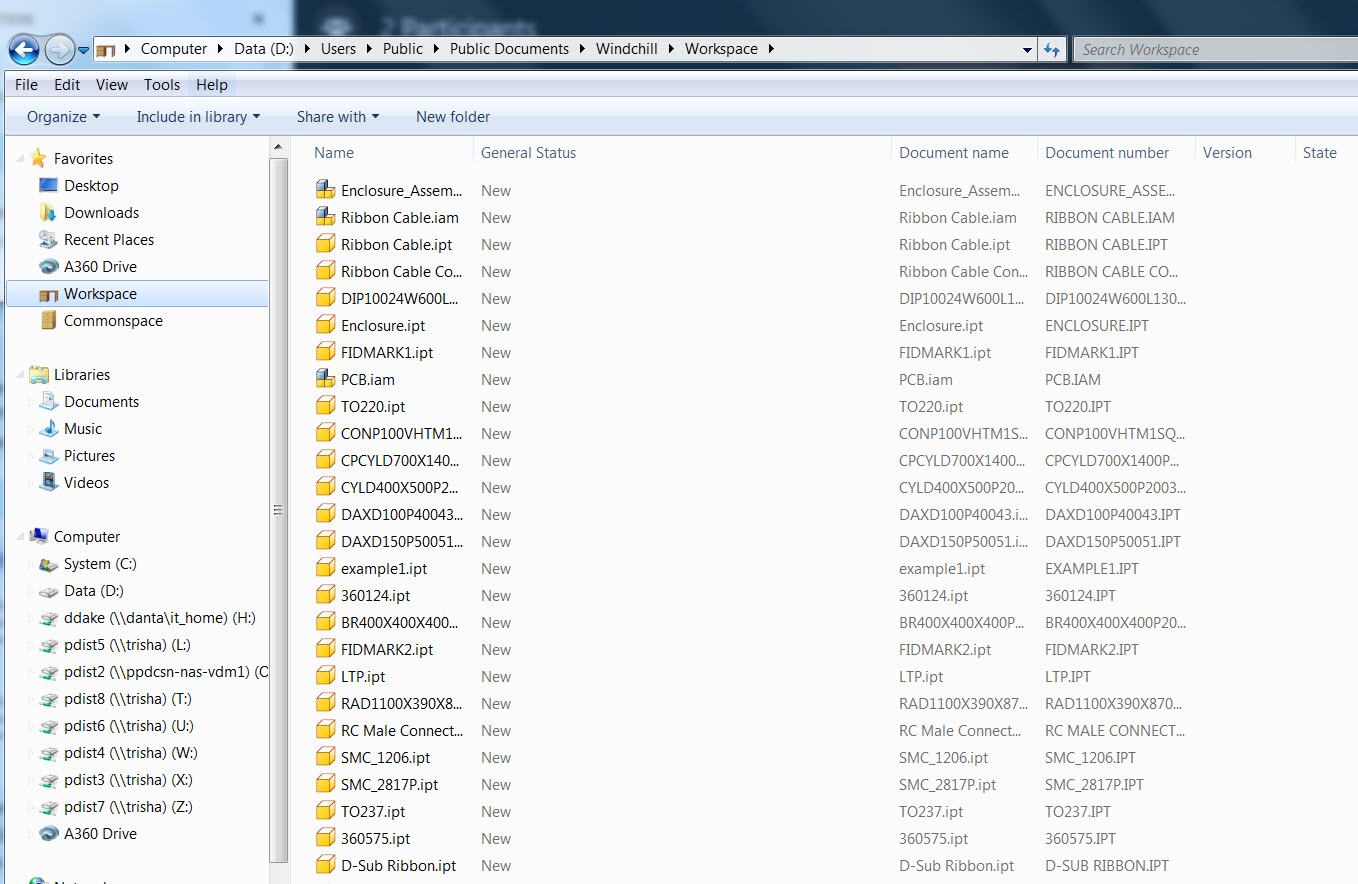
After save of the main assembly, the Windows explorer shows all the files in the Workspace location as shown below.
Limitations
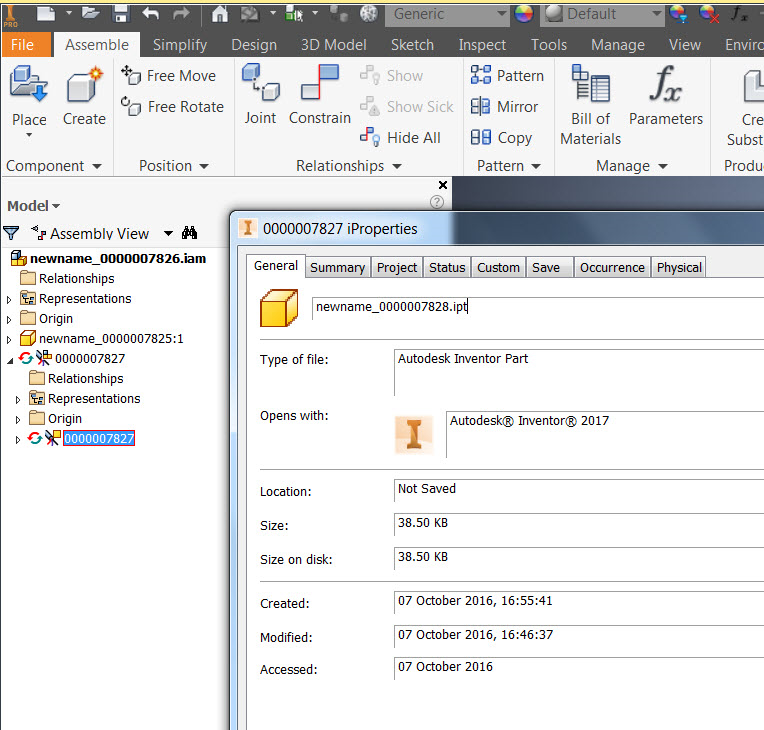
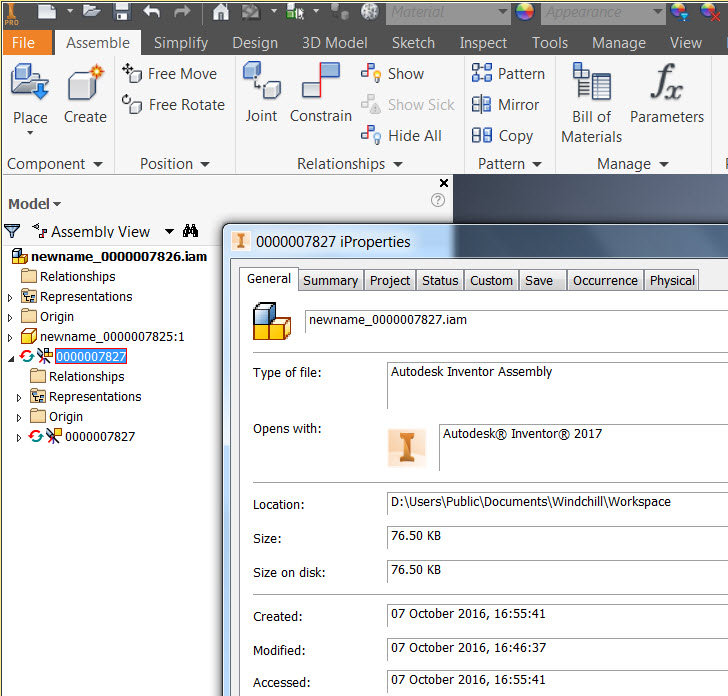
• For an Autodesk Inventor Cable and Harness assembly that is created using ‘Save As’ and ‘Rename’ commands from Windchill, the occurrence names of Harness sub-assemblies and Harness parts are not updated after you close, update, and then reopen the updated assembly in Autodesk Inventor.
Using ‘Save As’ or ‘Rename’ commands, if you change the names of the Harness part and assembly to newname_0000007828.ipt and newname_0000007828.ipt respectively, the Autodesk Inventor part and assembly names in the Model Tree are not updated as shown in the following examples.
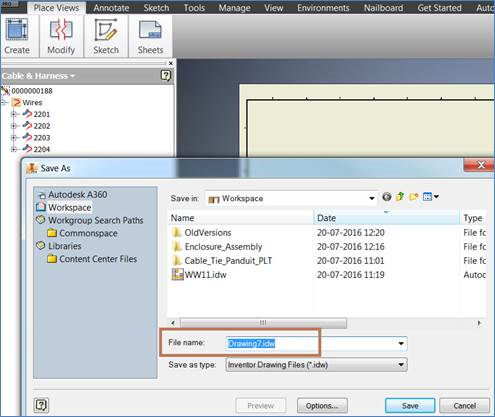
• If you create a 2D drawing of a Cable and Harness assembly using Nailboard command, the drawing does not inherit the harness assembly file name. In the following example, ‘Drawing7.idw’ name is automatically assigned to the drawing that is created using Nailboard command.
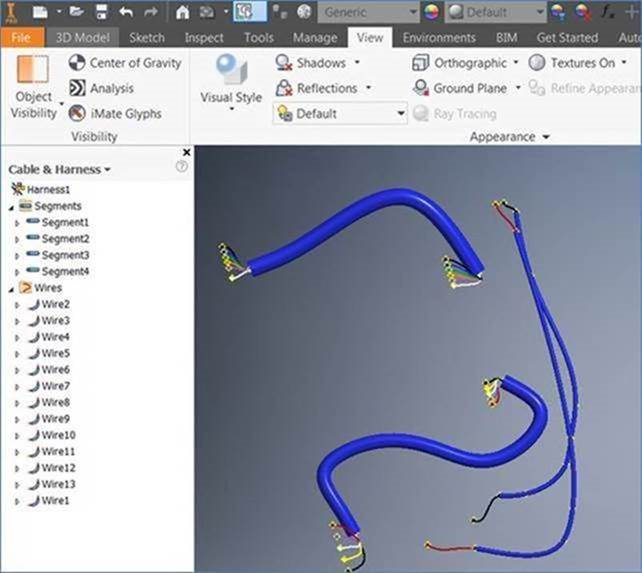
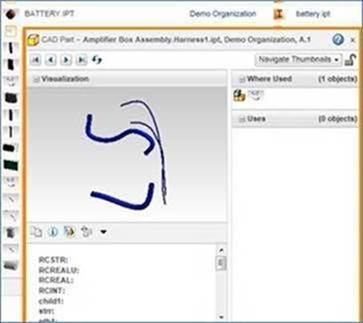
• Viewable of a Cable and Harness assembly does not display wires and cables. It displays only segments as shown in the following images.
Figure 6. Cables, Wires, and Segments in Autodesk Inventor
Figure 7. Thumbnail of the Harness Assembly showing only segments
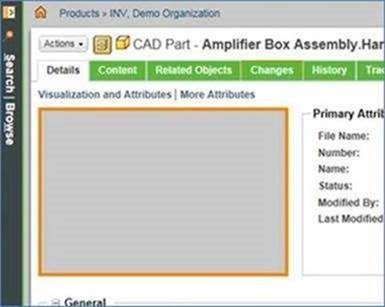
• The Details tab of Windchill Workgroup Manager does not display the Cable and Harness assembly thumbnail as shown below.
• If you create and save a child Harness part or sub-assembly to workspace before saving the parent Cable and Harness assembly to workspace, the child Harness part and sub-assembly is not saved to the workspace and a ghost part is created for the Harness sub-assembly.
• Whenever you create a new Cable and Harness assembly (parent) in Autodesk Inventor connected with Windchill Workgroup Manager, save it before creating any Harness sub-assembly or part (child) to prevent creating a ghost object of the sub-assembly.
• While re-importing a Cable and Harness assembly that is already checked-in to Windchill, import from Specify Options page with Reuse option selected for the standard parts (Library or Content Center parts). If Import to Workspace is done with Add as modified, Check out, and Revise and Checkout options for the standard parts, the following message is displayed after opening and saving the parent assembly.
“Documents being saved have a reference of documents outside the Workspace”